low-fodmap meatballs

low-fodmap meatballs are comforting, delicious and safe for friends with IBS
Low-fodmap meatballs are comforting, delicious and safe for friends with IBS

One of my dearest friends is following the low-FODMAP diet to combat IBS, and it can be a little challenging to stick with the ‘no wheat, onion and garlic’ rule when you’re eating out. It’s not impossible, but I’ve seen the struggle – poring over menus, referencing the extensive list of prohibited foods and interrogating waiters as to the contents of a dish while your dining companions wait to order. A menu becomes a minefield and what should be a lovely, free and happy choice based purely on what you feel like eating becomes stressful, difficult and a little isolating.

Serve with rice or rice pasta for a FODMAP-friendly meal

So sometimes we eat in, and whenever I have her around I like to make something she can eat safely and share with everyone else. It’s maybe a little complicated, but with a bit of creativity and an understanding of good substitutions, everyone can tuck into the same dish.

The simple act of sharing – good food, a cheeky glass of wine and lots of laughter with friends – is a powerfully healing experience. I can’t think of a better way to spend a weekend!

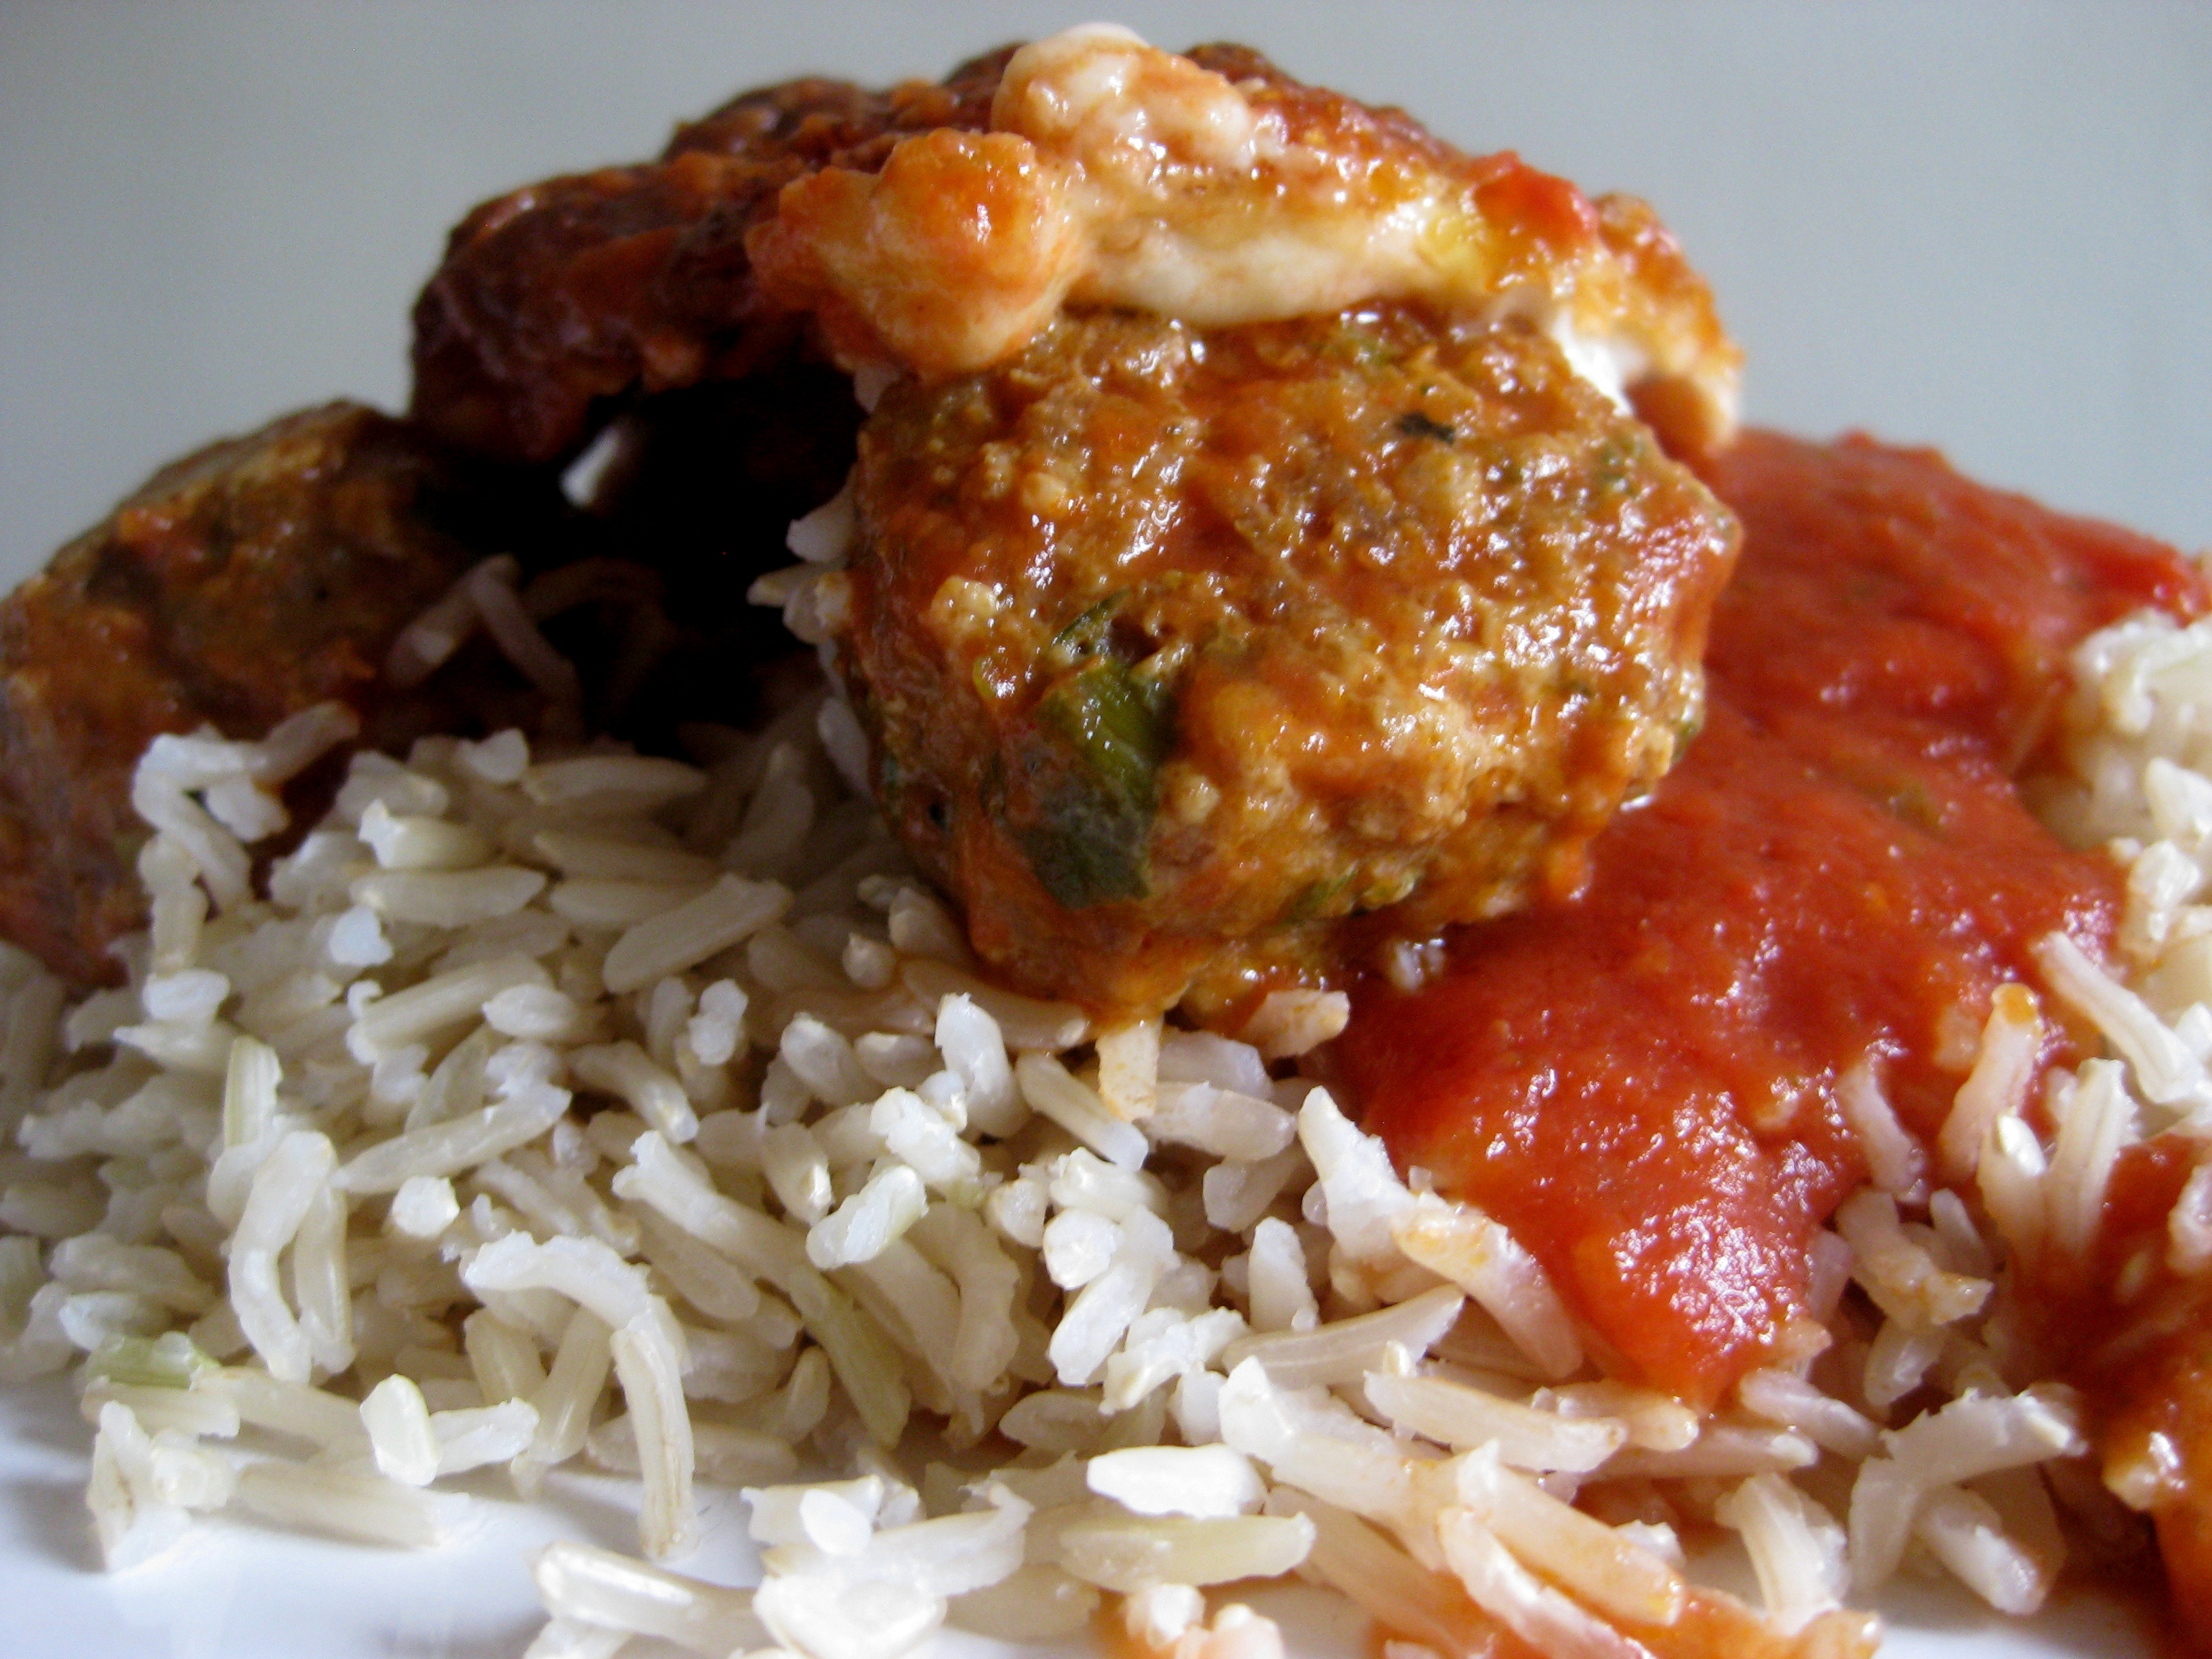
Low-FODMAP meatballs (makes 60)
For the meatballs:
500g beef mince
500g pork mince
2 bunches spring onions (green part only), finely diced
5 sprigs of parsley, finely diced
1 tbsp mixed herbs
1 tbsp garlic oil
4 tbsp parmesan
4 eggs
1 tbsp salt
1 tbsp pepper
2 tsp baking soda
3-4 tbsp cornstarch

For the tomato sauce:
2 x 400g tins chopped tomatoes
2 x 500g passata
1 bunch spring onions (green part only), finely diced
3 bay leaves
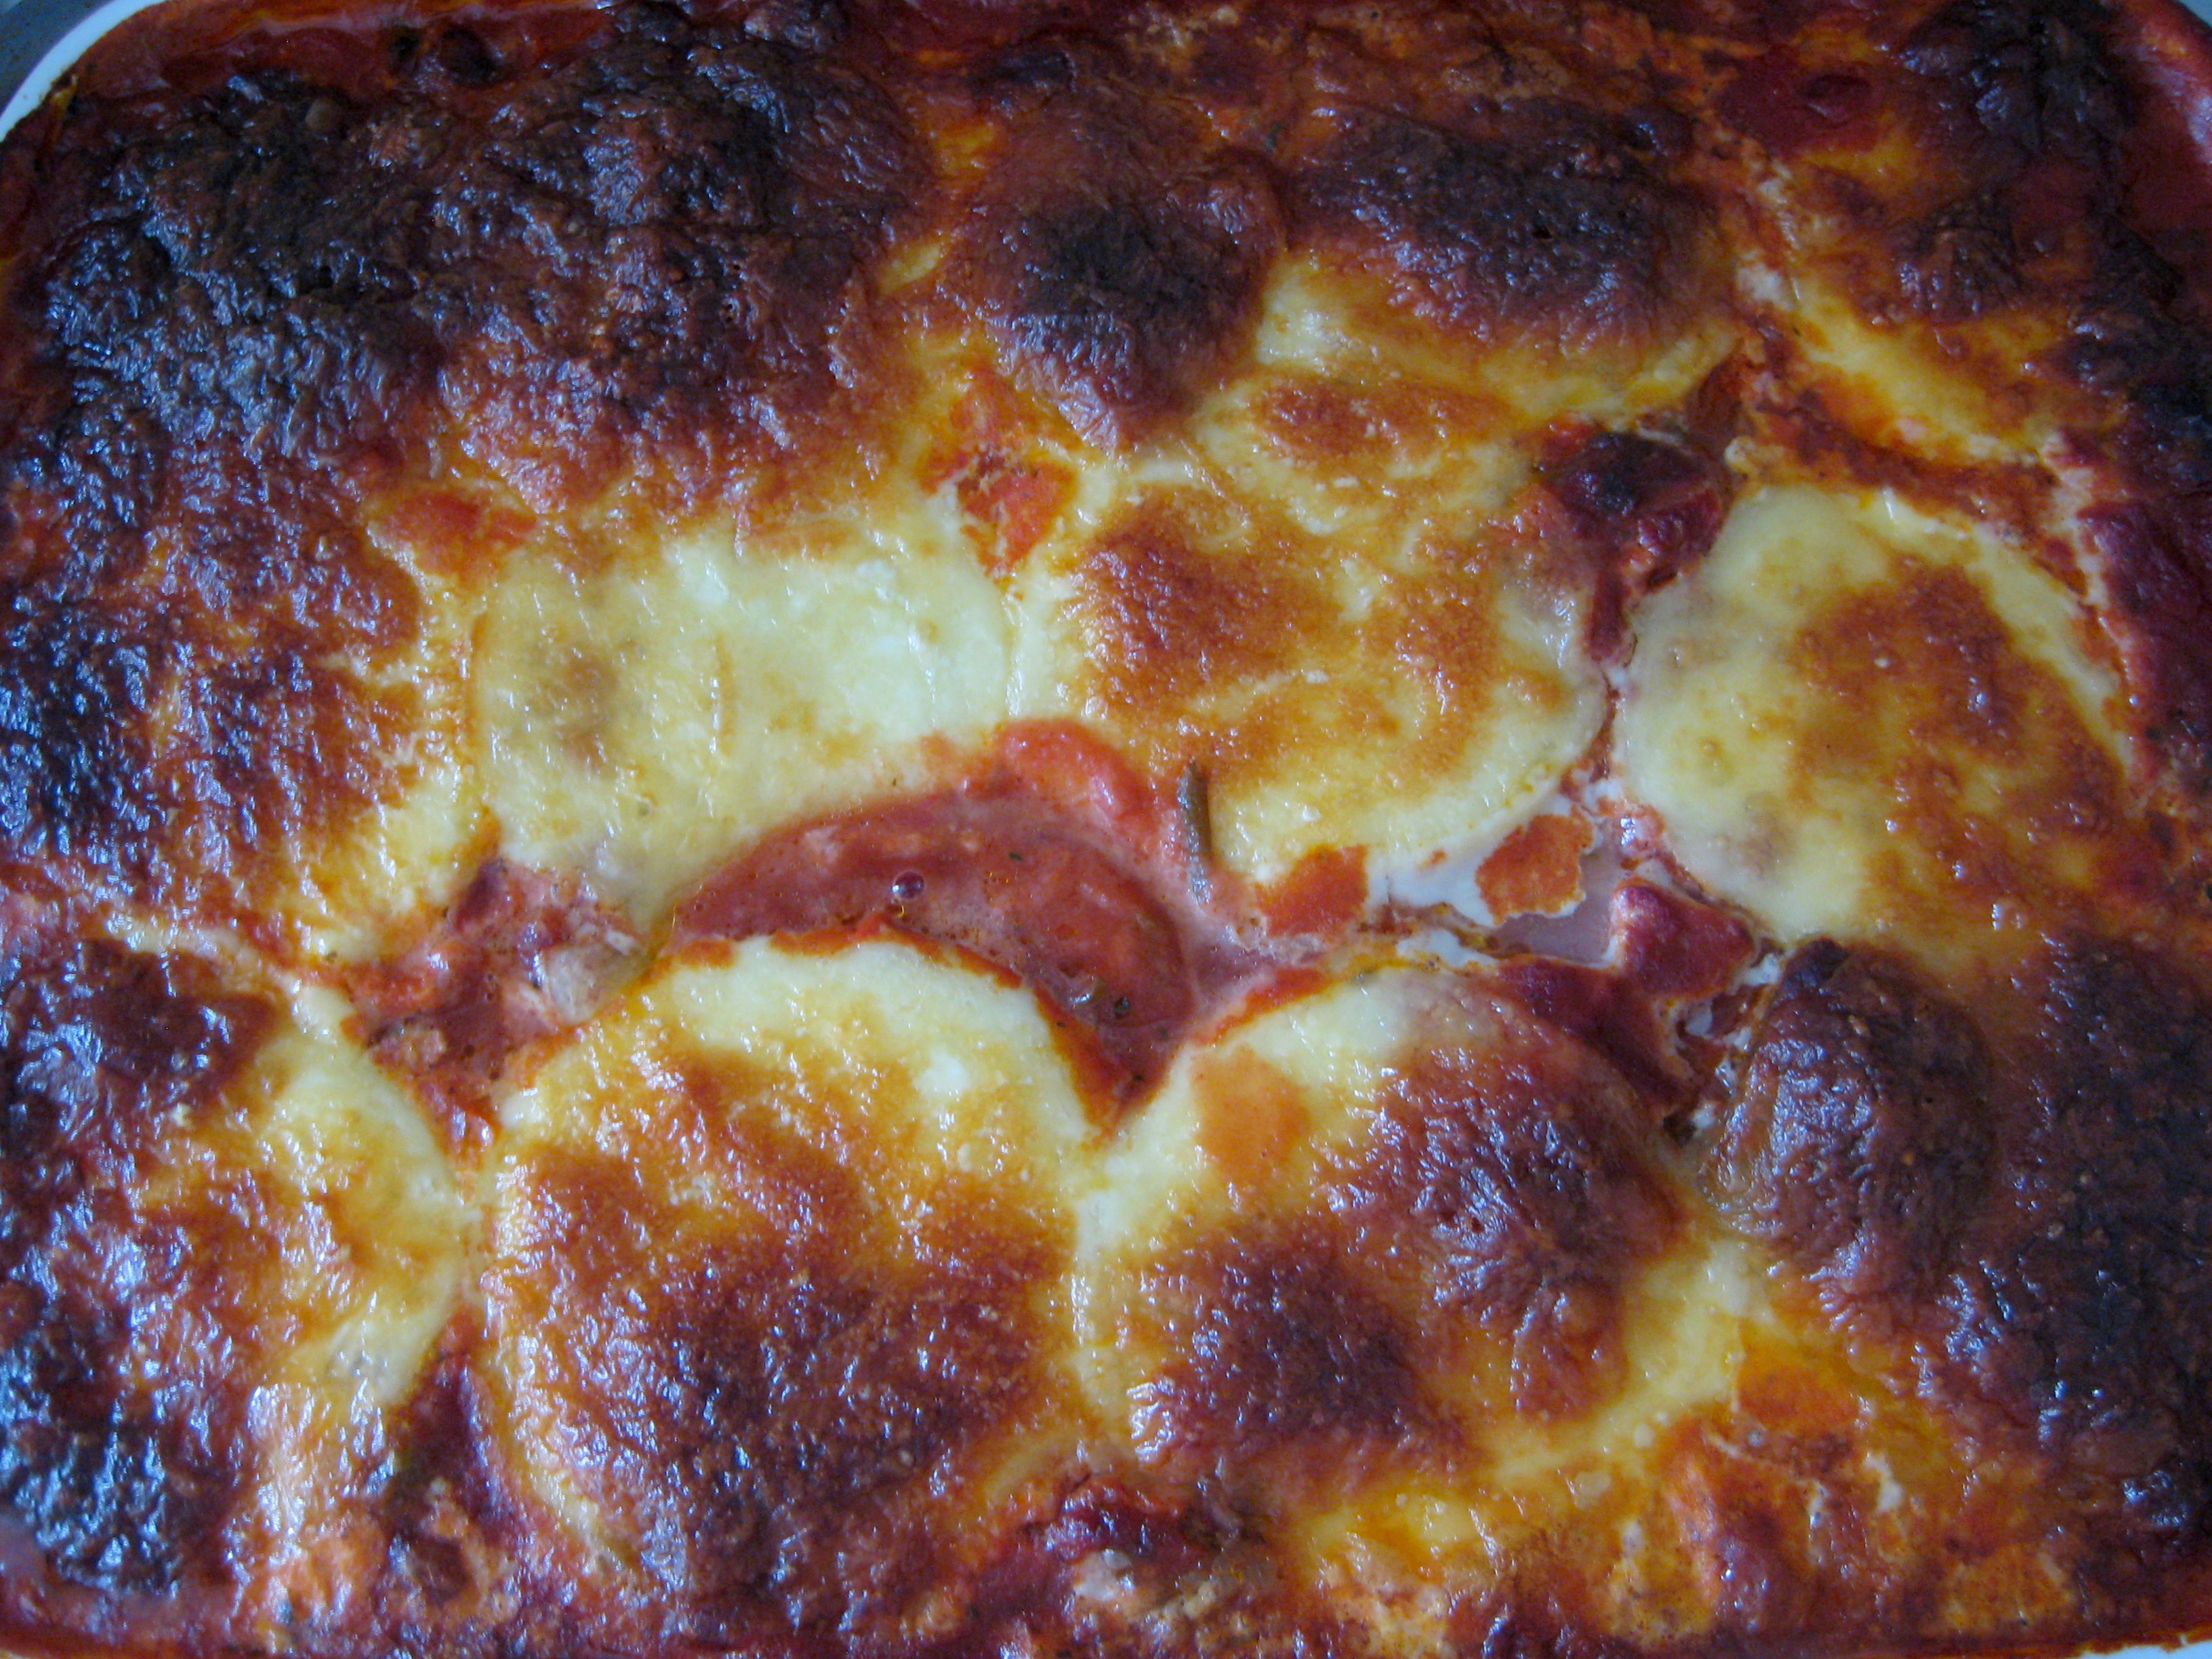
3 mozzarella balls, to bake

Put it in the oven to bake and go and join your friends for a chat.

Mix all the ingredients except the cornstarch together with a fork.

The cornstarch is there to regulate the wetness of the mix, so start with 2 tablespoons, mix thoroughly and see how wet it is. You want it to be moist, but easy to handle.

Roll into small balls.

From here, there are a few ways to go about cooking the dish. The easiest is to place them directly into the sauce, top with mozzarella and bake the whole thing for 90 minutes in a 200 degree oven.

Alternatively, you can bake your meatballs separately for 30 minutes so they brown nicely, then place them into the sauce and bake for 30 minutes. This is also a good method if you like to drain the fat from your mince.

Finally, if you don’t have an oven, you can simmer them in the sauce. Don’t stir them at the start as they’ll break up – wait until the egg has cooked and will hold them together. Total cooking time is about 30 minutes, starting with a fast simmer for the first 15 minutes and coming back down to a low simmer.

Serve with brown rice or mashed potatoes.

FODMAP notes: I’ve included parmesan in the recipe, because even though lactose is a no-go, parmesan has very little lactose. I’m not quite sure what it is about the ageing process, but hard cheeses have far less lactose than soft cheeses and milk.

Having just said that, mozzarella is also on the safe list for FODMAP. Nevertheless, some people are super-sensitive to lactose, so leave it out if you have to.

Advertisement

spring pasta

Pasta with broccoli - the perfect spring supper.
Pasta with broccoli – the perfect spring supper.

This week I celebrated the arrival of my new baby: a beautiful, pristine Cambridge-blue ceramic pan.

Yes, I’m aware this is a little strange. Most people celebrate the arrival of actual children, of Spring, of parcels and packages and Christmas and birthdays. But those of you who understand the excitement associated with a new kitchen accessory – its perfect white ceramic surface gleaming up at you – you’re my kindred spirits. We’ll be completely mad together.

The colour makes me think of spring, which is fitting because it’s growing ever so slightly warmer in London – by which I mean you can now leave the scarf, hat and gloves at home and just go out with a coat and umbrella. Every day I throw open the curtains and peer eagerly up at the sky, just waiting for the moment I can put away the Vitamin D tablets and bask in the sunshine.

It’s just around the corner. I can feel it.

Pasta with broccoli, garlic and chilli.

Broccoli with pasta is traditional to the south of Italy. This light, simple dish is bright enough to celebrate the imminent arrival of sunshine and filling enough to stave off the last of the winter blues, and it always makes me think of the outdoors and lazy days full of wine and laughter. I love the juicy burst of fresh tomatoes and the crunchy zing of parsley, combined with the dense bite of pasta and the gentle heat of garlic and chilli.

For me, this is the perfect spring supper.

Pasta with broccoli, garlic and chilli
250g short pasta
1 small head of broccoli, cut into small florets
5 cloves garlic, diced
½ teaspoon Chiu Chow chilli oil (you can use chilli flakes)
3-4 sprigs parsley, chopped
10 cherry or baby plum tomatoes

Cook the pasta in salted water until firm but not hard.

Three minutes before the pasta finishes, add the broccoli to the pot.

Reserve 1 cup of the cooking liquid and drain the pasta and broccoli.

In a frying pan over a medium heat, add the garlic in some oil and heat for around 30 seconds, taking care not to let it burn.

Add the chilli and fry for another 15 seconds, then add half the reserved liquid to the frypan. Turn the heat up so it bubbles.

Add the pasta/broccoli and heat through. If it becomes too dry, add more of the cooking liquid so it forms a creamy sauce.

Top with parsley and serve with cherry tomatoes.

simple char kway teow

Char kway teow: warm, filling and easier to make than you think.

My dad is known throughout the house as the Noodle King.

Mind you, it’s not the only name he has. Throughout my life, he has variously been Chief Chauffeur, Education Executive (Maths and Chemistry Departments), Coach, Captain of Kahmen’s Cheer Squad, Director of Driving Instruction and Head Fixer of Things That Break. Oh, and he also answers to ‘AAAAARRRRRRGHHHHH SPIDER!!!!’

A man of many talents. But even amongst these skills, his noodles stand out.

Straight from the pan: glossy, dense and dark with sauces.

When I was little, the sight of mountains of yellow or white noodles sitting on the bench filled me with a balloon-like expansive happiness and excitement. We were going to have noodles, which was basically a kind of culinary miracle to me. And as if that wasn’t awesome enough, I’d probably get to take some to school the next day. My cup runneth over.

I would watch Dad would prepare the ingredients, washing the dirt from the vegetables, chopping garlic and slicing fishcake. Inevitably, he would tut as he picked over the bean sprouts and shallots – ‘Aiyaaaa, why don’t you like chung? It’s high in zinc!’ – and yet most times, he would end up making a separate batch of noodles without these wretched ingredients, just for me.

That’s love for ya.

Love on a plate.
Love on a plate.

Gradually I’ve learnt from the Noodle King and now I make my own noodles right here in the tiny kitchen. To me, they’re the ultimate comfort food, reminding me of home and my dear little parents, half a world away. And yes, the sight of noodles sitting on my bench still brings me a secret little thrill of excitement.

Char kway teow is a classic Malaysian hawker stall dish made with flat rice noodles, soy sauce and bean sprouts. The original version is made in pork fat, with belacan, prawns, Chinese sausage and cockles. It’s high in saturated fats, packed with flavour and very filling.

If you’ve ever made noodles in large batches, you’ll know that even in a big kitchen it can become unwieldy and slightly stressful. After it’s all over, it’s kind of like that scene from the Sixth Sense; dirty plates everywhere, every utensil imaginable on the bench and all cupboard doors open.

It's the simple pleasures in life that count the most: eating noodles and not having piles of washing up to do. Yes!
It’s the simple pleasures in life that count the most: eating noodles and not having piles of washing up to do afterwards. Yes!

This much-simplified adaptation would never pass for the traditional, but it’s quick, easy and far healthier than the original. Better still, nothing comes out of the pan, so it uses a minimal number of plates (I got by with one plate and a chopping board).

The key is to use a large wok, essentially treating half as a warm holding bay and half as a frypan. The order of ingredients and timing is also important; since you don’t remove anything, you have to add ingredients according to how long they take to cook.

Char kway teow made easy.

I’ve used garlic oil to start the process and waited until quite a long way into the process to add garlic because it would just burn. If you don’t have garlic oil, heat some regular oil in the pan, add two cloves of garlic, sliced, and cook until fragrant. Then scoop the garlic out and use the oil.

Last but not least, don’t worry if you don’t have everything on the list. Like most street food, char kway teow channels the principles of convenience and taste, and so should you.

Simple char kway teow (serves 2)
400g flat rice noodles
6 full stalks of gai lan (or a large handful of vegetables of your choice)
65g frozen fishcake (half)
200g fried tofu (optional, and probably not traditional)
6 large prawns (cooked or raw)
3 eggs
200g bean sprouts
5 cloves garlic, finely chopped
4 tbsp light soy
2 tbsp dark soy
1 tbsp caramel sauce (optional)
1 tbsp kecap manis
White pepper
Garlic oil

Once the cooking gets going, it’s really quick, so you need to prepare everything first. Wash the vegetables and chop into stems and leaves, keeping them apart.

Cut the fishcake into slices about 5mm thick.

Cut the tofu into small slices, about the same width as the fishcake.

Then chop the garlic. ‘Start chopping,’ my sister says. ‘Then chop some more. When you think you have too much, chop another few cloves.’

As you begin cooking, microwave your noodles so they’re soft when they hit the pan. Sometimes if you get them fresh, you don’t need to do this at all, but the ones I’ve seen in London are fridge-cold and need about 4 minutes in the microwave.

In a large wok, heat the garlic oil over a high heat until it shimmers, then turn it down to medium. Add:
– Gai lan stems and fry for 30 seconds
– Fishcake and tofu and fry until golden (about 4 minutes)
– One third of the chopped garlic right before the next step

Start with the items that take the longest to cook.

Push these ingredients to one side and move the wok so it is slightly off-centre, with the full half sitting partially off the flame.

In the empty half, add the noodles and the sauces plus the white pepper. Mix until the noodles have changed colour, add the raw prawns and gai lan leaves and then incorporate with the other half of the pan.

The noodles should be dark, glossy, slightly peppery and slightly sweet.

Again, push this to one side and move the wok so the full side is partially off the flame. Pour the eggs and one third of the garlic into the empty half. You might need to hold the wok so it sits correctly and the eggs don’t run too far into the other half (but it all gets cooked, so don’t worry too much about it.)

When the egg is cooked, add the rest of the garlic and incorporate the whole lot together. Taste and adjust the seasoning with extra soy if needed.

Turn off the flame and add the bean sprouts. You want them to be bright, juicy and crisp, so you barely need to heat them.

Serve immediately.

summer rolls

Start - err, spring - with summer rolls.
Start – err, spring – with summer rolls.

As I write this, I’m keenly aware that there is a pile of washing up behind me that closely resembles a small mountain.

I’m breaking the rules a bit here, because although it’s certainly achievable to make these even in a small space, this isn’t exactly an ideal tiny kitchen recipe. It’s time consuming, a little fiddly and uses more plates than I would like – but I have to include it, because I simply can’t have you going into Spring without the deliciousness of summer rolls.

In truth, my love affair with Vietnamese food began with these rolls. Gỏi cuốn, nem cuốn or bánh tráng cuốn, as they’re known, are rice paper rolls stuffed with bún (rice noodles), herbs, vegetables and meat. They’re best served at room temperature with a dipping sauce – I personally think that you can’t beat the classic nước cam, but you can also serve them with a sweet hoisin or chilli sauce and peanuts.

Gluten-free and easily adapted to suit vegans and meat-eaters alike.

Summer rolls embody everything I think is amazing about Vietnamese cuisine. Light and zingy, crunchy and softly dense, summer rolls have a certain balance of tastes and textures designed to bedazzle the palate. They’re commonly served as an entrée, and they make a beautifully bright introduction to the stronger flavours of phở and cơm tấm.

So while there may seem like there’s a lot of ingredients and a load of washing up to do at the end; persist, friends. It’s most definitely worth it.

There's something exceptionally light, fresh and tasty about summer rolls.
There’s something exceptionally light, fresh and tasty about summer rolls.

Summer rolls
10 rice paper sheets
100g rice vermicelli noodles
1 carrot, julienned
Small bunch of coriander
Small bunch of mint
Three lettuce leaves
Bean sprouts (optional)
Cooked prawns (three per roll) – for a vegetarian alternative you can use fried tofu

Prepare all the ingredients so that they’re ready to roll. Start with the noodles; you can cook according to directions but in my opinion you almost never need to boil them. Soaking them in boiling water is fine. Like pasta, make sure the noodles are al dente – they should be springy but not chewy. Drain well.

While the noodles are soaking, take the carrot and blanch in equal parts water and vinegar. If you’d prefer to save time and not to pickle your carrot, that’s fine too.

Finely chop the lettuce.

Pull the mint and coriander into leaves and pick over the bean sprouts.

When you’re done, you should have a crowded-looking plate of noodles, carrot, lettuce, herbs and bean sprouts. The key is to make sure that all the filling ingredients are as dry as possible.

To prepare the rice paper, have a bowl of very hot water and a clean tea towel next to your rolling surface. Dip the paper in the water until it softens and carefully fish it out, trying not to break it. Lay it briefly on the clean towel to absorb the excess water and then lay it flat on the board.

Assemble your summer roll. I use three prawns or one tofu puff sliced into three, plus a few shards of everything else. Try to make it as compact as possible as this will help when you roll.

Rolling is an art. I’ve rolled plenty of spring rolls, but they’re a cinch compared to the fiddly nature of the summer roll beast; all the lightness and springyness that we love about a summer roll seems to work against us here in a very irritating manner.

My tip is to flip up one end over the ingredients and use it to push them into as compact a roll as possible. Using one hand to keep the roll tight, fold up the sides and then push the roll forwards to complete.

Also, be careful about flipping rice paper – running a close second to the nasty possibility of the paper tearing is it sticking to itself. Once it does that, it’s very difficult to unstick it without tearing.

Serve with nuoc cam.

pancake saturday

What's your favourite pancake topping?
What’s your favourite pancake topping?

Saturday is undoubtedly my favourite day of the week. Blissfully free of the Monday to Friday grind and yet lacking those Sunday blues that can descend on the day-before-you-go-back-to-work, Saturday is a friend that brings with it a sleep-in, morning coffee and a deep sense of relaxation.

To me, there’s no better day to have pancakes.

Pancake Saturday may not be as famous as Shrove Tuesday, but since I work full time and have neither the ability nor the desire to get up at 6am to make pancakes on the appropriate day, I postponed. And oh, the wait was worth it.

I defy you to stop at just one.

I’ve made gluten free pancakes before, but this recipe, taken from Nigella, is strictly traditional; it makes thick, sponge-like American pancakes and I even used white flour and everything (I did substitute dark muscovado sugar for the white sugar, but that was purely a matter of what I had in the cupboard).

There are rumours that you can make a pretty darn good pancake with wholemeal flour, and that’s what I’ll be trying next.

A veritable cascade of syrup.
A veritable waterfall of syrup.

American pancakes
225g plain flour (1½ cups)
1 tbsp baking powder
1 tsp sugar
1 pinch of salt
2 large eggs, beaten
30g butter, melted and cooled
300ml milk (1¼ cups)

Take the dry ingredients – flour, baking powder, sugar and salt – and mix in a bowl.

Make a well in the centre and pour in the wet ingredients – eggs, butter and milk.

Mix together briefly and let the mixture stand as you heat the frypan. The batter will look fairly runny, but it puffs up in the pan.

Oil the pan and dollop a small amount of batter onto the surface. Wait until the surface bubbles and then you can flip the pancake and cook for a minute on the other side.

pork and water chestnut dumplings

Mardi Gras pork and water chestnut dumplings
Pork and water chestnut dumplings

Next week marks the beginning of Lent, traditionally a period of sacrifice, penance and atonement.

Even if you’re not a religious person, I think it’s a good idea to become acquainted with these concepts, because undoubtedly at some point in your life you’ll experience these things, difficult as they are. And after all, towards the brighter shade of the same spectrums lie indulgence, forgiveness and acceptance.

To me, Lent is a thoughtful period in the spiritual calendar; a somewhat sombre time of reflection on the notions of love and strength of will. But before all that solemnity kicks off, there’s Mardi Gras (‘Fat Tuesday’ in French), which must be celebrated in the traditional manner – with richer, fatty foods on the last night before the Lenten season. Presumably this would use up the last of the goods and also keep people sane during a period of fasting.

I know most people eat pancakes – and believe me, I fully intend to participate in that too – but I thought it fitting to celebrate the beginning of a season of love by making these delicious little pork and water chestnut dumplings.

Dumplings are something special.
It’s impossible not to love a dumpling.

There’s something very special about dumplings. They always make me think of home; from the initial laughter-filled all-hands-on-deck preparation method and the proud presentation of neat rows of adorable little parcels (with the inevitable teasing about a few of the misshapen practice shots), to the family dinner at night and sharing the rewards with loved ones. There’s nothing more deeply satisfying than biting past the delicate pastry into the juicy filling and the flavour flooding your mouth and seeing smiles all around and thinking I helped to create this moment.

I’m always dazzled by the powerful combination of sweet pork, fiery ginger and sharp vinegar, and amazed by the complexity of flavours in Chinese cooking. Savoury and moreish, these tiny treasures go perfectly with a sharp and sweet dipping sauce.

Pork and water chestnut dumplings – makes 40
For the filling:
500g lean pork mince (see note below)
3 shallots, finely chopped
8 water chestnuts, diced
4 shitake mushrooms, diced
3 tsp grated ginger
3 cloves garlic, minced
3 tsp corn flour
1 tbsp oyster sauce
1 tbsp light soy sauce
1 tbsp Shaoxing rice wine (or dry sherry)
1 tsp sesame oil

To wrap:
40 x gyoza wrappers

To serve:
5 slivers of ginger
Black rice vinegar or distilled sugar cane vinegar
Light soy sauce

dumpling ingredients

Just reading the list of ingredients can feel a bit daunting – goodness, is all that really necessary, Kahmen?

The short answer is yes; dumplings are meant to be complex and balanced so every bite is a joy. But the good news is that you can take each ingredient and add it directly to the mixing bowl as soon as it’s ready, so they’re really simple to make.

Combine all the filling ingredients and mix well. Yep, that’s it. Dumpling mix done and no MSG in sight.

If you’re planning to freeze dumplings, dust the tray with cornflour. I can’t even begin to tell you how many times I forget to do this and it always ends in torn dumplings and tears the next day.

On a clean flat surface, lay out a set of dumpling wrappers – I think about nine at a time is about right because if you prepare too many they’ll dry out before you can get to folding them.

Lay about a teaspoon of mix in the centre of each wrapper. I find it easier to fold later if you shape the mix into a sausage now.

Ready to be folded
Ready to be folded

Dab the rim of the wrapper with water and fold over into a half circle, pinching the edges together. If you like, you can crimp them slightly to give the classic gyoza look. One down, thirty-nine to go.

You can either steam the dumplings for 8 minutes, or you can fry in a medium pan with oil, then add some water to create steam and cover for 4 minutes to help the insides cook.

I haven’t given quantities on the dipping sauce recipe because everyone has their own preference. In general, people recommend that you start off with equal parts vinegar and soy and then adjust to taste. I like a sharp sauce, so 2 parts vinegar to 1 part soy is about right.

NB: Interestingly, dumpling recipes always tell you to use fatty meat and with good reason – the juicier your dumplings, the tastier they’ll be. However, a quick look at the fat content in regular mince was enough to scare me right off, and I opted for lean mince, which you’ll be glad to know turned out just fine.

the hangover brekkie

Minimum fuss. Maximum comfort.

Let’s be honest: is there anything better than a drink or two with friends after a difficult week?

I salute those of you going through Dry January, I really do. But it seems like everyone I know is reluctant to accept the fact that the festivities of the Christmas period have passed, and have carried on merrily arranging dinners, drinks, events and celebrations all to be accompanied by vast quantities of wine or colourful cocktails.

And who am I to resist the siren call of the grain and grape?

Of course, nights out on the town don’t come without a cost, and the morning after can be a terrible, penitent affair. The food situation can be particularly tricky, with your stomach behaving like a moody teenager; one day it can rebel at the slightest hint of acid, weird textures, odd smells and adventurous tastes, the next it can protest at bland, comforting foods, beg for caffeine and yearn for oil (I inevitably wake up wanting a burger and fries).

I like this particular hangover brekkie because it manages to be comforting and plain without being boring. Also, I generally have the ingredients sitting in the fridge, which is perfect for when you can’t face the long wander down the street to the shops.

The hangover brekkie
2 slices toast
2 tbsp hummus
Half a chorizo sausage
4 eggs
Salt and pepper
Parsley (optional)

Chop the chorizo into small pieces and place in a dry pan over medium heat. Depending on the size of the slices, it can take around 2-5 minutes to cook. You’ll know they’re done when they turn a brilliant red-gold. Remove and place onto a paper towel.

Crack the eggs into a bowl, season with salt and pepper and beat. Place in the pan over a low heat and cook, dragging the spatula through the middle to scramble them. Now would be a good time to put the toast on as well.

When the eggs begin to look sloppy, add the chorizo back to the pan and cook the eggs through.

Spread the hummus on the toast or serve on the side. Top with the eggs and if you have parsley, it will add a fresh, vibrant crunch.

Last but not least, make yourself a cup of tea and think about what you’ve done, and whether there is any photo evidence you’ll need to take care of once you’re back to full strength.

smoked salmon bagels

From fridge to plate in five minutes.

Some Sunday mornings you spring out of bed, ready to cook a full English and take on the world (or Oxford Circus) powered by the holy breakfast trinity of eggs, bacon and HP sauce.

Other Sunday mornings, no force, human or divine, could part you from your doona.

This is one of those mornings, and since I’m nursing a cold that, like a bad house guest, just won’t seem to pack up and leave, here is what I ate. Not because I think you need a recipe for something as simple as pouring milk over cereal, but because occasionally we all need a reminder of how deeply satisfying a smoked salmon bagel can be.

Smoked salmon bagels
1 wholemeal bagel (ok, I’ll concede to the sesame seeded kind too)
2 tbsp Philadelphia cream cheese
2 slices smoked salmon

You know what to do. Enjoy your Sunday morning!

banoffee pie

I know I was supposed to whip the cream. It was a long day, ok?
I really did mean to whip the cream, but sometimes loose & unstructured is just fine.

Even the most savoury-toothed person would have to admit that there’s something quite delightful about the idea of banoffee pie.

The name immediately conjures up all sorts of lovely images: golden, sticky caramel cascading onto a bed of crunchy biscuit crumbs; smooth slices of pale sunshiney banana; and curls of rich, bittersweet chocolate raining down in a dark flurry onto fluffy clouds of whipped cream.

You may think I’m waxing ridiculously lyrical, but you’ll understand when you eat it.

There are lots of variations of banoffee pies, but all of them involve the delicious combination of banana and toffee, and most will advise you to add whipped cream to the top. I feel, however, that there would be no great crime in adding chocolate or nuts or honeycomb pieces or even a smattering of peanut butter. These things are meant to evolve.

This banoffee pie doesn’t need to be baked, so it’s perfect for the oven-free amongst us. Who said that tiny kitchens need be deprived?

You can make this gluten-free if you like.

Banoffee pie
250g digestive biscuits (I used gluten-free biscuits, but feel free to go ahead and use whatever digestives you like)
2 x 100g unsalted butter
100g dark brown sugar (I used muscovado)*
400g can of condensed milk
4 bananas
300ml double thick cream

Grease a 20cm loose-bottomed springform cake tin.

Crush the digestives into powder; I used a freezer bag and a Vegemite jar to work off some aggression, but a rolling pin would probably be faster.

Melt 100g of butter and add to the digestives, mix into a soft, damp sand.

Press the biscuit mix into the cake tin, coming slightly up the sides and making sure it is packed tightly. You want to form a hollow that is about 1.5cm deep.

A biscuit base doesn't need to be baked
a biscuit base doesn’t need to be baked

Place the tin into the freezer for at least 20 minutes.

Meanwhile, place 100g of butter and the sugar into a pot and melt together, stirring constantly.

When you can no longer feel the sugar granules, add the condensed milk and bring to a rapid boil, stirring constantly. Boil for at least two minutes, until the mix forms a golden, caramel colour.

thick, luscious caramel

Allow to cool slightly, then pour the caramel into the biscuit base and place in the refrigerator for at least one hour.

at this point, it's just a toffee pie
at this point, it’s just a toffee pie

Before serving, top with sliced banana and whipped cream.

Note: A few of my guests thought this pie was a little too sweet, so I’d say you could safely reduce the sugar content. I haven’t tried it out to see how it goes, but next time I’d try halving the sugar. I mean, that almost makes it healthy – right?