Well, this is different. How many times do you get to say it’s really hot in London? Summer has found its confidence and is blazing away at a temperature that makes the thought of a pasta dinner just slightly uncomfortable. Thankfully, though, there’s haloumi – glorious haloumi – the delicious squeaky cheese that renders all who consume it instantly voluntary vegetarians.
Ok, so it feels like cheating to call this a recipe. But when it’s hot, the very last thing I feel like doing is cooking, so it’s gotta be simple: three ingredients (very Hugh Fearnley-Whittingstall) and there is zero chance of the oven going on. Slip it onto a plate, dress with balsamic or lemon juice, and slide out the door to enjoy the rest of the summer evening.
Simple haloumi salad
Half a 225g block of haloumi
Spinach leaves
Plum tomatoes
Balsamic vinegar or lemon juice
Fry the haloumi over a medium heat until brown, turning once to fry the other side.
Arrange the spinach on a plate and slice the tomatoes. Top with the grilled haloumi and drizzle with balsamic vinegar.
Goodness. Is anyone else feeling the chill lately?
During the rickets-inducing darkened winter months, I feel it’s almost mandatory to switch over to comfort food. After all, after trudging through the biting wind on icy pavements, I think even the most determined salad enthusiast would be hard-pressed to be happy to come home to a chilled bowl of leaves.
Instead, it’s time to embrace winter food. Piping hot soups. Steaming piles of pasta. Plates of deep, rich stew and rivulets of gravy running down mountains of mash.
Getting cosy with winter food is a definite bright spot in the otherwise grey, chilly days.
Comforting. Easy. Delicious.
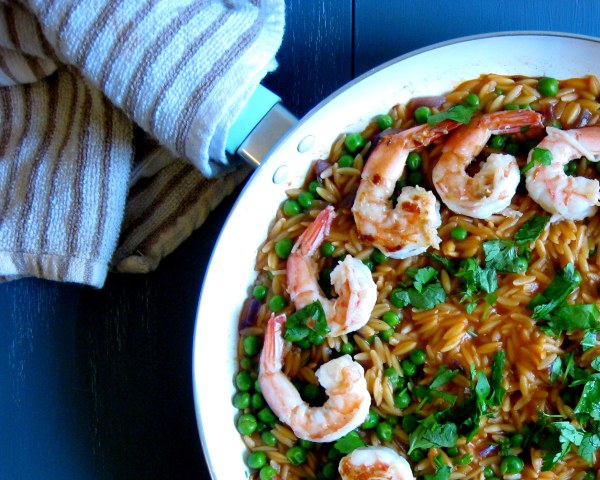
Winter food is all about creamy comfort, and one of the best places to find it is in a bowl of silky orzo. Cooking orzo risotto-style has become all the rage, which is a total blessing for the time-poor. If you’re in the mood for a risotto and you can’t possibly face stirring at the stove for an hour, orzo is your friend.
I love this recipe for many reasons – it’s filling without being heavy, it’s fast and it’s super easy. Most of all, it’s completely delicious. The succulent prawns and juicy peas invoke memories of sunshine bright enough to sustain us through a freezing winter.
Prawn and pea orzo (serves 2)
1 onion, diced
1½ cups orzo
1 cup peas
1 tbsp tomato paste
2½ cups fish stock
1 tsp smoked paprika
12 prawns
3 cloves garlic, minced
Chopped parsley to serve
Lemon juice
Slowly fry the onion in vegetable oil with some salt, so it begins to soften. After three minutes, add the orzo and coat in the oil.
Add the tomato paste, paprika and stock, stirring. It takes around 12 minutes to cook orzo this way.
At the 8-minute mark, add the frozen peas.
At this point you can also heat some oil in a frying pan, ready to toss the prawns in. They are very quick – place them on one side for one minute, then add the garlic and toss the prawns so the other side cooks. They need around two minutes in total, depending on the size. Take them off the heat and set them aside.
Test if the orzo is done. It should be toothsome but yielding, just like normal pasta. Serve the orzo with the prawns and top with a handful of chopped parsley and a squeeze of lemon juice.
Remember when you were growing up, and a salad was eternally comprised of a sad, round tomato, circles of cucumber and wads of damp iceberg lettuce, drowning in a sea of sharp, vinegary dressing? Oh, that salad. Sometimes it was accompanied by a ring of pungent onion, or a lonely olive that was also wondering why it was there. They weren’t particularly bad or good, they were just something that had to be heroically endured to get to the good stuff, like pizza and chicken and lasagne.
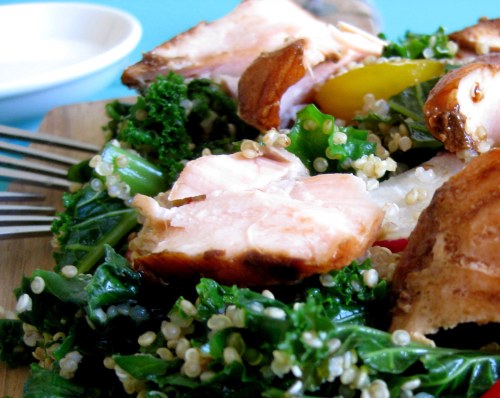
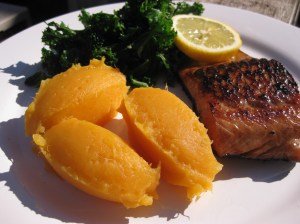
grilled salmon is a delicious indulgence
I’m not sure when it all started changing, but Australia probably owes a great debt to its multicultural history. Greek salad. Caesar salad. Someone heard a rumour of this amazing stuff called tabbouleh, others murmured words like panzanella and fattoush and niçoise.
And thus salads were set free, and we were all a lot happier for it.
Say yes to salads.
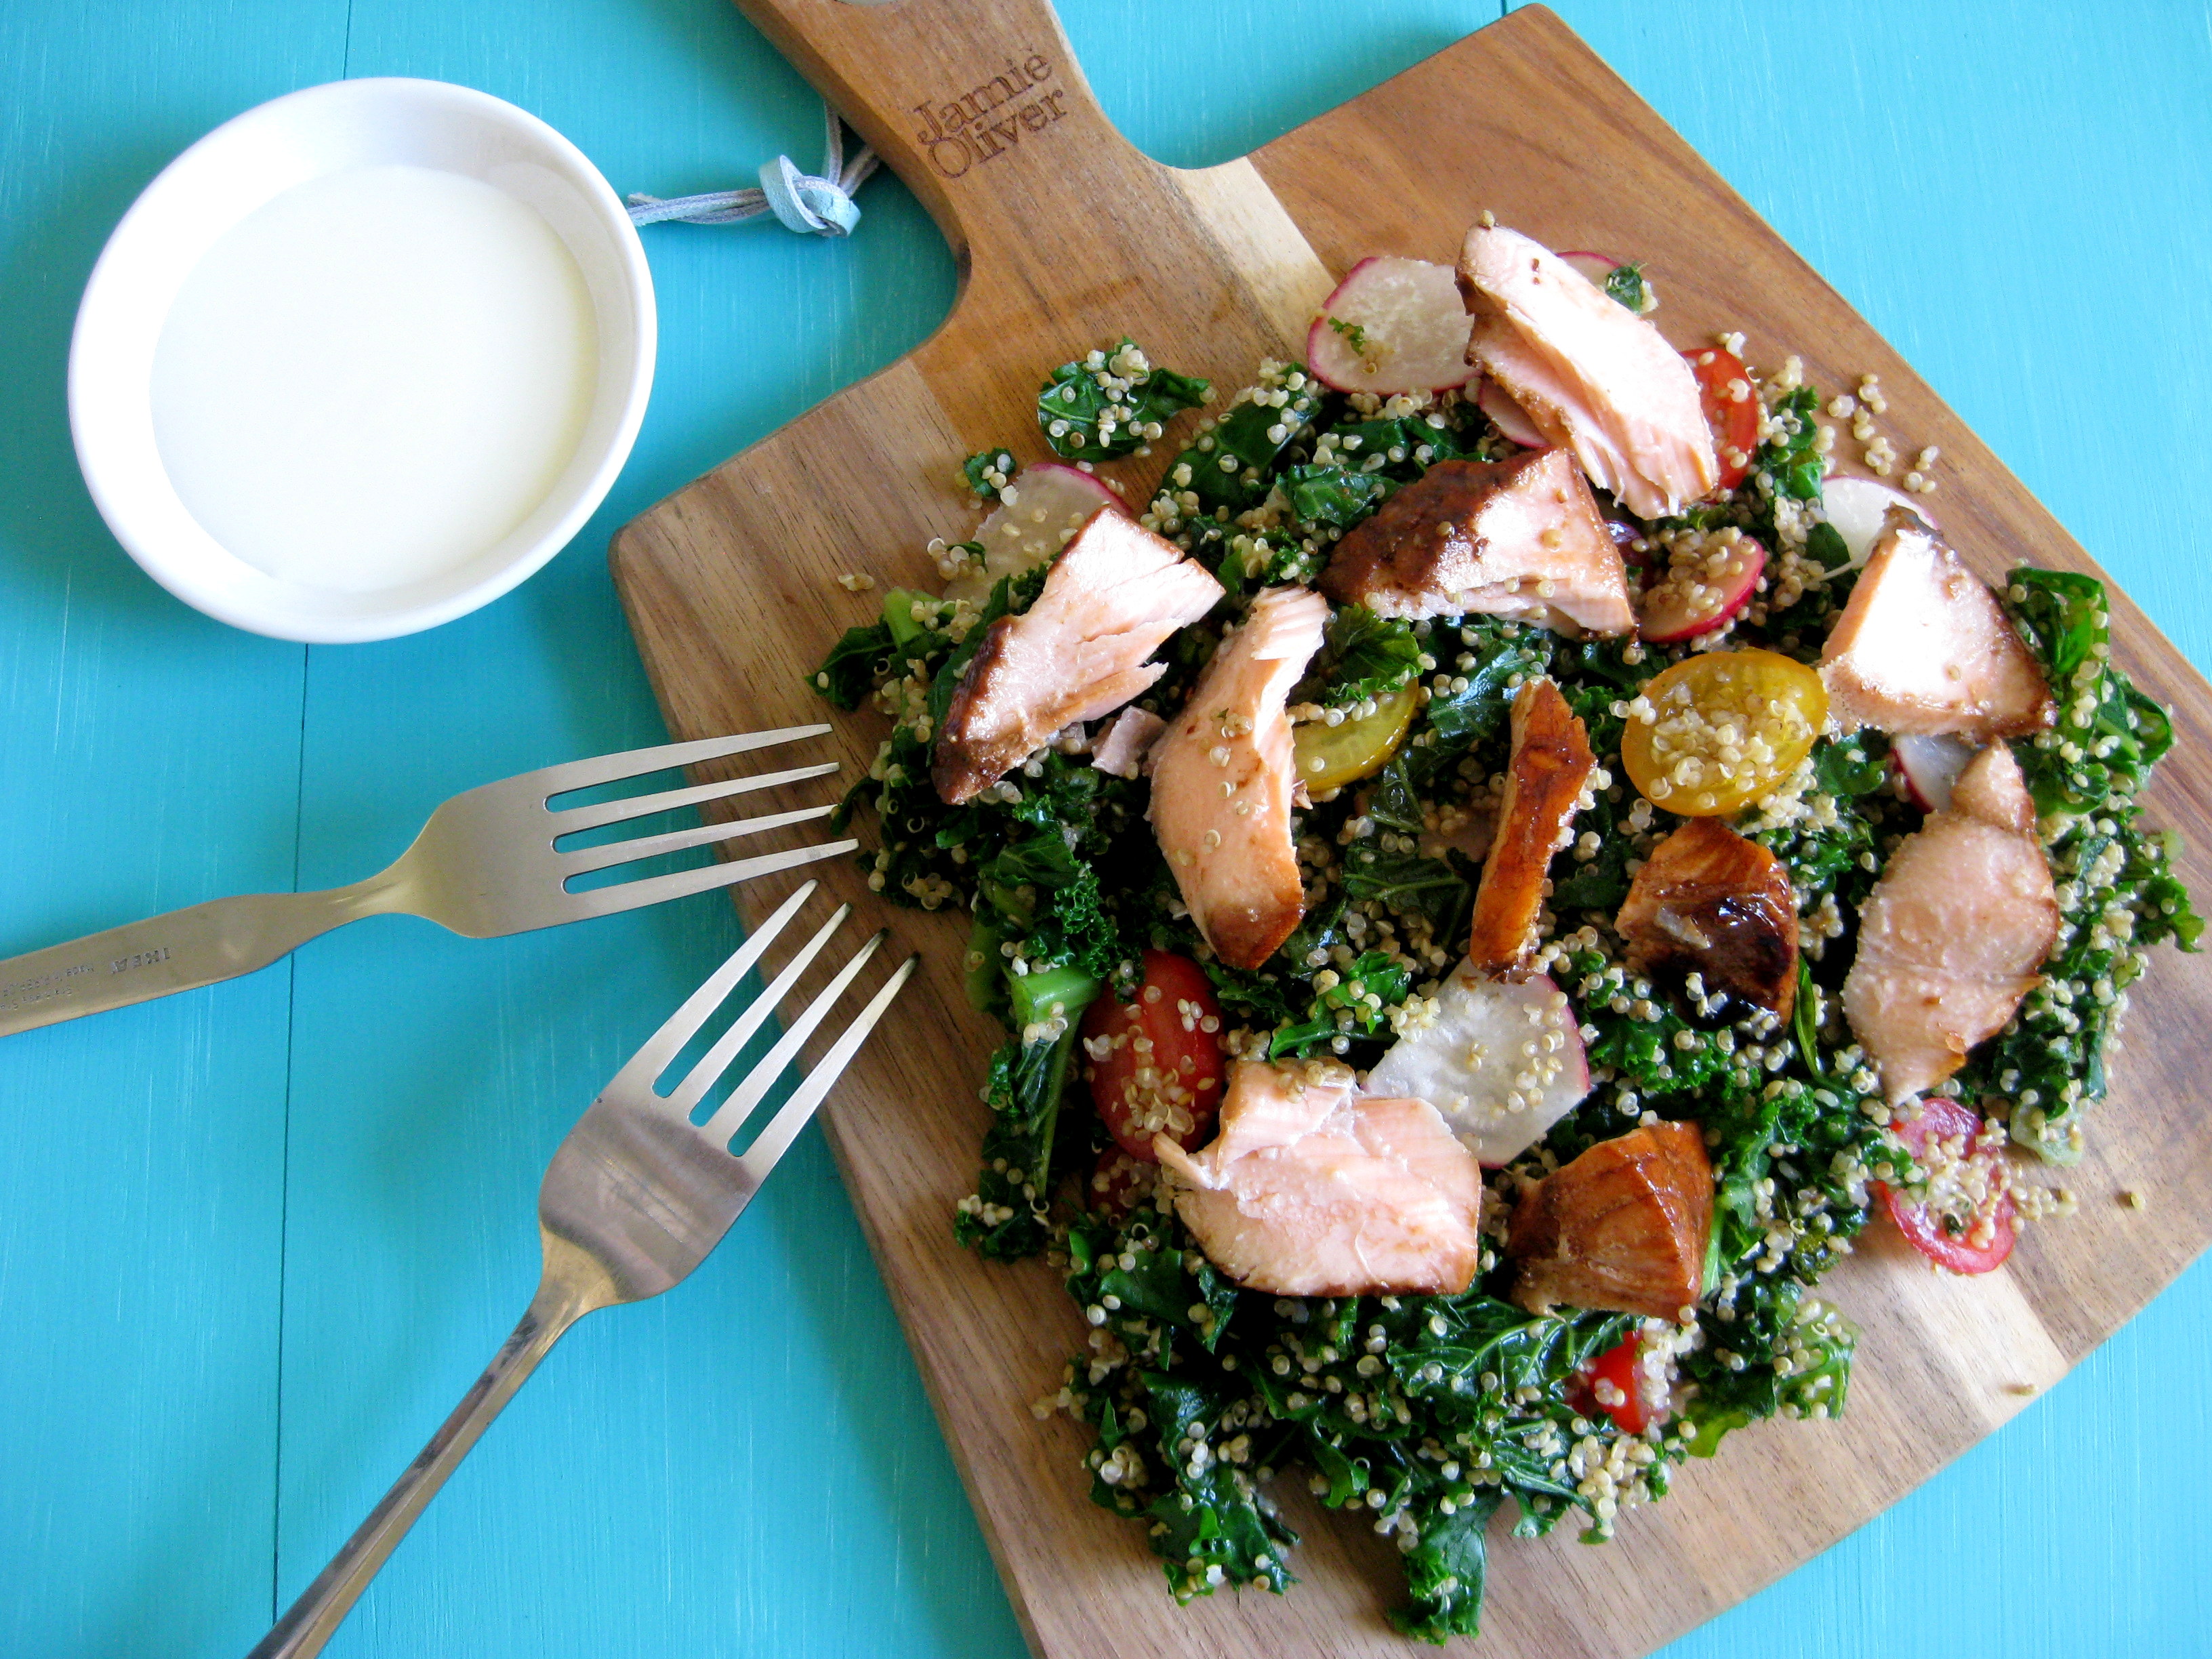
I love using kale as an alternative to salad leaves, because it feels so much more substantial than biting into lettuce (although don’t get me wrong, I also love lettuce). Quinoa is often a feature in my salads, not just because it’s excellent for my gluten-free friends, but also because it lends a brilliant texture, holds dressing well and gives the salad a certain heft.
And if you need something else to convince you, let me just say that the grilled salmon is a deliciously indulgent affair that means you’ll never have to dread eating a salad for dinner ever again. I promise.
Kale and quinoa salad with grilled salmon (serves 2) For the salad:
1 x salmon fillet, grilled (try honey soy salmon)
100g kale
150g quinoa
5 baby radishes, sliced
100g plum of cherry tomatoes
For the dressing:
250g low-fat Greek yoghurt
Juice of a lemon
1 tbsp honey
Rinse the quinoa well and cook until just tender. This is quite often a much shorter cooking time than they suggest on the packet, so check it at 5 minutes.
Steam the kale (if your pot is big enough, you can steam it above the quinoa) and dry using a clean teacloth or a salad spinner.
Slice the radishes and tomatoes.
Combine all the salad ingredients and make the dressing by stirring the juice of a lemon into a cup of yoghurt, then sweetening with the honey.
Breakfast is a great meal. Roll out of bed, spend the first few minutes of each day yawning, stretching, and then you can get to thinking about cheerful items like freshly-brewed coffee, fruit, cereal and the all-important question of what breakfast spread you’ll have. Is it a Nutella morning? Will there be peanut butter in my life today? And surely every day is a Vegemite day…
(Between you and me, sometimes toast is the only reason I get out of bed.)
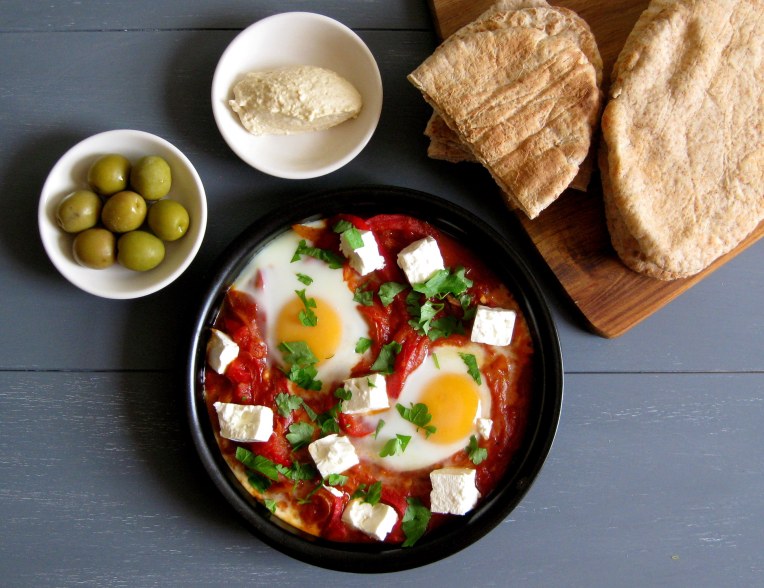
Weekend breakfasts are especially joyful, because eggs get involved. I’m a huge fan of including eggs in breakfast, and while the full English is a force to be reckoned with, I think the Israelis have it down pat. Imagine kickstarting the day with spiced tomatoes and peppers, eggs with runny yolks and custardy whites, creamy hummus and sharp olives and crusty bread. Yes.
Versatile. Simple. Nutritious. What’s not to love?
Shakshuka is thought to have originated in Tunisia, and is popular throughout the Middle East and in Israel, where it is commonly eaten for breakfast. In its simplest form, the dish is made by poaching eggs in a sauce made from tomatoes, onions and peppers. Other versions include harissa, cumin, salty cheeses like feta, or a spicy sausage like merguez.
It’s a perfect breakfast dish, but also works well at lunch and dinner. The meal scales really well and it’s incredibly easy to prepare. And as if you needed another reason to love shakshuka, the dish is low in fat, high in vitamin C and lycopene, and is said to be an excellent hangover cure.
Plus, there’s something immensely, greedily satisfying about plunging your pitta into the heart of the pan, and watching the golden-yellow yolk mingle with the fiery sauce. Oh, you so want to make this.
These delicious Queen Green olives are the perfect accompaniment.
Shakshuka (serves 2) For the tomato sauce
1 onion, finely sliced
2 red or yellow capsicums, sliced
2 x 400g cans tomatoes
4 cloves garlic, chopped
1 tsp cumin
1 tsp paprika
½ tsp chilli flakes
Pinch sumac
To serve
2 eggs
Parsley
Feta (optional)
The sauce can be made well in advance. Fry the onion in a little olive oil, adding salt to stop it from burning. After a minute, add the peppers and fry for three minutes.
Add the rest of the sauce ingredients and simmer over medium-high heat for 10 minutes. Taste and adjust the seasoning, then simmer for another 10 minutes.
To make the shakshuka on a stovetop, put the (warm) sauce into a frypan and make two wells for the eggs. Crack the eggs into the wells and simmer for 5-7 minutes, depending on how runny you like your eggs.
To make the shakshuka in an oven, put the (warm) sauce into an ovenproof dish like a shallow pie dish, and make two wells for the eggs. Crack the eggs into the wells and bake in a 180C oven for 10-15 minutes, checking it at 7 minutes.
Top with parsley and cheese, and serve with pitta bread, olives and hummus or tahini.
A piping hot plate of pasta… what could be better?
I have a slightly alarming ability to consume vast quantities of pasta. I love every second of the dance; twirling golden strands into thick ropes around your fork, feeling the pile unravel in your mouth, the moreish, al dente bite against your teeth and the explosion of juicy flavours. Oh, God. It’s deeply satisfying, and I never want it to be over.
But the passionate love affair burns brightly until every last morsel is gone, and then I’m left bereft and alone, faced with the inevitable post-consumptive regret that is pasta bloat.
Simple, tasty and on the table in ten minutes.
I mean, it’s definitely worth it. After all, what’s a little digestive discord in the grand symphony of the perfect pasta dish? If the measure of love is what you’re willing to sacrifice, pasta and I would make a Mills and Boon novel blush.
But recently I discovered something wonderful, life-affirming and joyful, so naturally I must share it with you. It’s spelt, it’s delicious, and it’s much kinder to your digestive system.
Spelt pasta loves you back.
This ancient grain is a species of wheat, but has a different molecular structure to the common modern classifications and thus is digested differently. It’s not safe for coeliacs, mind, because it still has gluten. But those with wheat sensitivity often find that they can tolerate spelt – excellent news for the wheat-challenged amongst us!
Spelt is high in fibre and a great source of complex carbohydrates as well as providing a wide range of nutrients like vitamin B2, niacin, copper, iron, zinc and magnesium, all of which contribute to the healthy function of the body’s nervous, cardiovascular and immune systems. And for what it’s worth, in my very non-clinical trial I found that pasta bloat was not a problem with spelt.
Spelt is kind of wonderful.
Spelt pasta has a gentle nutty flavour and a smoother texture than wholemeal pasta, so it’s a perfect option for those who dislike the grainy mouthfeel of brown pasta. Cooked here with subtle strands of zucchini and lit up with lemon, garlic and chilli, it makes a fantastic ten-minute supper. Dive in – twirl away – enjoy!
Spelt spaghetti with zucchini (serves two)
200g spelt spaghetti
1 medium zucchini
3 cloves garlic, chopped
1 tsp Chiu Chow chilli oil or chilli flakes
Zest of a lemon
1 tbsp olive oil
Parsley, to garnish
Put the spelt on to boil but be careful not to overcook it. You want to stop it before it’s quite done as it does keep cooking when you drain it and again in the pan later.
Meanwhile, shave the zucchini into strips using a vegetable peeler.
Reserve one cup of the spelt cooking liquid and then drain the pasta.
In a pan, heat the olive oil and zest the lemon into the oil.
Gently fry the garlic over a medium heat without letting it colour. You can add salt to stop the garlic from browning.
Add the chilli oil and half the cooking liquid.
Add the zucchini and heat through, then add the pasta and toss well. If it looks a little dry, add some more of the cooking liquid so it forms a creamy sauce.
I tell myself things like this on a regular basis. Fish is delicious – tender, light yet filling and full of delicate flavour – and it’s good for you, too; packed full of vitamins, protein and omega 3s, fish is rightfully known as brain food. It’s the heart-healthy meat that can be farmed sustainably and your body will love you for it.
But just between you and me, I may be a wee bit – scared – of cooking fish. I mean, it has this reputation, doesn’t it? It’s fiddly, it falls apart not just on your fork but also in the pan, or sticks with a stubbornness that only a determined spatula can overcome. It cooks unevenly. It can turn dry and tough. When you cook fish you’re taking the chance that it all may come to a ruinous, nightmarish mess resulting in pasta and sauce for dinner.
honey and soy salmon, served with a gingery kale and sweet potato mash.
Worry not, friends. The dense, tender flesh of salmon stands up to flavours well, is significantly less likely to fall apart and is much more forgiving than your average fish when it comes to cooking times. Its high fatty acid content means it’s unlikely to dry out, and most importantly it makes for wonderful eating. If you’re at all wary about cooking fish, salmon’s where you start.
Honey and soy, two things I always have in the cupboard, make an excellent marinade for the salmon, highlighting its natural sweetness. To balance this, I’ve added ginger and garlic to the kale – yet another so-good-for-you-it’s-hard-to-believe ingredient. Kale is nutrient-rich, high in calcium, fibre and iron, not to mention vitamins C and K.
And please, let us not have me begin waxing lyrical about sweet potato again. Suffice it to say that a good bed of buttery sweet potato mash completes this delicious and nutritious feelgood trinity.
Honey soy salmon with ginger kale and sweet potato mash
For the salmon:
2 salmon fillets
2 tbsp honey
2 tbsp light soy sauce
For the kale:
100g kale
2 tsp freshly grated ginger
2 cloves garlic, grated OR garlic oil
For the sweet potato mash:
500g sweet potatoes
25g butter
Mix the honey and soy together and pour over the salmon fillets. You can do this the night before and store them in a ziplock bag, or marinate 30 minutes before you start.
Peel and wash the sweet potatoes, then cut into large chunks and boil in a pot until soft (this takes around 20 minutes depending on the size of your chunks). Drain and add the butter before mashing, then cover and set aside.
Heat oil in a pan and add the grated ginger and garlic. For low-FODMAPpers, leave out the garlic and use garlic oil.
Add the kale and fry gently until the leaves go glossy and dark green – this should only take about 2-3 minutes.
Heat oil in a pan (the same one, if you like!) and then add the salmon, skin-side down. Fry for 4 minutes, taking care the honey isn’t burning the skin. Flip and cook for another 3 minutes.
My beautiful sister is a medical doctor, yoga teacher and busy business owner who, in addition to being an all-round nice person and a luxury handbag addict, runs a holistic health programme based on a blend of science and Eastern philosophy. Through the process of thought, movement, physical care and spiritual nourishment, the Global Goddess Project aims to encourage people to live healthier, more fulfilling lives.
And what could be a better way to begin that life than with oatmeal?
It takes just five minutes to make oatmeal.
Oatmeal is one of those beloved breakfast stalwarts you probably grew up with. On cold wintry days before the house had quite lost its chill, I would shiver my way into the kitchen and scant minutes later, sink into a pile of oats that warmed me from the inside out. It was not quite enough to make up for the fact that I was no longer snuggled under my doona, but it was a comforting consolation.
Hay there. Remember us?
If you need further motivation to embrace oatmeal, just think about the fact that oats are one of the best foods you could possibly eat. Oats are high in insoluble and soluble fibre, including a specific type of soluble fibre called beta-glucans, which are proven to lower LDL cholesterol and reduce the risk of heart disease. They’re low-GI, which means they are digested slowly and are an excellent choice for diabetics.
Oh, and they’re naturally gluten-free. More oats for everyone, I say!
If you’re looking for a breakfast that you can have on a detox, low-stress or immunity-boosting diet, look no further. The almond milk makes it dairy-free and the blueberries, which are high in vitamins C and K as well as cancer-fighting flavonoids, are tasty as well as being extremely good for you.
So take five minutes at the start of your day to treat yourself well. Don’t you deserve it?
It’s like a big hug at breakfast.
Oatmeal with almond milk
1 cup rolled oats
1 cup water
1 cup unsweetened almond milk
1 tbsp honey
Small handful blueberries
Place the oats and water in a saucepan over a medium heat, stirring until the water has been absorbed.
Add the almond milk and cook the oatmeal for 4 minutes, or until the milk has been absorbed and it achieves a thick consistency.
Stir through the honey and blueberries. Oh, and don’t forget to soak the oatmeal pan immediately – removing hardened oatmeal is a soul-destroying experience.
A few notes about oats. Rolled vs steel-cut: the difference here is in the process. Rolled oats are de-husked, steamed, rolled and then lightly toasted. Steel-cut oats are chopped before steaming so they retain bits of the bran layer. They’re chewier, taste nuttier, have a slightly lower GI profile and typically take longer to cook (about 30 minutes on the stovetop). You can pre-soak them overnight to reduce the cooking time if you want to use steel-cut oats.
Gluten-free: oats are naturally gluten-free, but can be cross-contaminated during growing if they’re next to wheat fields. If you’re gluten-intolerant, you can buy gluten-free oats that have been certified through growth and production as being free from gluten.
You know you need serious help when you’re rifling through the vegetable bin on a mad search for a ‘photogenic carrot’.
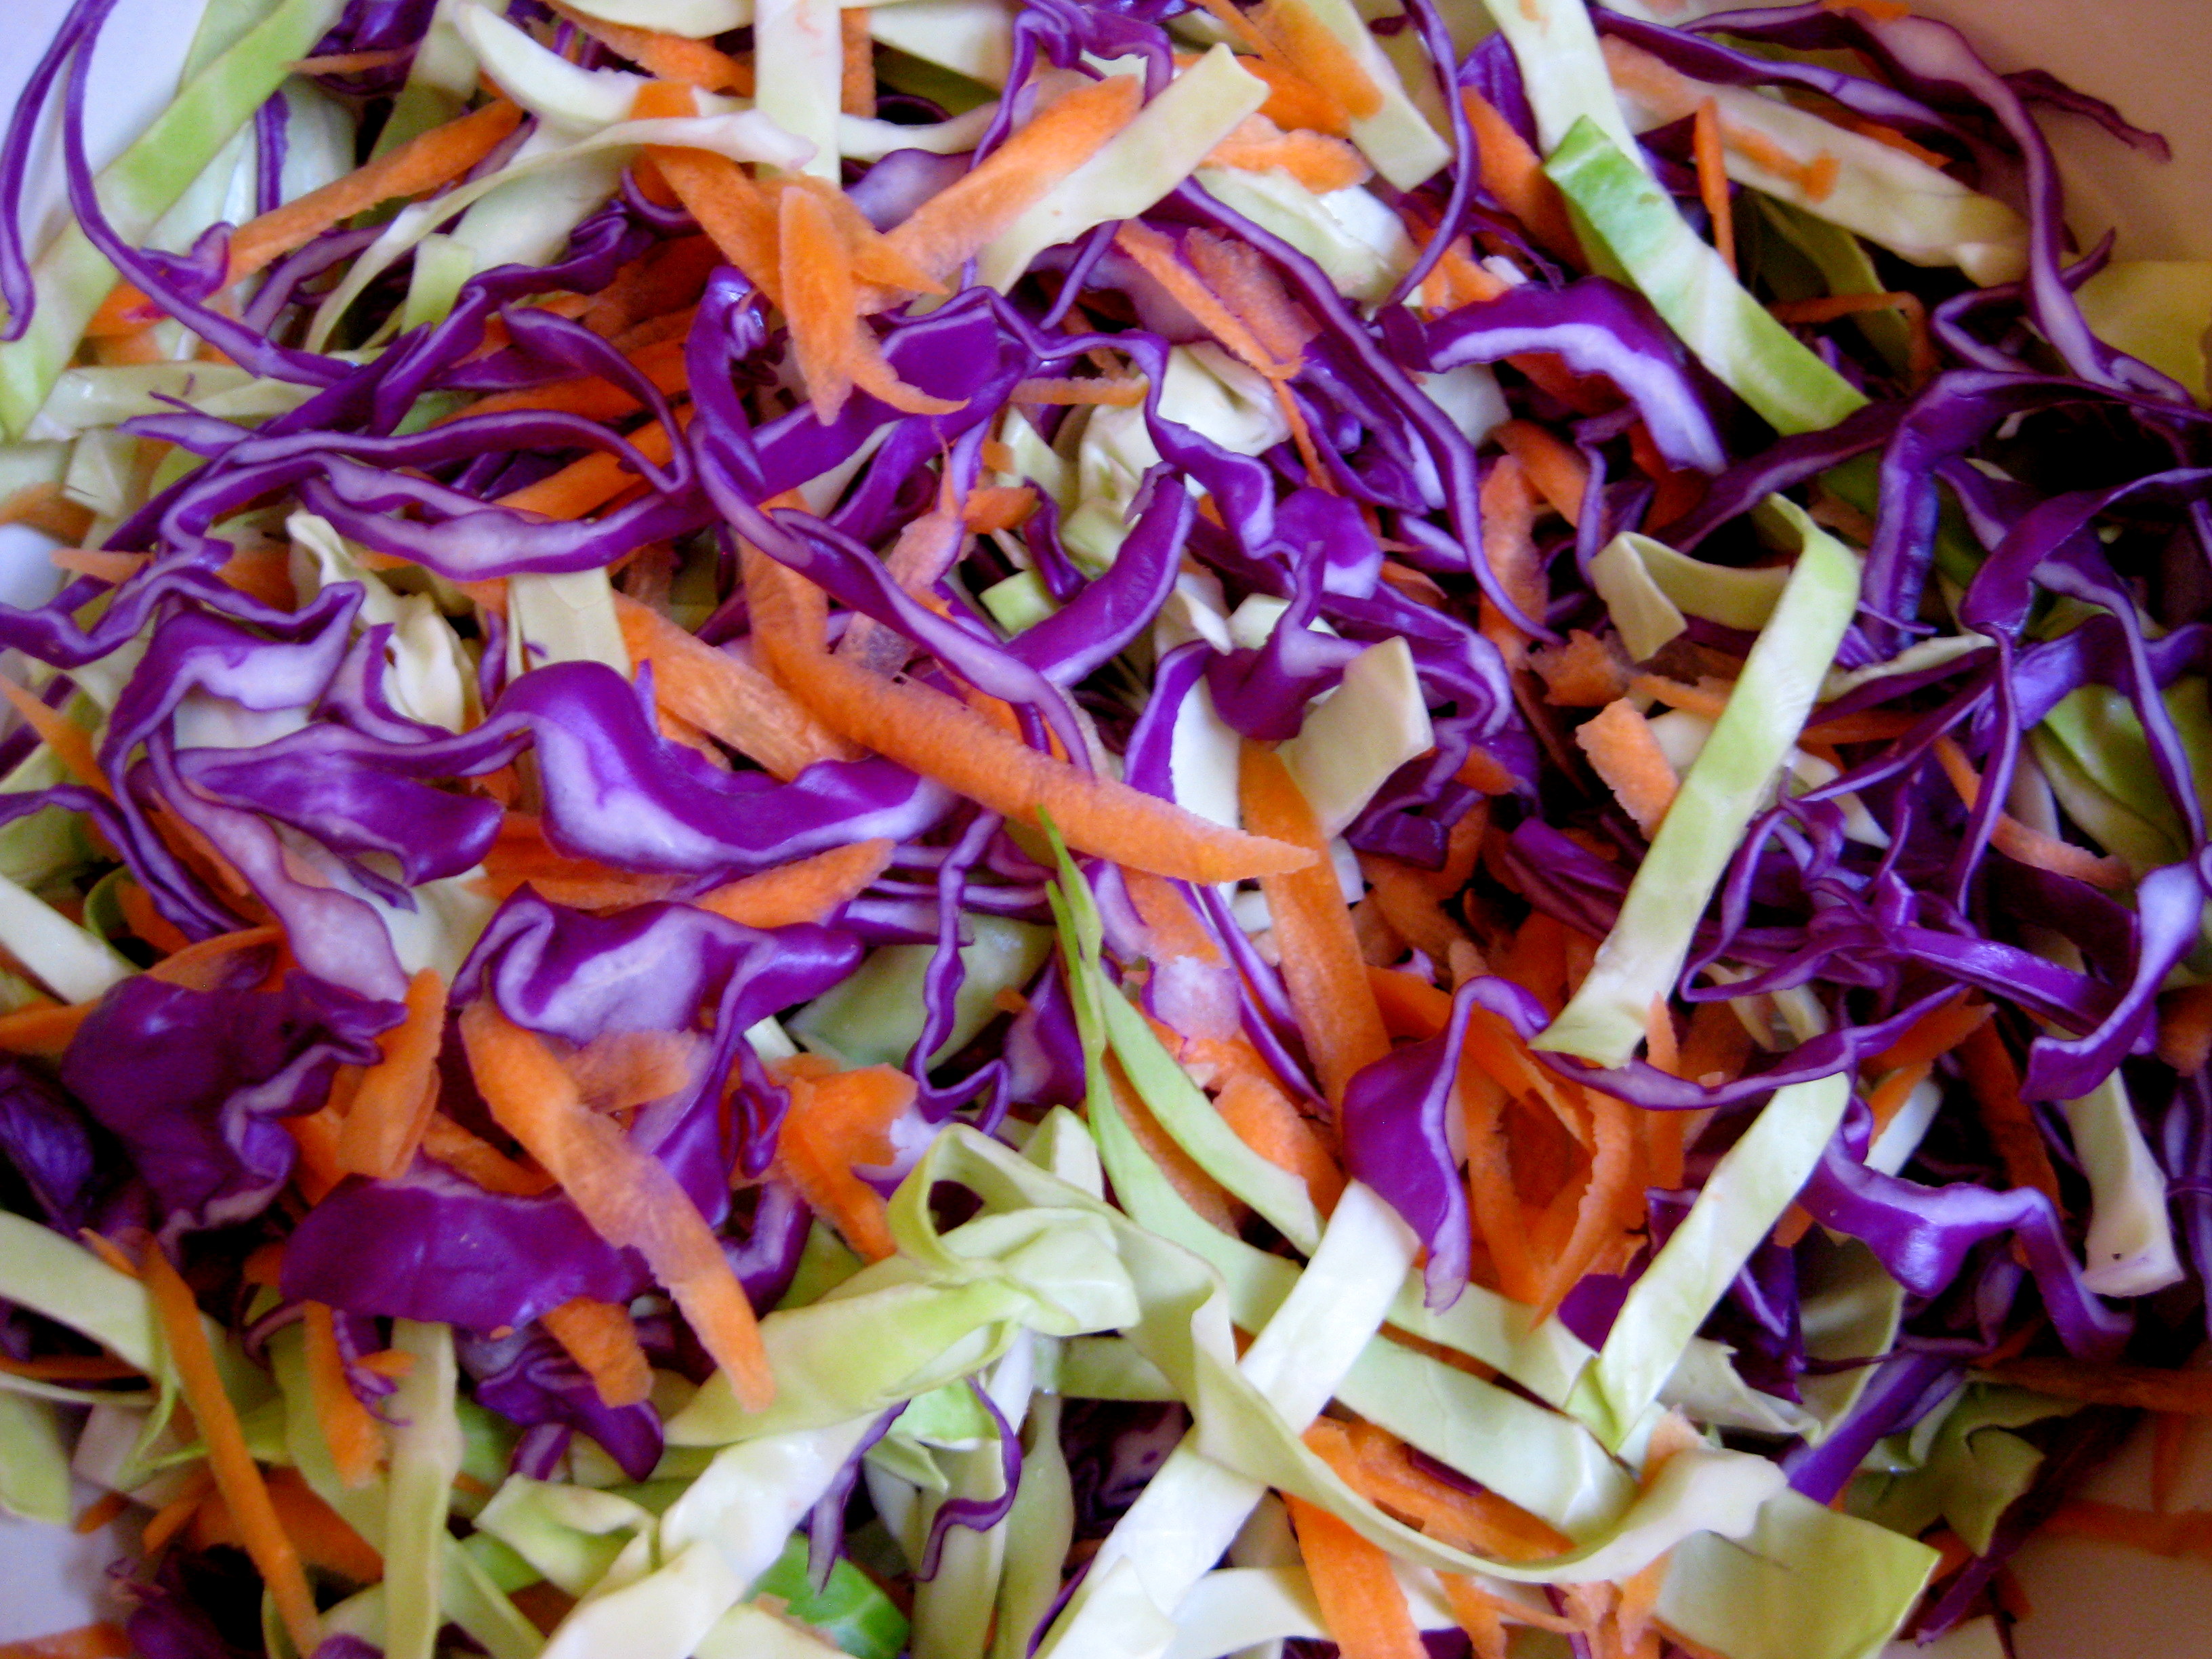
I get the feeling that it’s not quite cool to love cabbage. I mean, there’s the trendy purple sprouting broccoli, showy rainbow collards and the ultra-chic kale, but you don’t really hear about artisanal cabbages, do you? And that’s a little sad. It always strikes me as somewhat underappreciated and overlooked; a steady and consistent performer, but hardly ever invited to be the star of the show.
Except, of course, in coleslaw.
Coleslaw is one of those mad concoctions that has the rather unexpected capacity to blow your culinary socks off. It’s a riot of colours and textures, a positive festival of flavours. Homemade coleslaw is a world away from its commercial counterpart, which tends to be a damp and colourless collection of mystery vegetables swimming in a sort of mayonnaise soup. If you have the chance, it’s worth the extra effort.
It’s time to celebrate the humble cabbage, don’t you think?
Since it’s so often served with meat (like the weekend’s pulled pork), I think it particularly important that it be able cut through that rich density with a bright, crisp zingyness.
This mayo-free coleslaw is all zesty freshness and isn’t remotely heavy. You can serve it as a traditional side dish, but in my opinion it also stands on its own as a delicately balanced, intensely crunchy salad.
Mayo-free coleslaw
For the slaw:
4 x spring cabbage leaves, finely sliced into ribbons (you can use a quarter of a white cabbage if you prefer)
Quarter red cabbage, finely sliced into ribbons
Half a red onion, very finely sliced
1 carrot, grated
Juice of half a lemon
For the dressing:
4 tbsp olive oil
Juice of a whole lemon
1 tbsp honey
Half tbsp wholegrain mustard
To take the punch out of the onion, squeeze half a lemon over it and leave it to soak as you get on with the other ingredients. You can skip this bit if you’re fond of the taste.
In a large bowl, toss all your salad ingredients.
In a separate bowl, whisk the salad dressing ingredients together (you can also shake in a jar). The juice output of lemons varies, but you’ll know when you’ve got it right because it will form a light, citrusy emulsion. Season with a pinch of salt, or to taste.
Pour the dressing over the coleslaw and mix well. I tend to like mixing it ahead of time so the cabbage has time to lose a little of its rawness. The dressed or naked salad keeps well overnight.
Oh Sunday, will you ever stop with your loveliness?
There’s something impossibly lazy about a Sunday morning. I’m always reluctant to wake, generally unwilling to leave the sanctuary of the doona covers, but Sunday beckons to me nevertheless, murmuring of long coffees and longer brunches in the soft sunlight, hinting at mellow, gentle laughter and promising peaceful moments of perfect happiness.
And who am I to resist Sunday’s siren song?
Corn pancakes with bacon: the perfect Sunday brunch.
It’s tempting to make something quick and easy like bagels, but if I’m feeling particularly motivated I like to make something indulgent and special for Sunday brunch. I love these corn pancakes – they’re basically a savoury variation of the American pancakes I made a few weeks ago. They might, in another lifetime, be called corn fritters, but I tend to think that fritters are deep-fried and crunchier, whereas these darlings are soft and fluffy, punctuated with sweet bursts of sunshine from golden kernels of corn.
They are best served with bacon and avocado, and I added a dab of crème fraîche and a splash of really good balsamic vinegar. You could also try something sharp like a citrusy salsa or springy relish. I did poach an egg to go on top, but don’t trouble yourself. In the end, I think it’s enough to go with the pancakes and bacon.
Rivers of rich egg yolk gliding down a mountain of golden pancakes.
My Sunday plans: feast well, then spend the rest of the day groaning under the immense weight of my own epicurian satisfaction.
Corn pancakes with bacon (makes 6)
225g plain flour (1½ cups)
1 tbsp baking powder
1 tsp sugar
1 pinch of salt
2 large eggs, beaten
30g butter, melted and cooled
300ml milk (1¼ cups)
400g tin of corn kernels, drained
2 spring onions, finely chopped
6 rashers of bacon
In a large bowl, mix the flour, baking powder, sugar and salt together.
Add the eggs, butter, milk, corn and spring onions and mix well.
Let the mixture stand while you heat a non-stick pan to a medium heat. Add a ladleful of batter. When bubbles start to form on the surface (about 2-3 minutes), you can flip and cook on the other side.
Depending on how crispy you like it, you can start cooking the bacon when there’s two pancakes left to cook (I like it crispy but not tough, which takes about 6 minutes under a grill or on the stovetop). Serve together with lamb’s lettuce, balsamic vinegar and crème fraîche.