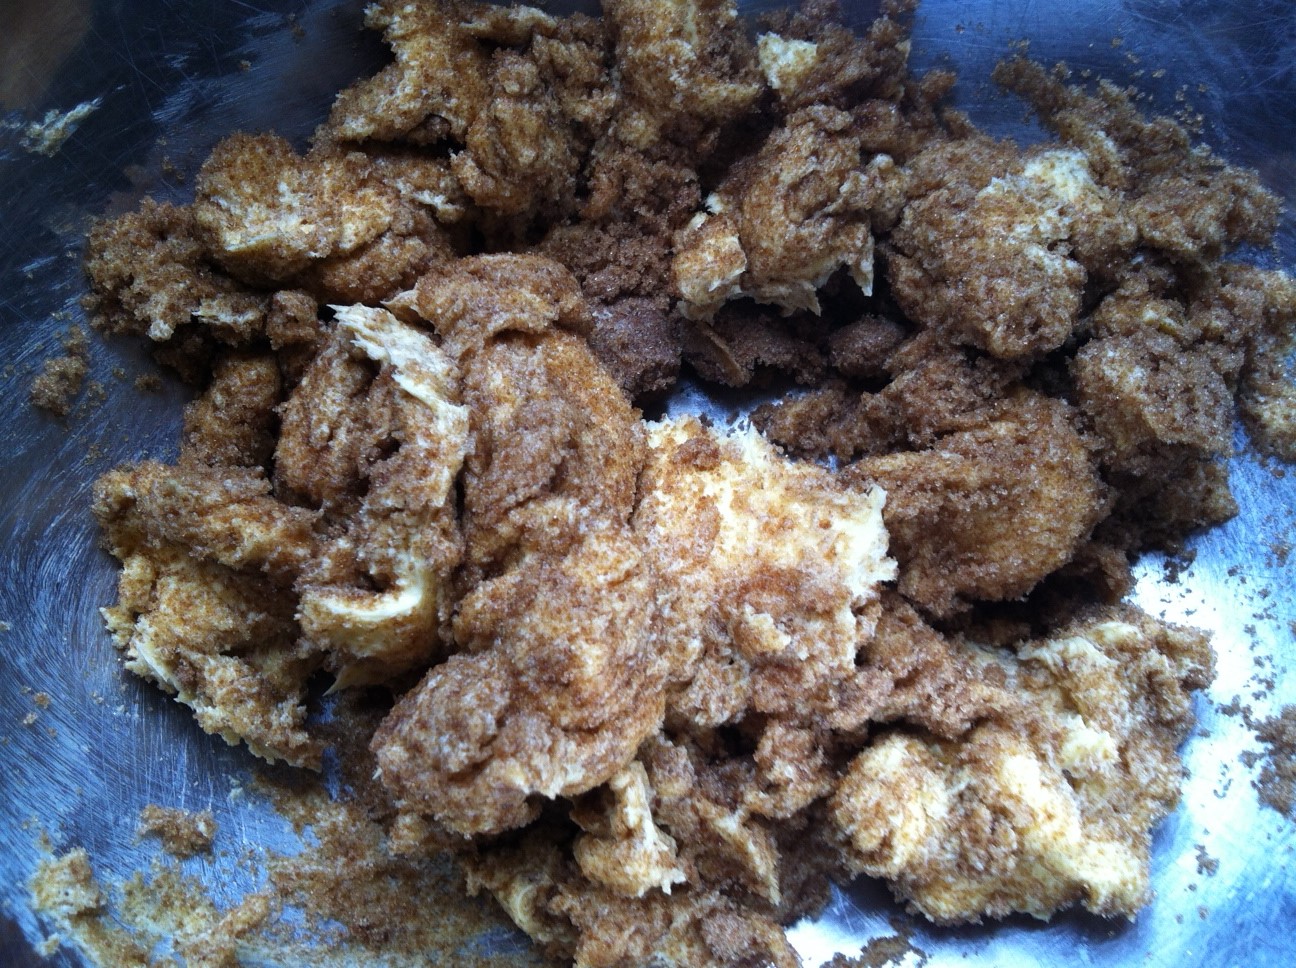
Eat them whilst still slightly warm from the oven, with avocado or cream cheese. Bliss.
I’ll be honest: ever since I realised you could substitute avocado for butter in baking quite successfully, I’ve been dreaming of muffins, cakes, loaves and scones.
The only thing that has stopped me from going completely nutty with the cupcake tray is the sugar. I’m not going to get into eating philosophies (there are so many, and they all claim to be backed by some kind of science), but the one thing they all seem to agree on is that limiting refined sugar is probably a Good Idea.
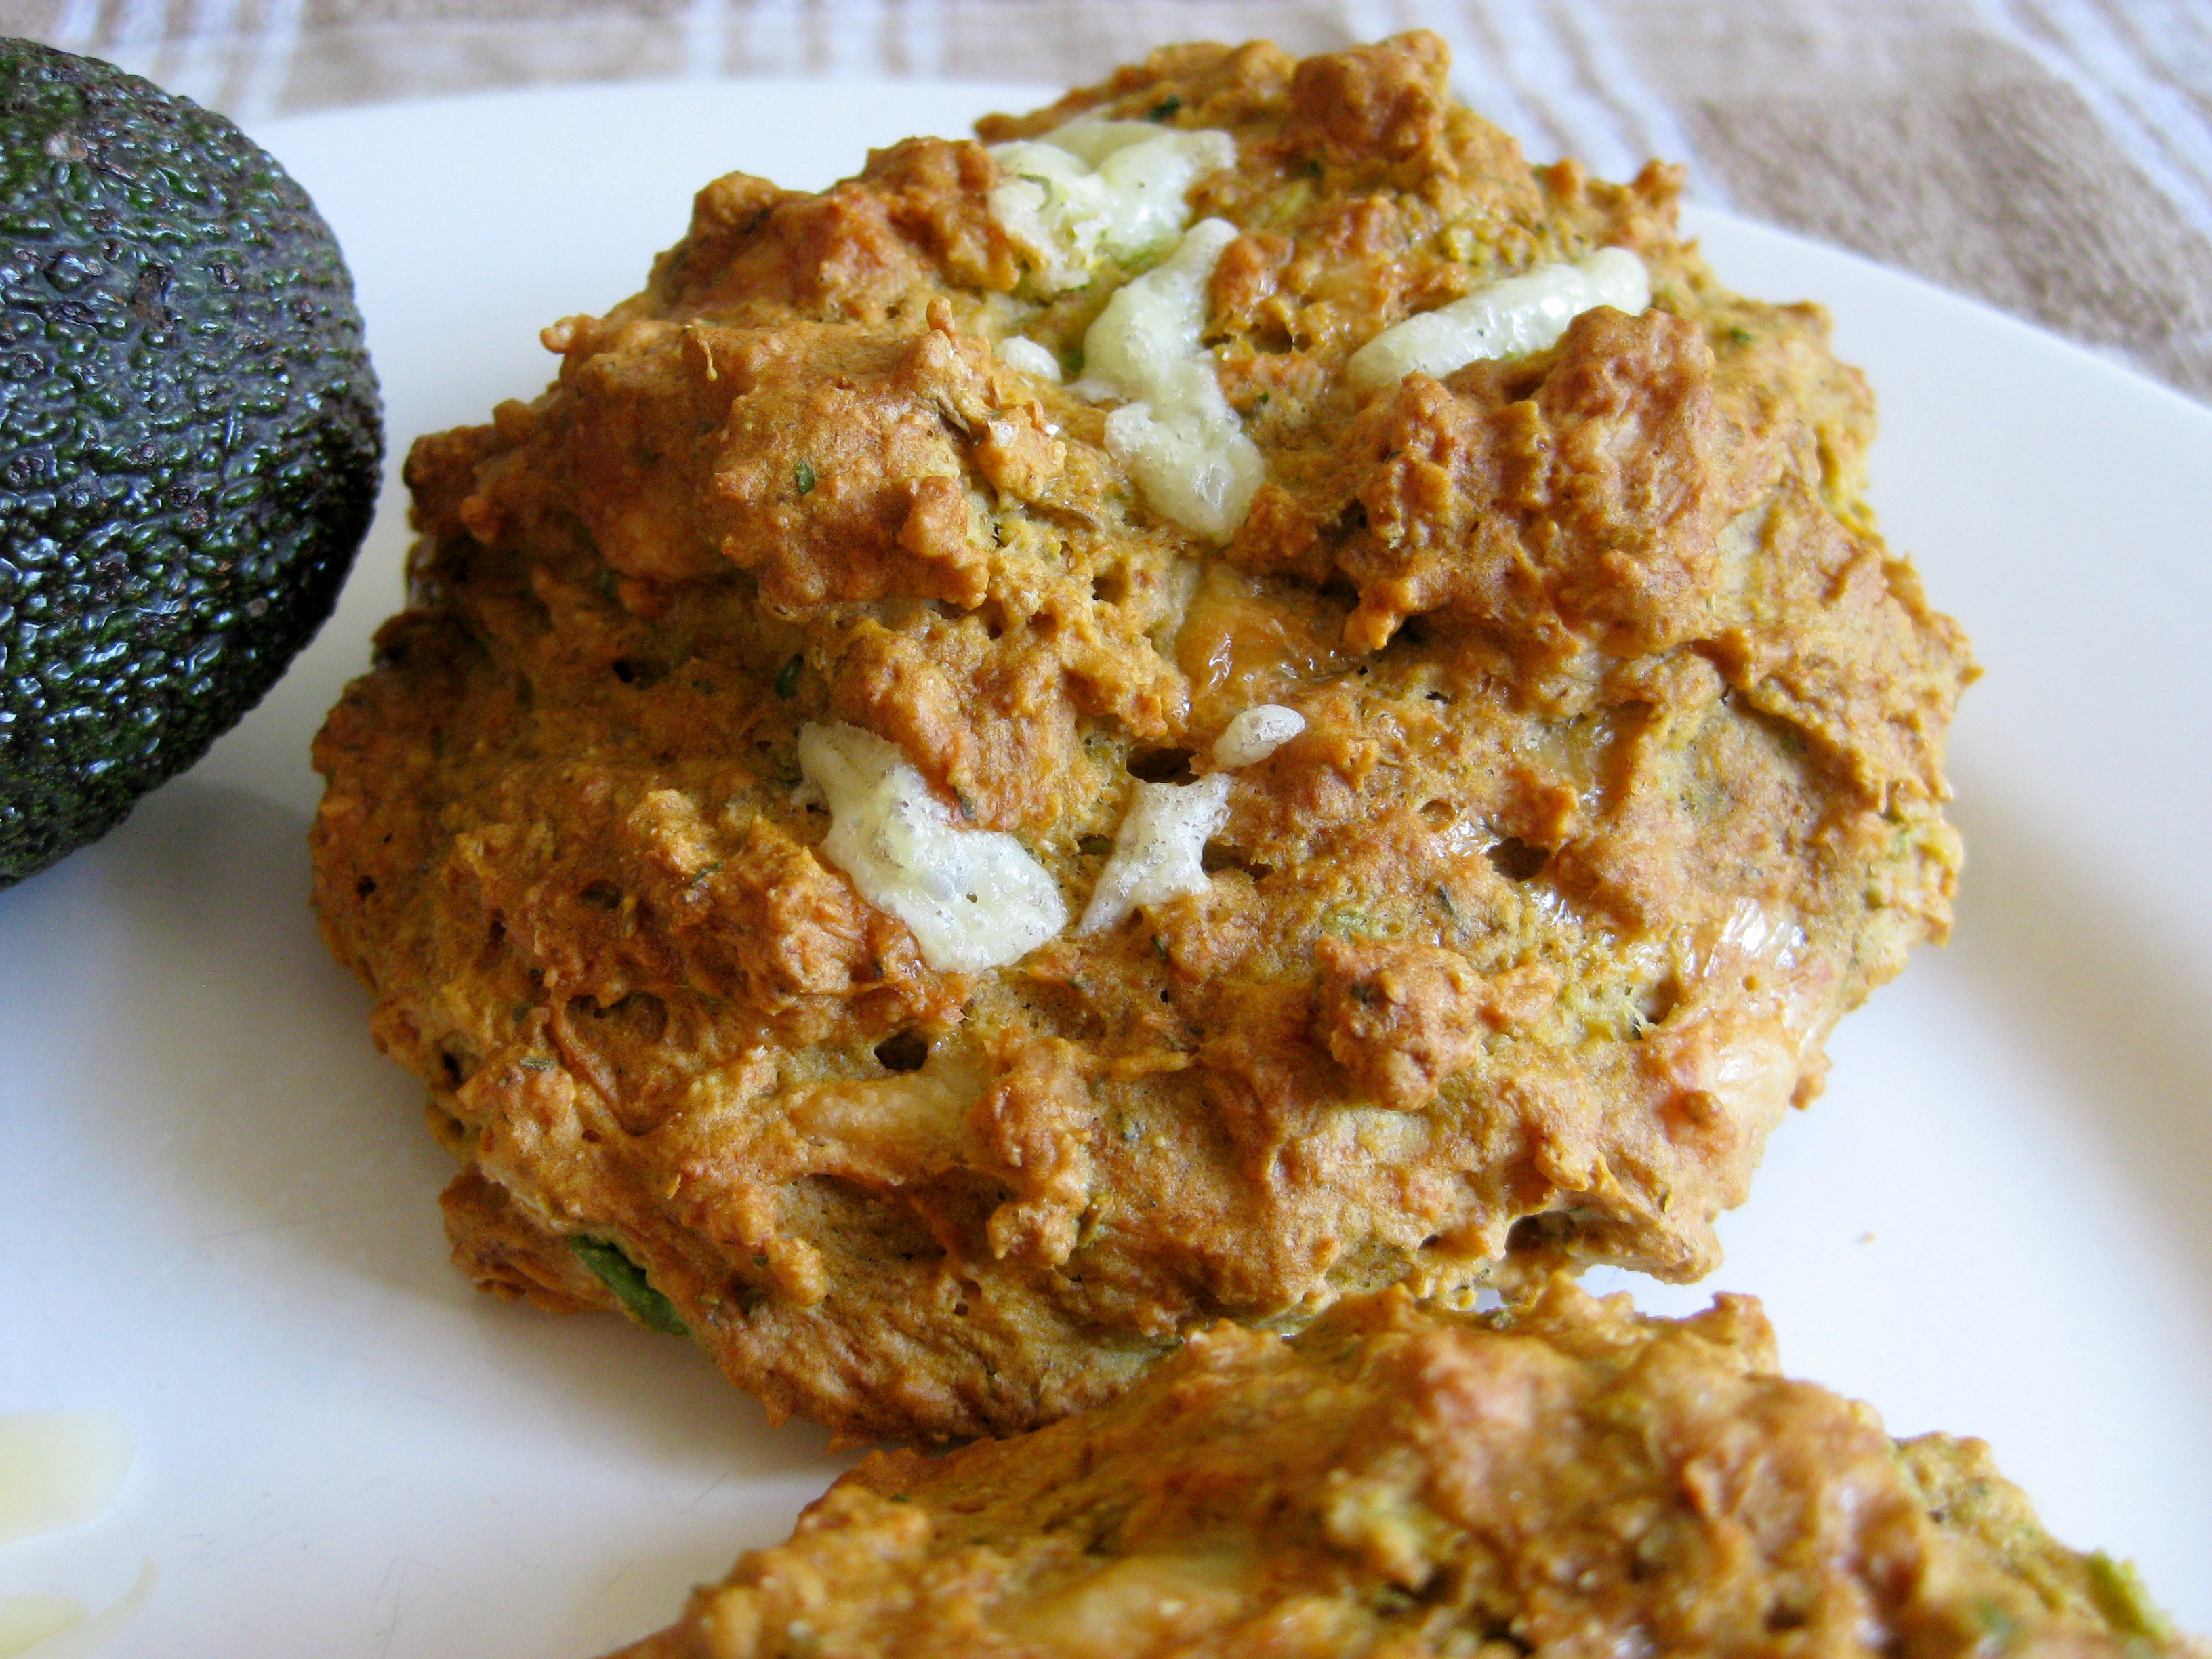
So this week, in order to feel truly smug and virtuous, I went with the savoury option: cheesy tomato and herb scones made with wholemeal flour and avocado.
Pop them in the oven and go and polish your halo.
Cheese and herb scones.
Wholemeal Avocado Scones (makes 9 large scones)
1 cup plain flour
1 cup wholemeal flour
3 heaped tsp baking powder
1 tsp salt
2 eggs
2 ripe avocados
½ cup milk (soy milk works too)
100g grated mature cheddar (I used low-fat)
1 tbsp tomato paste
2 tbsp mixed herbs
Preheat the oven to 200 degrees.
In a large bowl, sift together the flours, baking powder and salt, then mix through the herbs and grated cheddar.
In another bowl, mash the avocado thoroughly and add the eggs, milk and tomato paste. Mix (it will look lumpy and disturbing, but don’t worry).
Add the wet ingredients to the dry and mix until just combined. It’s a very wet batter.
Drop scoops of the mix onto baking paper and bake at 200 degrees for 12-15 minutes.
As I write this, I’m keenly aware that there is a pile of washing up behind me that closely resembles a small mountain.
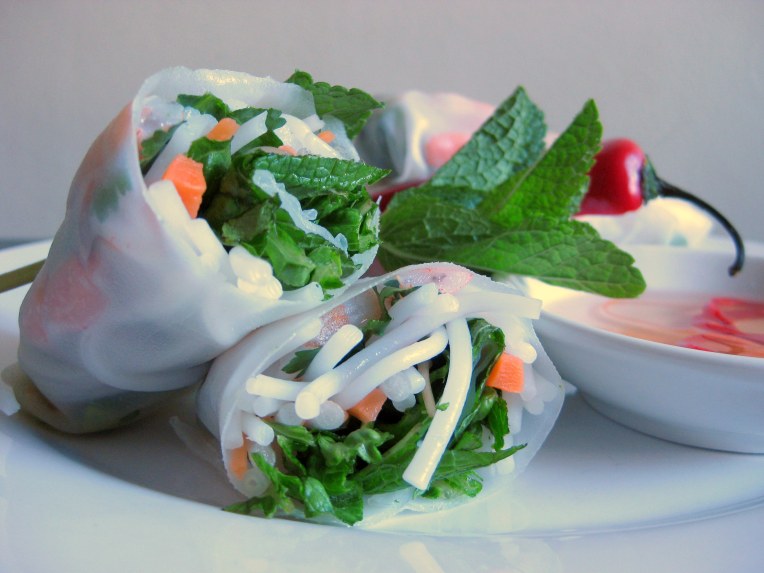
I’m breaking the rules a bit here, because although it’s certainly achievable to make these even in a small space, this isn’t exactly an ideal tiny kitchen recipe. It’s time consuming, a little fiddly and uses more plates than I would like – but I have to include it, because I simply can’t have you going into Spring without the deliciousness of summer rolls.
In truth, my love affair with Vietnamese food began with these rolls. Gỏi cuốn, nem cuốn or bánh tráng cuốn, as they’re known, are rice paper rolls stuffed with bún (rice noodles), herbs, vegetables and meat. They’re best served at room temperature with a dipping sauce – I personally think that you can’t beat the classic nước cam, but you can also serve them with a sweet hoisin or chilli sauce and peanuts.
Gluten-free and easily adapted to suit vegans and meat-eaters alike.
Summer rolls embody everything I think is amazing about Vietnamese cuisine. Light and zingy, crunchy and softly dense, summer rolls have a certain balance of tastes and textures designed to bedazzle the palate. They’re commonly served as an entrée, and they make a beautifully bright introduction to the stronger flavours of phở and cơm tấm.
So while there may seem like there’s a lot of ingredients and a load of washing up to do at the end; persist, friends. It’s most definitely worth it.
There’s something exceptionally light, fresh and tasty about summer rolls.
Summer rolls
10 rice paper sheets
100g rice vermicelli noodles
1 carrot, julienned
Small bunch of coriander
Small bunch of mint
Three lettuce leaves
Bean sprouts (optional)
Cooked prawns (three per roll) – for a vegetarian alternative you can use fried tofu
Prepare all the ingredients so that they’re ready to roll. Start with the noodles; you can cook according to directions but in my opinion you almost never need to boil them. Soaking them in boiling water is fine. Like pasta, make sure the noodles are al dente – they should be springy but not chewy. Drain well.
While the noodles are soaking, take the carrot and blanch in equal parts water and vinegar. If you’d prefer to save time and not to pickle your carrot, that’s fine too.
Finely chop the lettuce.
Pull the mint and coriander into leaves and pick over the bean sprouts.
When you’re done, you should have a crowded-looking plate of noodles, carrot, lettuce, herbs and bean sprouts. The key is to make sure that all the filling ingredients are as dry as possible.
To prepare the rice paper, have a bowl of very hot water and a clean tea towel next to your rolling surface. Dip the paper in the water until it softens and carefully fish it out, trying not to break it. Lay it briefly on the clean towel to absorb the excess water and then lay it flat on the board.
Assemble your summer roll. I use three prawns or one tofu puff sliced into three, plus a few shards of everything else. Try to make it as compact as possible as this will help when you roll.
Rolling is an art. I’ve rolled plenty of spring rolls, but they’re a cinch compared to the fiddly nature of the summer roll beast; all the lightness and springyness that we love about a summer roll seems to work against us here in a very irritating manner.
My tip is to flip up one end over the ingredients and use it to push them into as compact a roll as possible. Using one hand to keep the roll tight, fold up the sides and then push the roll forwards to complete.
Also, be careful about flipping rice paper – running a close second to the nasty possibility of the paper tearing is it sticking to itself. Once it does that, it’s very difficult to unstick it without tearing.
A new way to use avocados, those versatile darlings.
This one requires a small leap of faith.
Not in the way of ‘here, eat these crickets, they’re really tasty and an excellent source of protein’ or anything, but enough that I ask for your trust as we explore the world of using avocados in baking.
What?! Why would you do that to a delicious avocado? Has the London smog gotten to your brain?
I know, right. And yet there is a point to the madness; avocados are a great substitute for butter. Whereas butter is over 50% saturated fat, avocados contain just 2.1g per 100g. Avocados are high in fibre, a good source of potassium and folic acid, and have no cholesterol.
Go on, get yourself an avocado. I’ll wait.
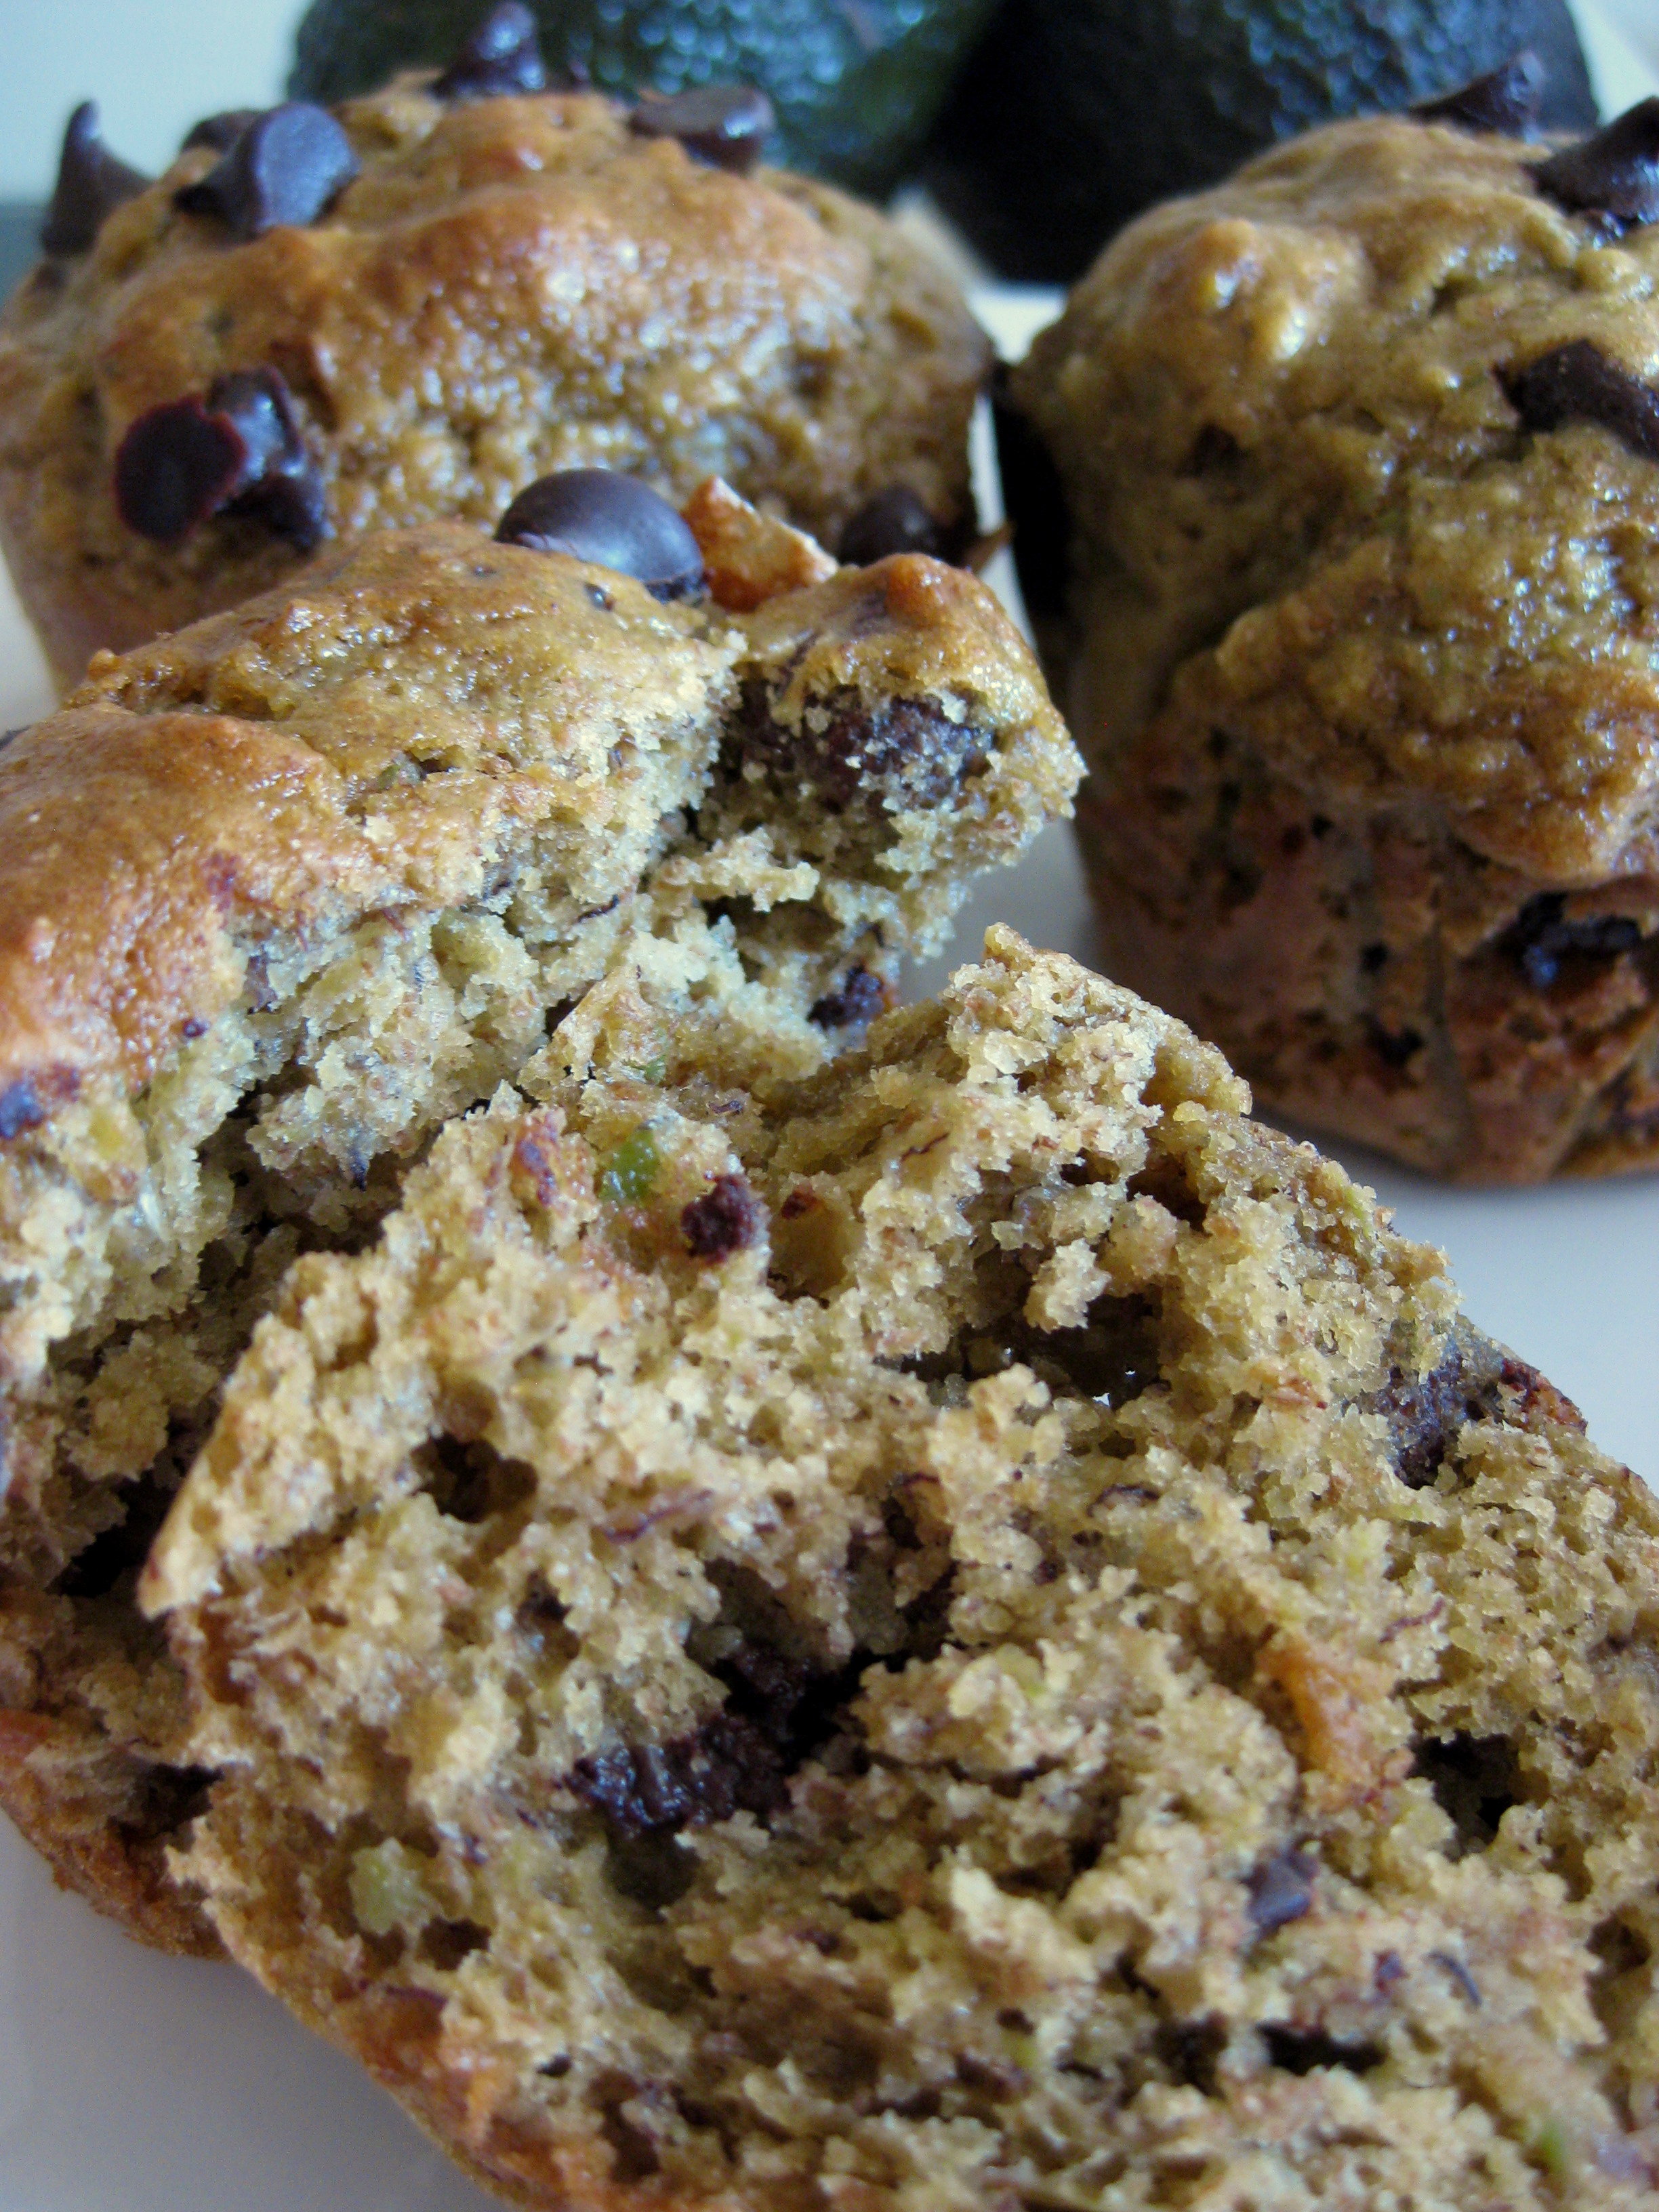
Banana and avocado muffins… with hazelnuts and dark chocolate chips.
Even knowing all this, using them in baking can be a bit of a stretch. What if my cake goes a lurid green? What if it tastes strange and salad-like? Should I dump the lot in cornbread with some jalapeños and just have an all-in-one Mexican meal?
Please don’t worry. These muffins are light and moreish; the avocado makes them moist without being greasy. I promise you can’t taste the avocado, and the wholemeal flour means that they also keep you full for a good long time. These muffins are smug, ‘I’m being good but also rather decadent’, win-win muffins.
I have it on my bestie’s authority that avocados are also fantastic in a smoothie – but that is another post for another time.
Light, moist and moreish. You’ll just have to trust me on this one.
Banana and avocado muffins
2 small ripe avocados
2 overripe bananas
1 cup sugar (I used about half a cup of golden caster sugar and then two tablespoons of honey)
2 eggs
1 tsp vinegar
6 tablespoons milk
1 cup white flour
1 cup wholemeal flour
1 tsp baking powder
1 tsp baking soda
Nuts and chocolate chips (optional, but who are we kidding)
In a bowl, mash the avocados really, really well. If you leave any lumps you’ll see it in the final product, so be diligent with that fork.
Add the sugar and whisk thoroughly with the avocado.
Add the eggs, milk, baking soda and vinegar and whisk away. The vinegar is there to activate the baking soda and you won’t taste it in the final product. If you don’t have baking soda, just use two teaspoons of baking powder in the next step.
Place the flours and baking powder in a sieve and sift into the bowl, mixing very gently. You don’t want to overmix, so stir until combined.
If you want to have nuts or chocolate in your muffins, now is the time to add them.
Drop the muffin mix into a greased muffin tray (or make pretty tulip cases by pressing greaseproof paper into the tray) and bake at 180 degrees for 35 minutes.
Saturday is undoubtedly my favourite day of the week. Blissfully free of the Monday to Friday grind and yet lacking those Sunday blues that can descend on the day-before-you-go-back-to-work, Saturday is a friend that brings with it a sleep-in, morning coffee and a deep sense of relaxation.
To me, there’s no better day to have pancakes.
Pancake Saturday may not be as famous as Shrove Tuesday, but since I work full time and have neither the ability nor the desire to get up at 6am to make pancakes on the appropriate day, I postponed. And oh, the wait was worth it.
I defy you to stop at just one.
I’ve made gluten free pancakes before, but this recipe, taken from Nigella, is strictly traditional; it makes thick, sponge-like American pancakes and I even used white flour and everything (I did substitute dark muscovado sugar for the white sugar, but that was purely a matter of what I had in the cupboard).
There are rumours that you can make a pretty darn good pancake with wholemeal flour, and that’s what I’ll be trying next.
A veritable waterfall of syrup.
American pancakes
225g plain flour (1½ cups)
1 tbsp baking powder
1 tsp sugar
1 pinch of salt
2 large eggs, beaten
30g butter, melted and cooled
300ml milk (1¼ cups)
Take the dry ingredients – flour, baking powder, sugar and salt – and mix in a bowl.
Make a well in the centre and pour in the wet ingredients – eggs, butter and milk.
Mix together briefly and let the mixture stand as you heat the frypan. The batter will look fairly runny, but it puffs up in the pan.
Oil the pan and dollop a small amount of batter onto the surface. Wait until the surface bubbles and then you can flip the pancake and cook for a minute on the other side.
‘Tis the season to be jolly, which means one thing: indulgence.
I love the way London does Christmas. It’s cool and crisp outside, cosy and warm inside, and people wander around town wrapped in scarves and beanies, noses pink from the cold and eyes sparkling with the twinkling lights of Oxford Circus and Regent Street.
The Grinchiest Grinch couldn’t fail to be caught up in the magic of this festive time of year.
The sadness at being away from those I love at home and abroad is somewhat tempered by the whirlwind of parties and irresponsible merriment. At any other time, drinking every day would basically render you a functioning alcoholic, but December is the exception: parties are simply the order of the month.
These party parcels are quick and easy to make and impressive to look at. Warm, filling and delightful, they’re perfect for a relaxed gathering – just add mulled wine, good friends and plenty of laughter.
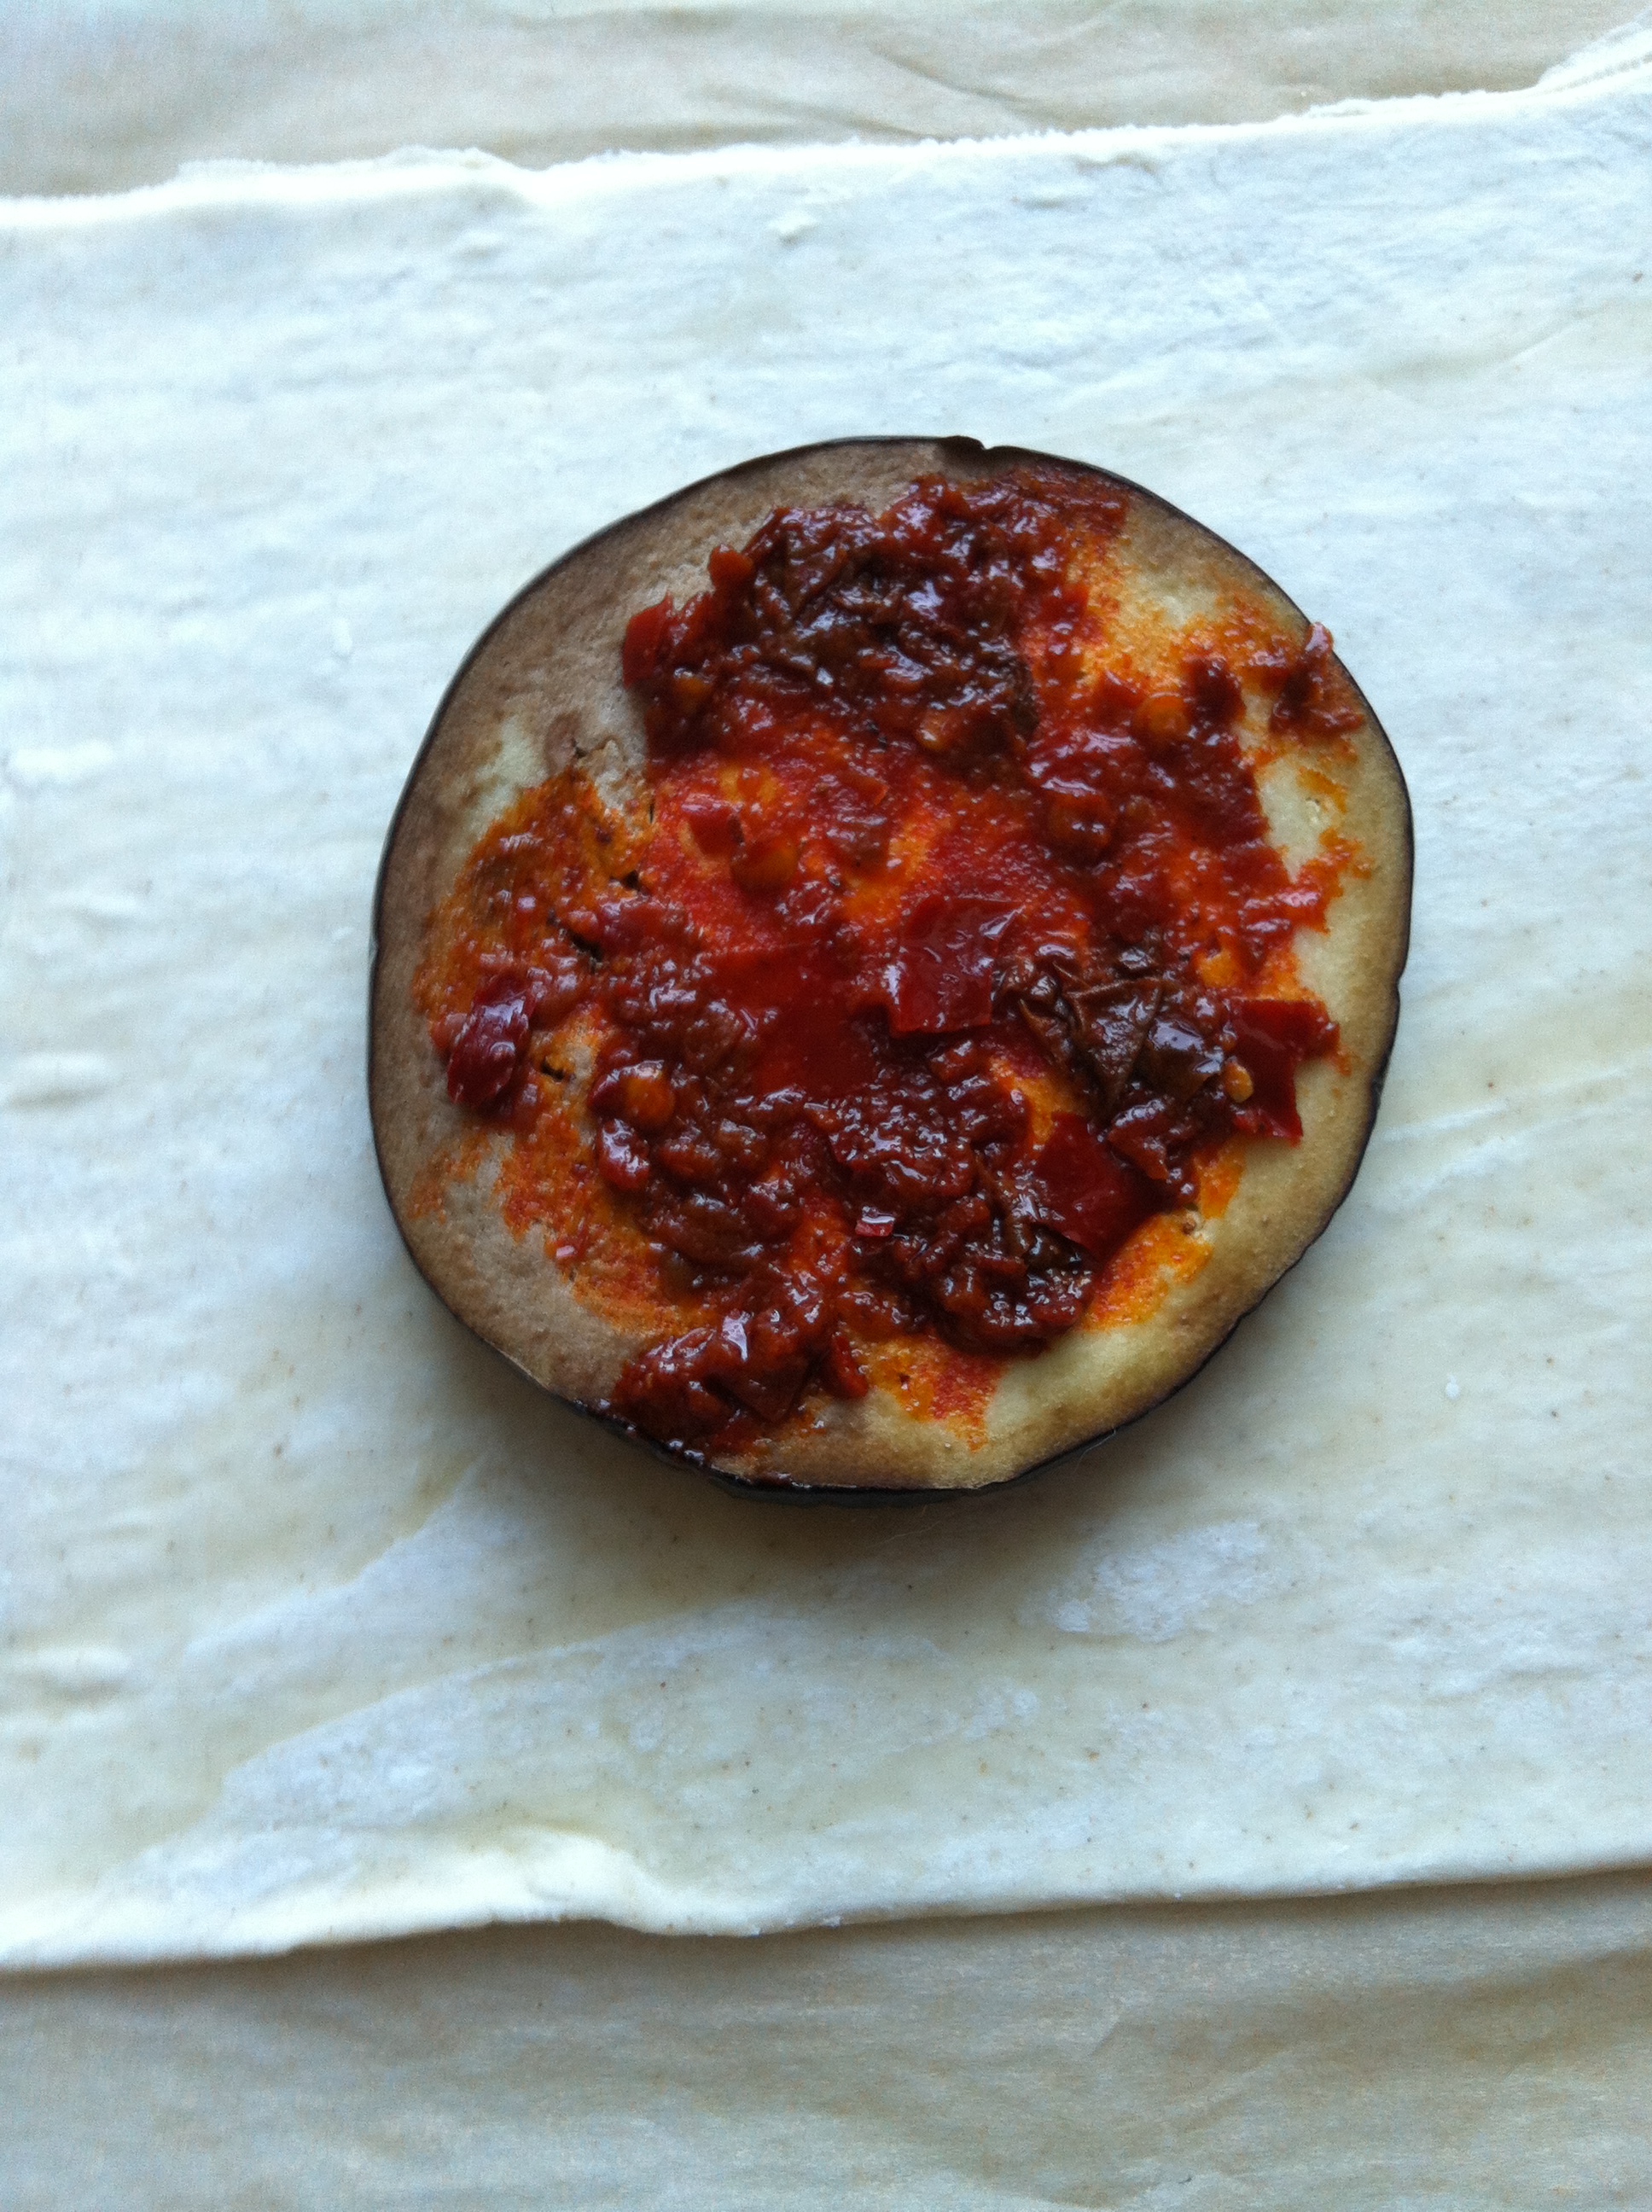
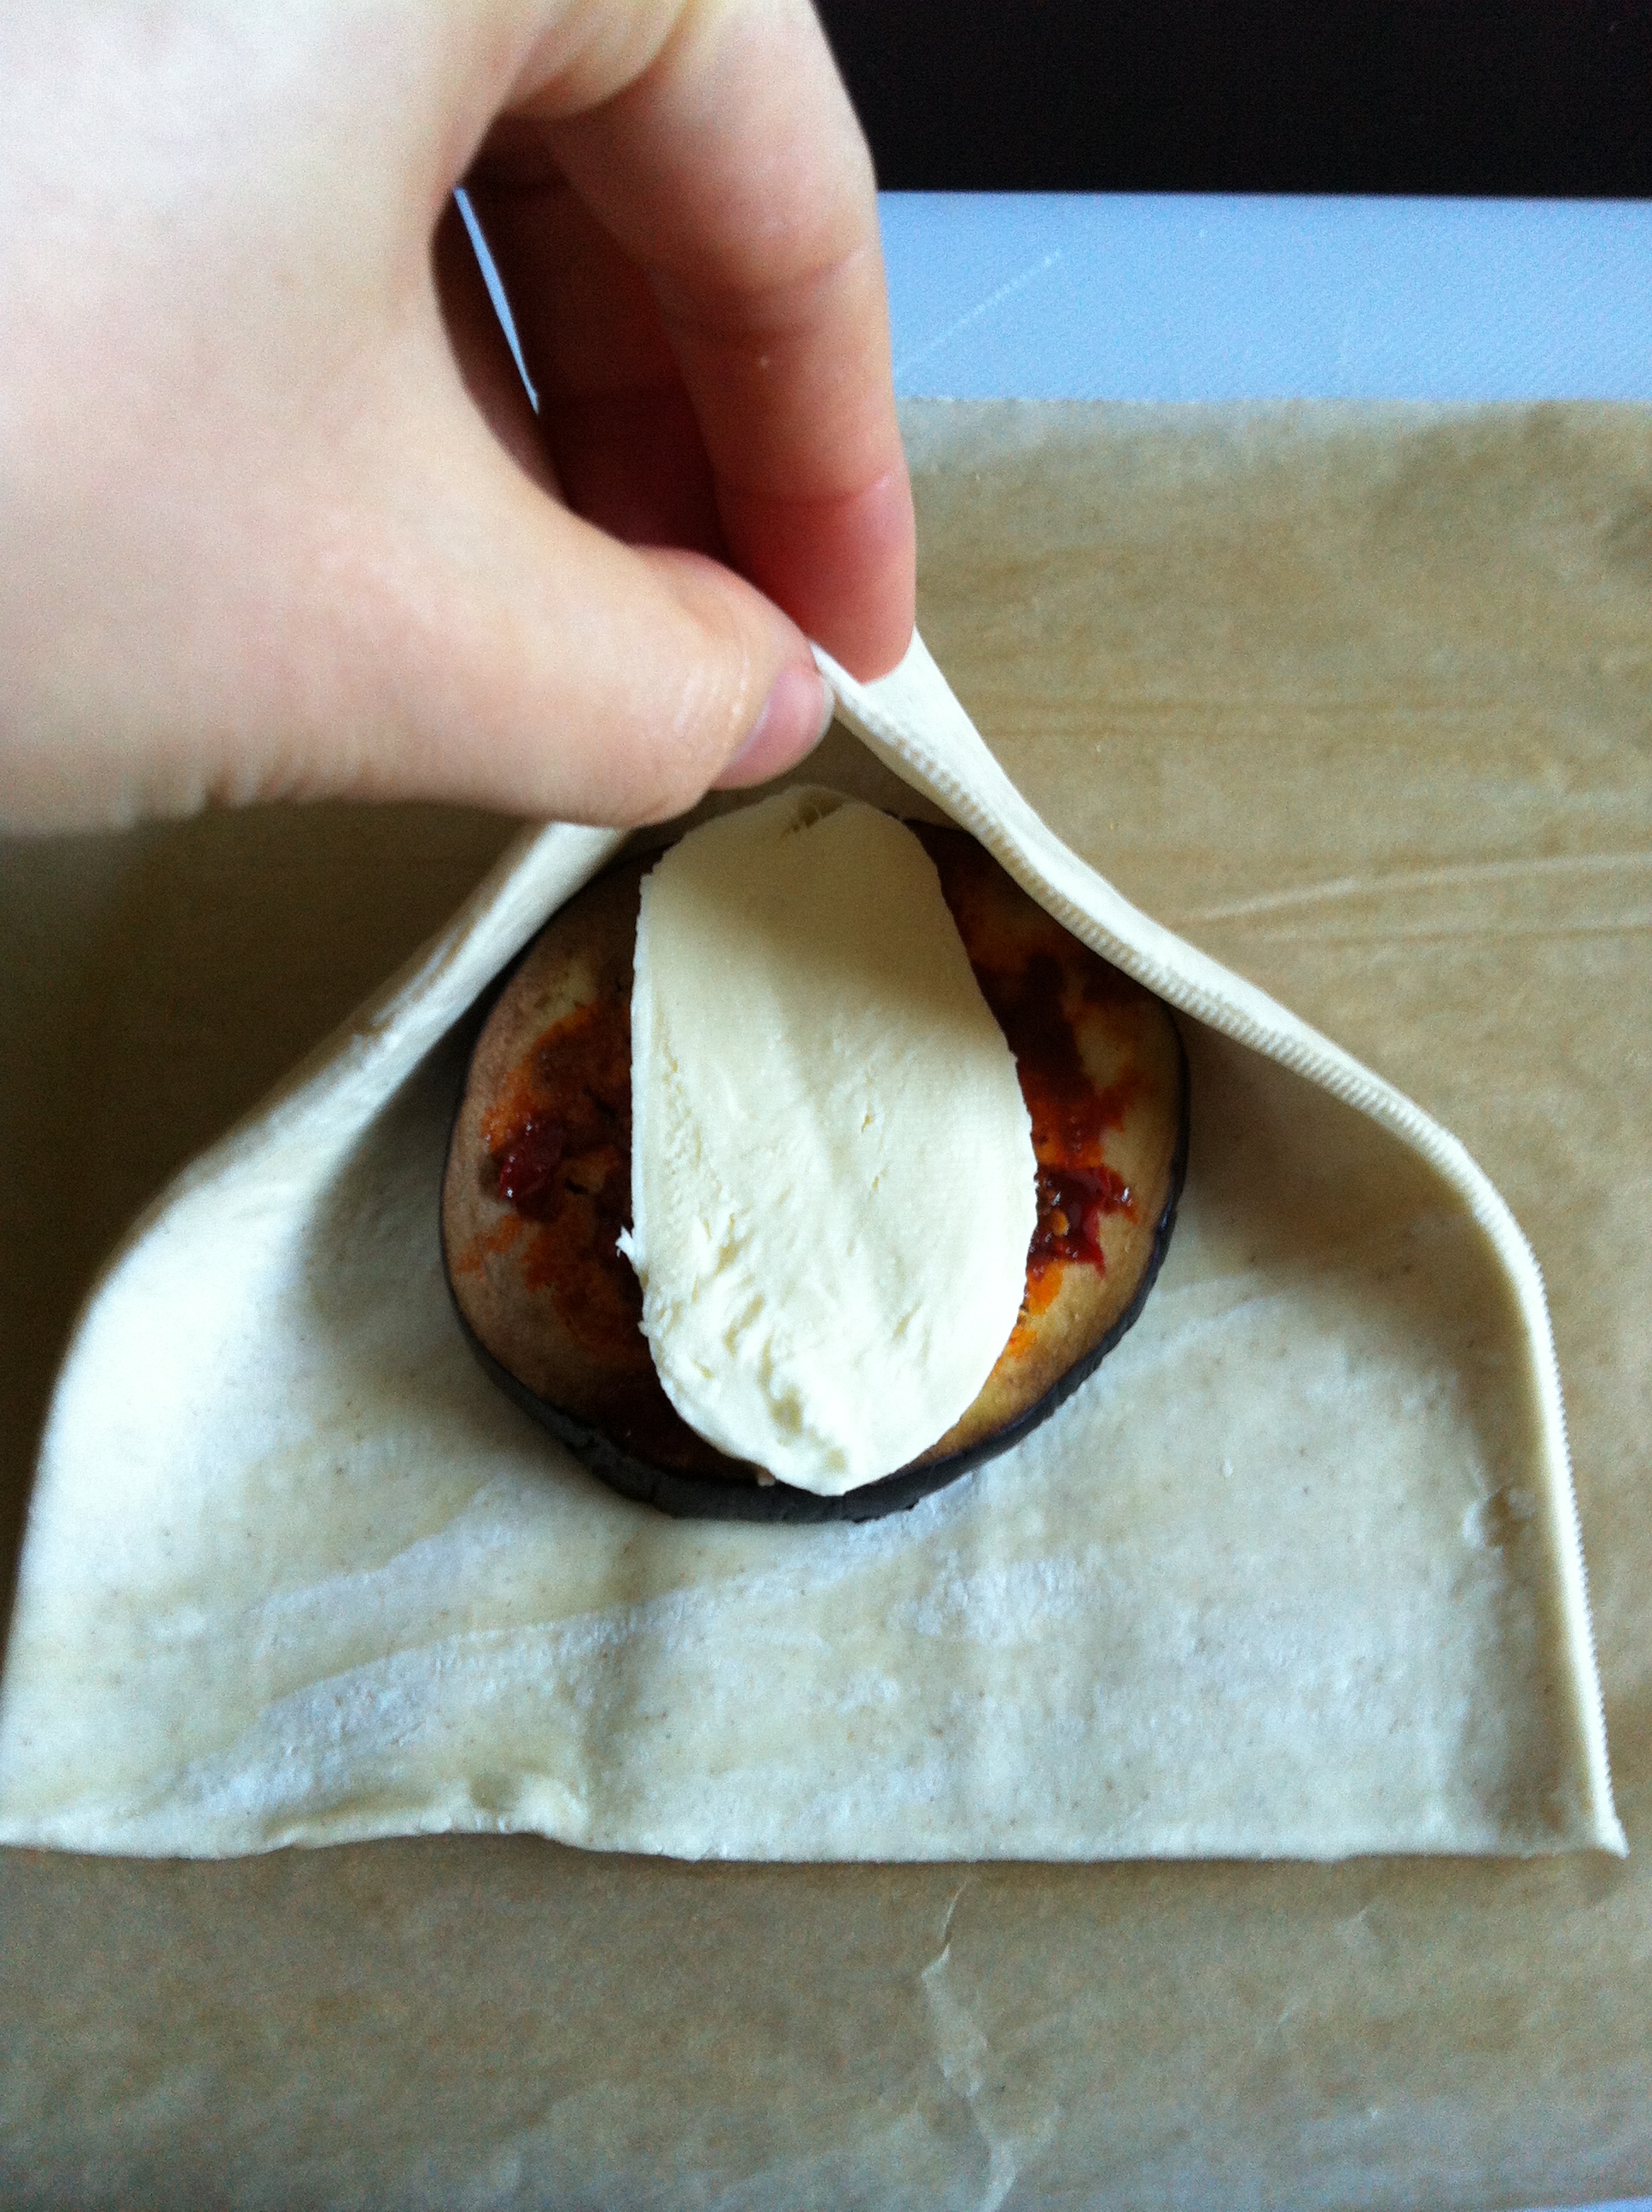
Trio of Party Parcels: ‘Plant, Parma and Pumpkin Eggplant parcel:
1 square of puff pastry, roughly 12.5-15cm in length
1 slice eggplant, about 7.5mm thick
Half a teaspoon of harissa paste
1 slice mozzarella cheese, about 5mm thick
If it isn’t already done, cut the puff pastry into a square. I used reduced fat ready-rolled puff pastry, but go with what you like.
Cut a square of pastry.
Place the eggplant in the centre and top with the harissa paste.
Eggplant and harissa is an amazing combination.
Add the mozzarella.
Eggplant, harissa and mozzarella. It just works.
To form the parcel, take two corners of the parcel and pinch together.
Wrapping the parcel.
Crimp hard along the seam, folding over slightly to get a better seal.
Pinch along the seam.
Fold the other corners up in the same way, crimping as you go.
One party parcel.
Truthfully, mine sort of popped open in the oven, so if you don’t want this to happen you can prick the pastry with a fork.
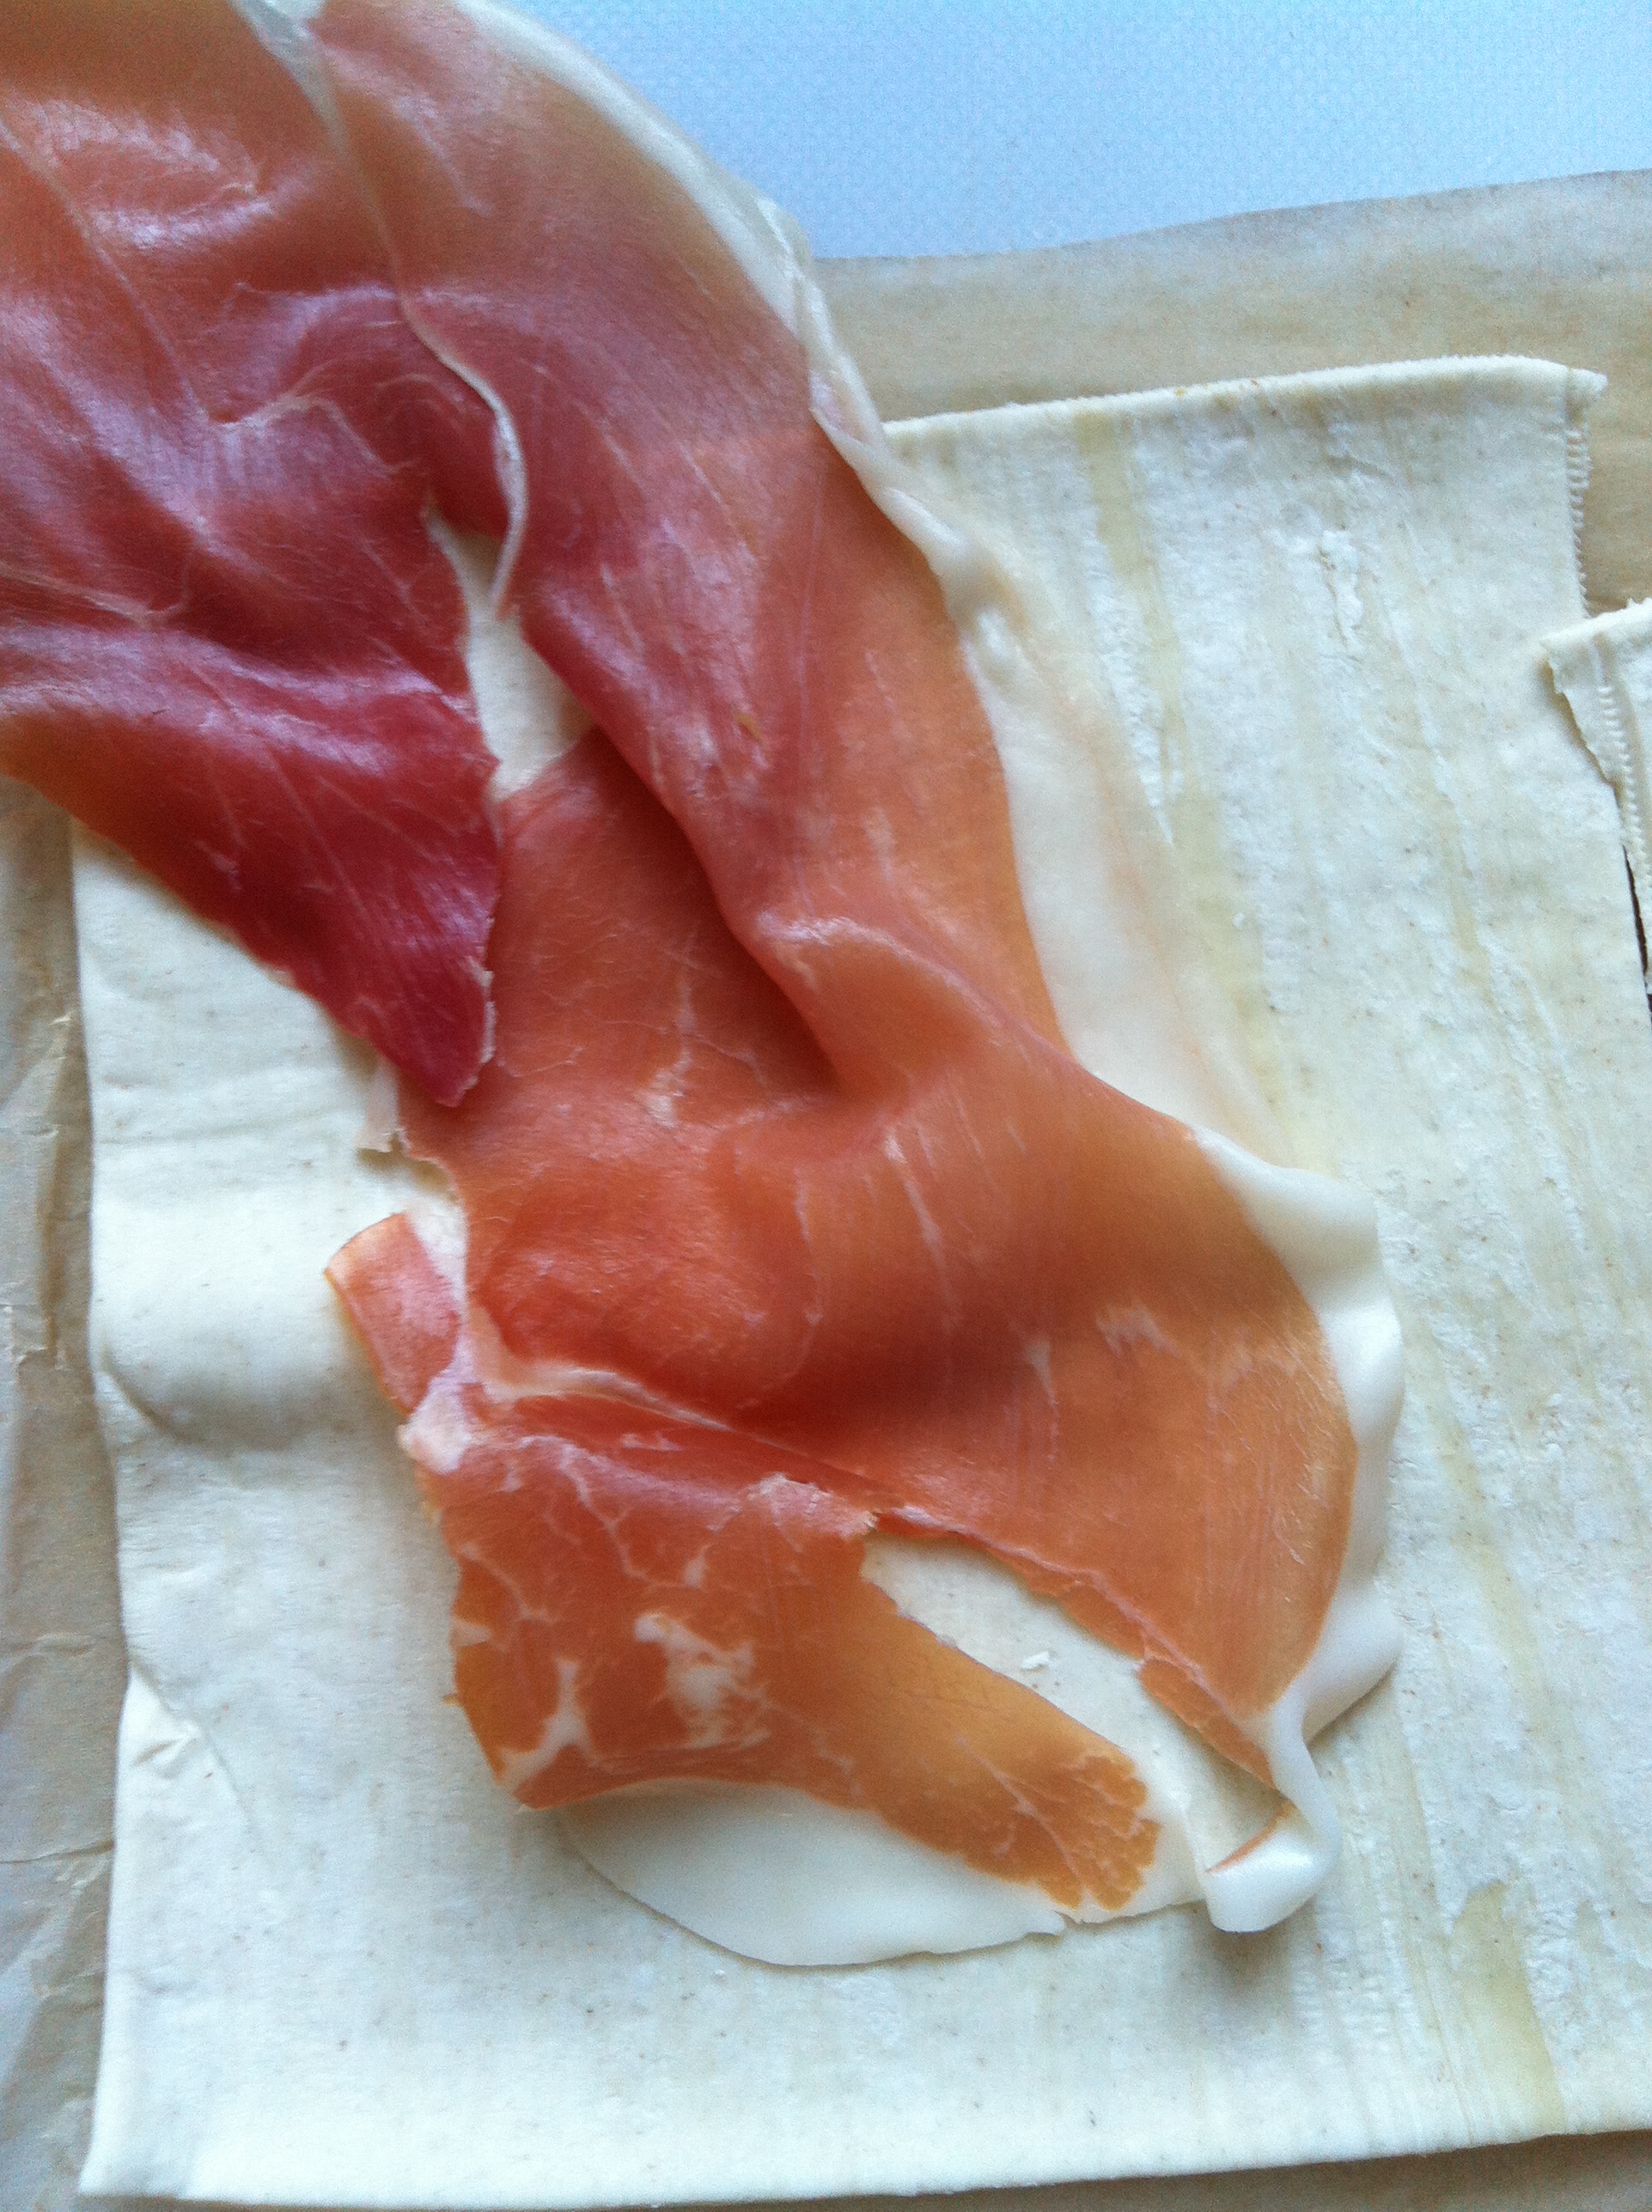
Parma parcel:
1 square of puff pastry, roughly 12.5-15cm in length
1 slice Parma ham
1 slice mozzarella cheese, about 5mm thick
1 slice pear, about 5mm thick
4 yellow pickled jalapeño slices
Take the square of pastry, and lay the Parma ham so the bulk sits in the middle and hangs off the side of the pastry square.
Isn’t Parma ham delicious?
Place the pear and jalapeños on top, followed by the mozzarella.
Parma, pear, pickles and cheese.
Wrap the other end of the Parma ham back over the top so it forms a neat package in the middle of your pastry.
Fold as per the eggplant parcel.
Parma party parcel
Pumpkin parcel:
1 square of puff pastry, roughly 12.5-15cm in length
1 slice pumpkin, about 5mm thick (I used butternut squash because that’s what I had lying around)
1 tablespoon chilli jam
1 square cheddar cheese (you can use mozzarella again here, but I think cheddar is nicer for the flavour)
Microwave your pumpkin slice for around 30 seconds and allow to cool.
Take the square of pastry, and lay the pumpkin in the middle and top with chilli jam.
Pumpkin and chilli jam.
Add the cheese and fold as per the eggplant parcel.
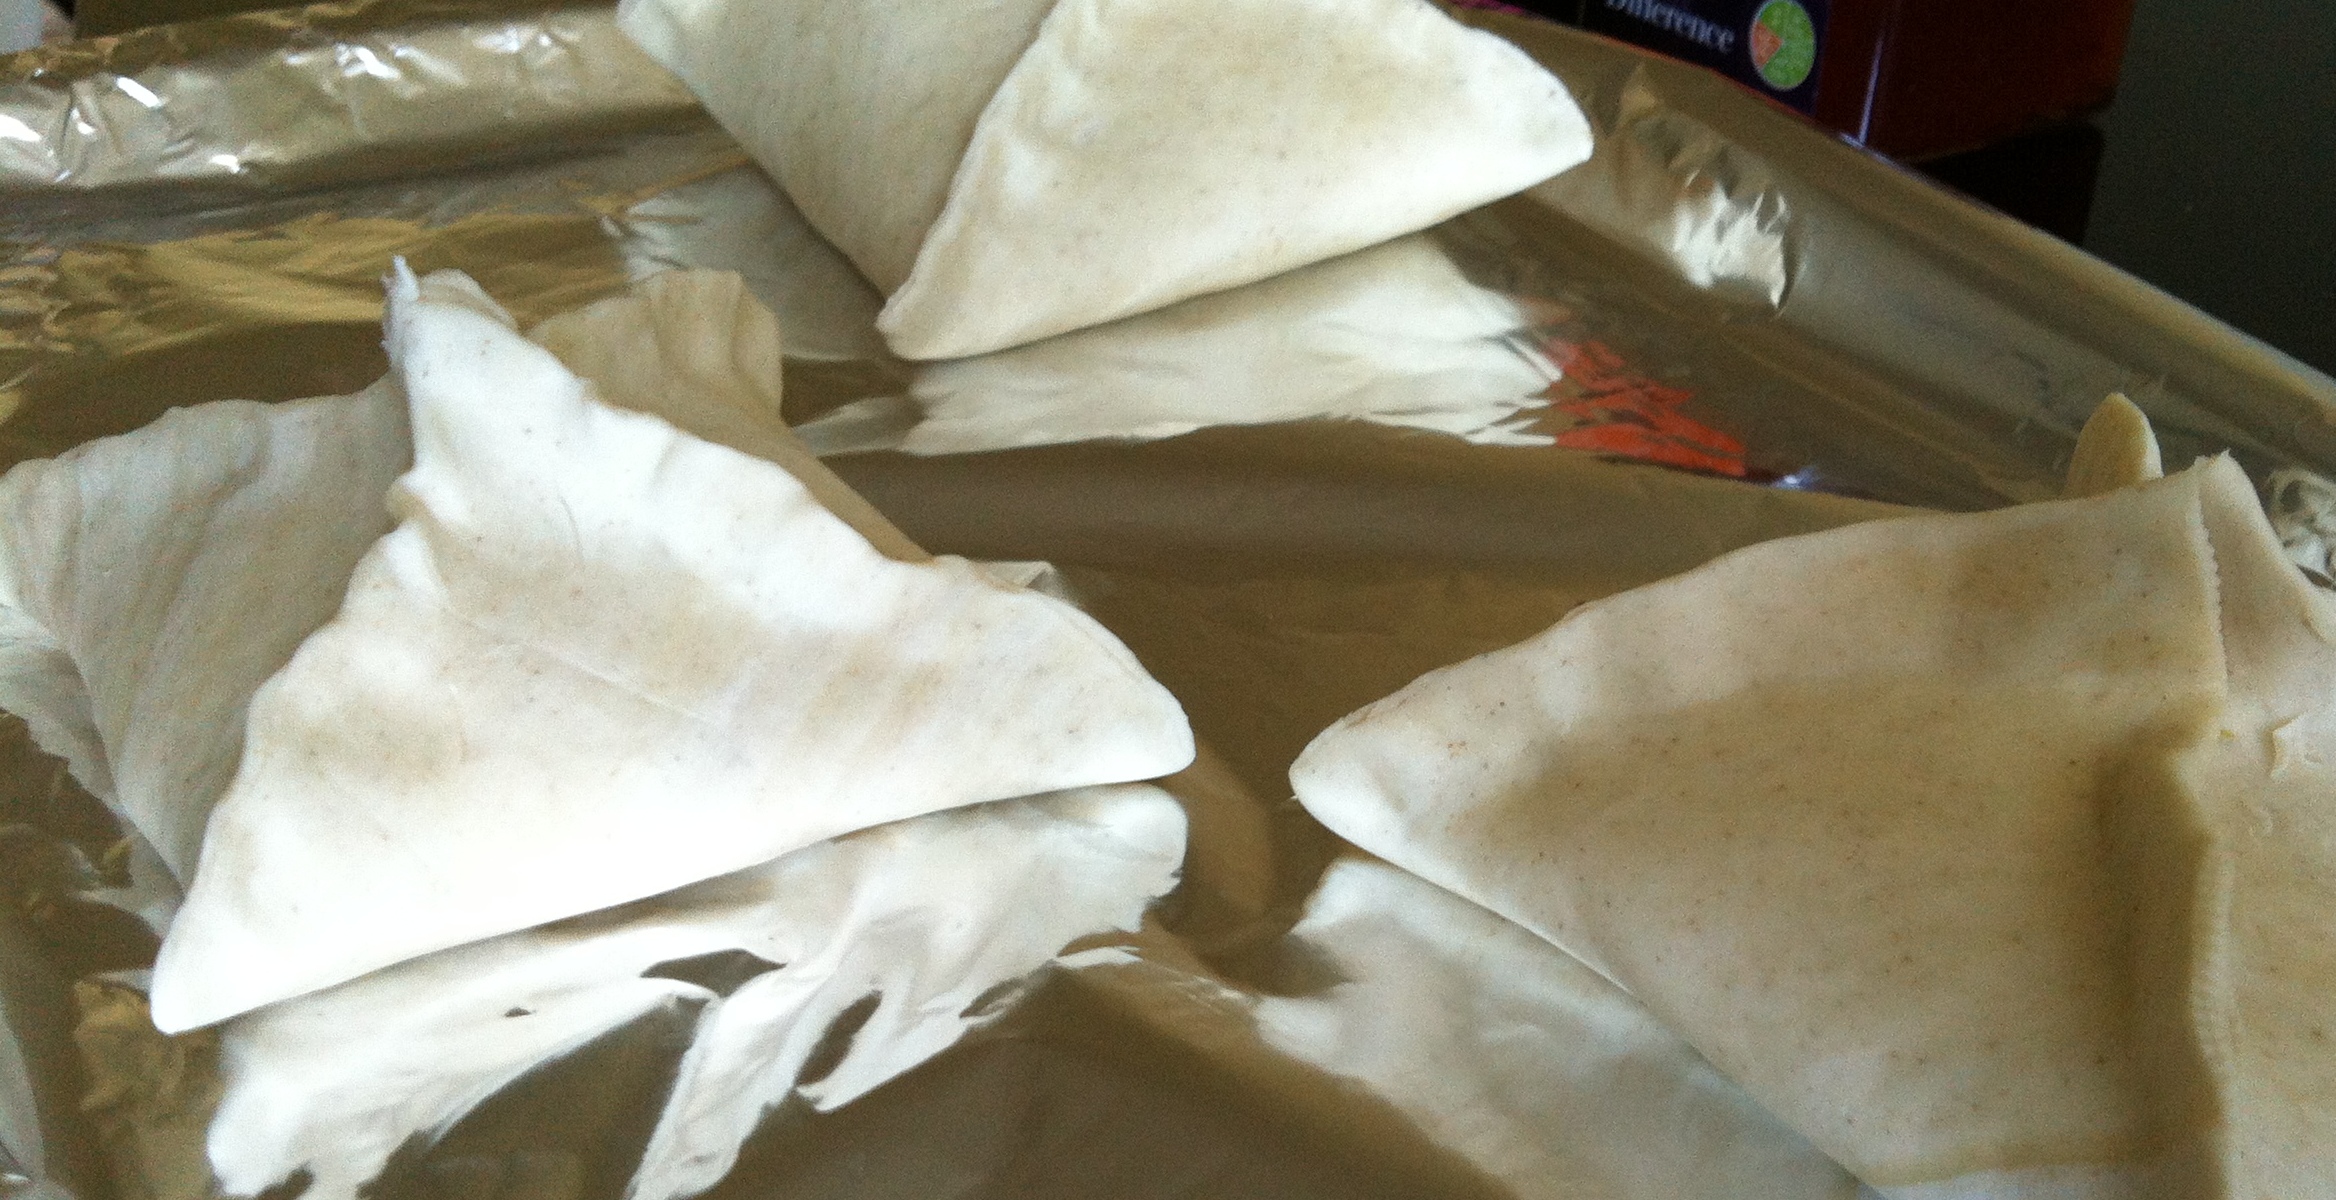
To cook, take a foil-lined tray and brush with a little oil. Place the parcels on top and brush with a beaten egg.
Brush with a beaten egg for a golden coating.
Bake at 180 degrees for 15 minutes, until the cheese turns molten and the pastry is golden.
Serve hot and fresh.
They explode into a shower of buttery pastry crumbs when you bite into them, so hand out the plates first. Merry Christmas, everyone!
I really did mean to whip the cream, but sometimes loose & unstructured is just fine.
Even the most savoury-toothed person would have to admit that there’s something quite delightful about the idea of banoffee pie.
The name immediately conjures up all sorts of lovely images: golden, sticky caramel cascading onto a bed of crunchy biscuit crumbs; smooth slices of pale sunshiney banana; and curls of rich, bittersweet chocolate raining down in a dark flurry onto fluffy clouds of whipped cream.
You may think I’m waxing ridiculously lyrical, but you’ll understand when you eat it.
There are lots of variations of banoffee pies, but all of them involve the delicious combination of banana and toffee, and most will advise you to add whipped cream to the top. I feel, however, that there would be no great crime in adding chocolate or nuts or honeycomb pieces or even a smattering of peanut butter. These things are meant to evolve.
This banoffee pie doesn’t need to be baked, so it’s perfect for the oven-free amongst us. Who said that tiny kitchens need be deprived?
You can make this gluten-free if you like.
Banoffee pie
250g digestive biscuits (I used gluten-free biscuits, but feel free to go ahead and use whatever digestives you like)
2 x 100g unsalted butter
100g dark brown sugar (I used muscovado)*
400g can of condensed milk
4 bananas
300ml double thick cream
Grease a 20cm loose-bottomed springform cake tin.
Crush the digestives into powder; I used a freezer bag and a Vegemite jar to work off some aggression, but a rolling pin would probably be faster.
Melt 100g of butter and add to the digestives, mix into a soft, damp sand.
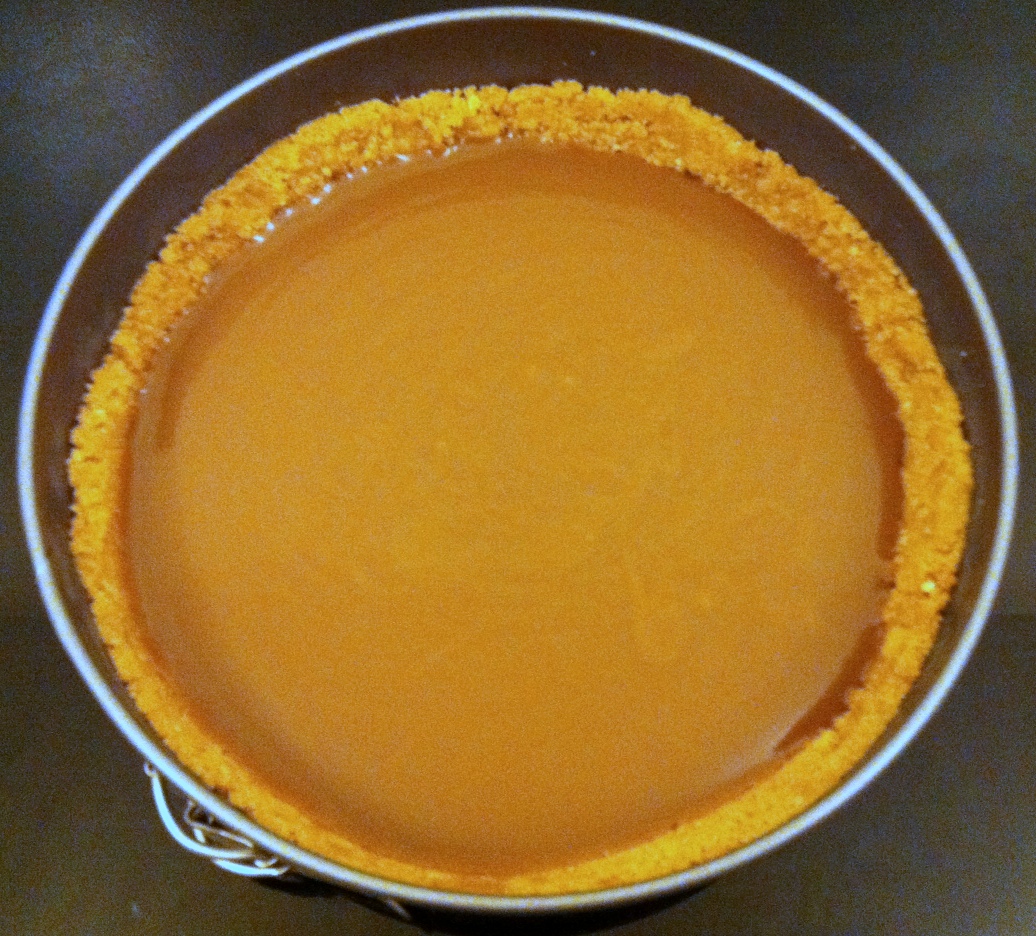
Press the biscuit mix into the cake tin, coming slightly up the sides and making sure it is packed tightly. You want to form a hollow that is about 1.5cm deep.
a biscuit base doesn’t need to be baked
Place the tin into the freezer for at least 20 minutes.
Meanwhile, place 100g of butter and the sugar into a pot and melt together, stirring constantly.
When you can no longer feel the sugar granules, add the condensed milk and bring to a rapid boil, stirring constantly. Boil for at least two minutes, until the mix forms a golden, caramel colour.
thick, luscious caramel
Allow to cool slightly, then pour the caramel into the biscuit base and place in the refrigerator for at least one hour.
at this point, it’s just a toffee pie
Before serving, top with sliced banana and whipped cream.
Note: A few of my guests thought this pie was a little too sweet, so I’d say you could safely reduce the sugar content. I haven’t tried it out to see how it goes, but next time I’d try halving the sugar. I mean, that almost makes it healthy – right?
When bananas are so brown they basically blend with the benchtop, it’s time to make banana bread.
On the banana spectrum from sappy green to mushy brown, there’s only a very small window where I like to eat a raw banana, and it makes me feel ridiculous to buy just one at a time. But I could eat banana bread every day of the week and never get tired, so sometimes I buy bananas in bunches to deliberately let them go brown.
Why throw these beauties out when they can bring you so much happiness?
Walnuts are the traditional nut to add to banana loaves, and with good reason – I love the soft resistance of a walnut in a piece of bread. That being said, banana bread is very forgiving, so if you don’t have walnuts you can use a handful of other nuts, or leave them out altogether.
Wholemeal flour is grainier and heavier than white flour, but that’s also why it’s better for you. Higher in fibre, folate and vitamins, wholemeal flour has a lower glycaemic index and will keep you fuller for longer.
Feeling virtuous never tasted so good.
Wholemeal banana bread
1/2 cup (8 tablespoons) butter – I used Proactiv Light
1/2 cup brown sugar, light or dark, firmly packed
1 teaspoon vanilla extract
3/4 teaspoon baking soda
1/2 teaspoon salt
3 medium to large bananas, brown as can be
1/8 cup honey
2 large eggs
2 cups wholemeal flour
1/2 cup chopped nuts
100g chopped dark chocolate (optional)
Preheat the oven to 180 degrees Celsius and grease a loaf tin with butter, oil or spray.
Take a large bowl and add the butter and brown sugar.
Get started with this glorious, sandy mess.
Beat the butter and sugar together. In the tiny kitchen I would just use a spoon and some elbow grease, but with an electric mixer it goes this delicious caramel colour.
Such a beautiful caramel colour.
Add the vanilla, baking soda, salt and bananas and beat until combined.
Beautiful treacley rivers.
Add the honey and eggs and beat until combined.
Add the flour, nuts and chocolate, stirring until combined.
Let the mix rest for 10 minutes and then spoon into the loaf tin. Bake for 50 minutes. Cover with foil to prevent excess browning, then bake for another 10 minutes. Stick a toothpick through the centre and if it comes out clean, it’s done.
Is that chocolate I see on the top?
Remove from the oven and stand for 10 minutes, then remove from the tin and place on a cooling rack.
The highly photogenic use-everything-up fridge omelette.
Let’s face it: everything in my fridge has seen better days.
How could I have let it come to this? Well, there’s a good reason for the very-unlike-me paucity of food in the tiny kitchen; I’m moving next week and I’m struggling to clear my cupboards to make things as simple as possible. That means the half-bags of pasta, cup of lentils, highly ambitious biryani mix, on-special kilo of chickpeas – it all has to go. I’ve been doing all sorts of odd culinary contortions (chicken bourgignon, anyone?) in an effort to use everything up.
So at the end of a determined month-long embargo on buying goods, my fridge is in a pretty sad state. What a creative and nutritional challenge!
Chop the haloumi into small chunks (rather than the slices used in a haloumi salad). Place in a non-stick frypan over medium-high heat. If your pan is properly non-stick, you won’t need oil.
Fry the haloumi until it begins to brown. This should take around 5 minutes. Make sure you flip the pieces so both sides get browned.
Meanwhile, slice the pointed pepper into slivers. Add them to the pan once the cheese is browned, then cover with the eggs.
I am not a great omelette-maker. That perfect omelette shape eludes me, especially since I don’t have a grill to finish the top. But I make up for this by not caring in the slightest what shape my omelette turns out to be. I wait until the edges of the omelette turn pale, meaning it’s safe to flip, then I flip it with two spatulas onto its other side and give it thirty seconds. Then I slide it onto the plate, attempting to fold it in half as I go.
The haloumi is really salty, so no seasoning is required. Serve with a drizzle of balsamic if you like, and a pile of pickled baby beetroot if it’s there just waiting to be used.
If you’re ever in Sydney’s inner west, swing by a restaurant known as Baja Cantina in Glebe and you’ll understand why the top end of my food-rating spectrum is food for which you would consider moving countries.
Is that a little extreme? You might think so if you had never eaten the nachos at Baja Cantina. The first time I tried them, my little head exploded with the colours, tastes and textures of a country I had never seen; the salty crunch of thick, hand-cooked corn chips, creamy, gently spiced beans, fire-laced salsa and jalapenos and zesty guacamole married in perfect harmony by smatterings of mature cheese and a dollop of sour cream.
I’m getting a little emotional just thinking of it.
My bestie and I have been to Baja Cantina hundreds of times, the colourful walls bearing silent witness to our laughter, tears, venting sessions, tantrums, dramas and soul-searching conversations that can only occur over a plate of Sydney’s finest nachos.
They’re not exactly photogenic now. But you’ll understand when you taste them.
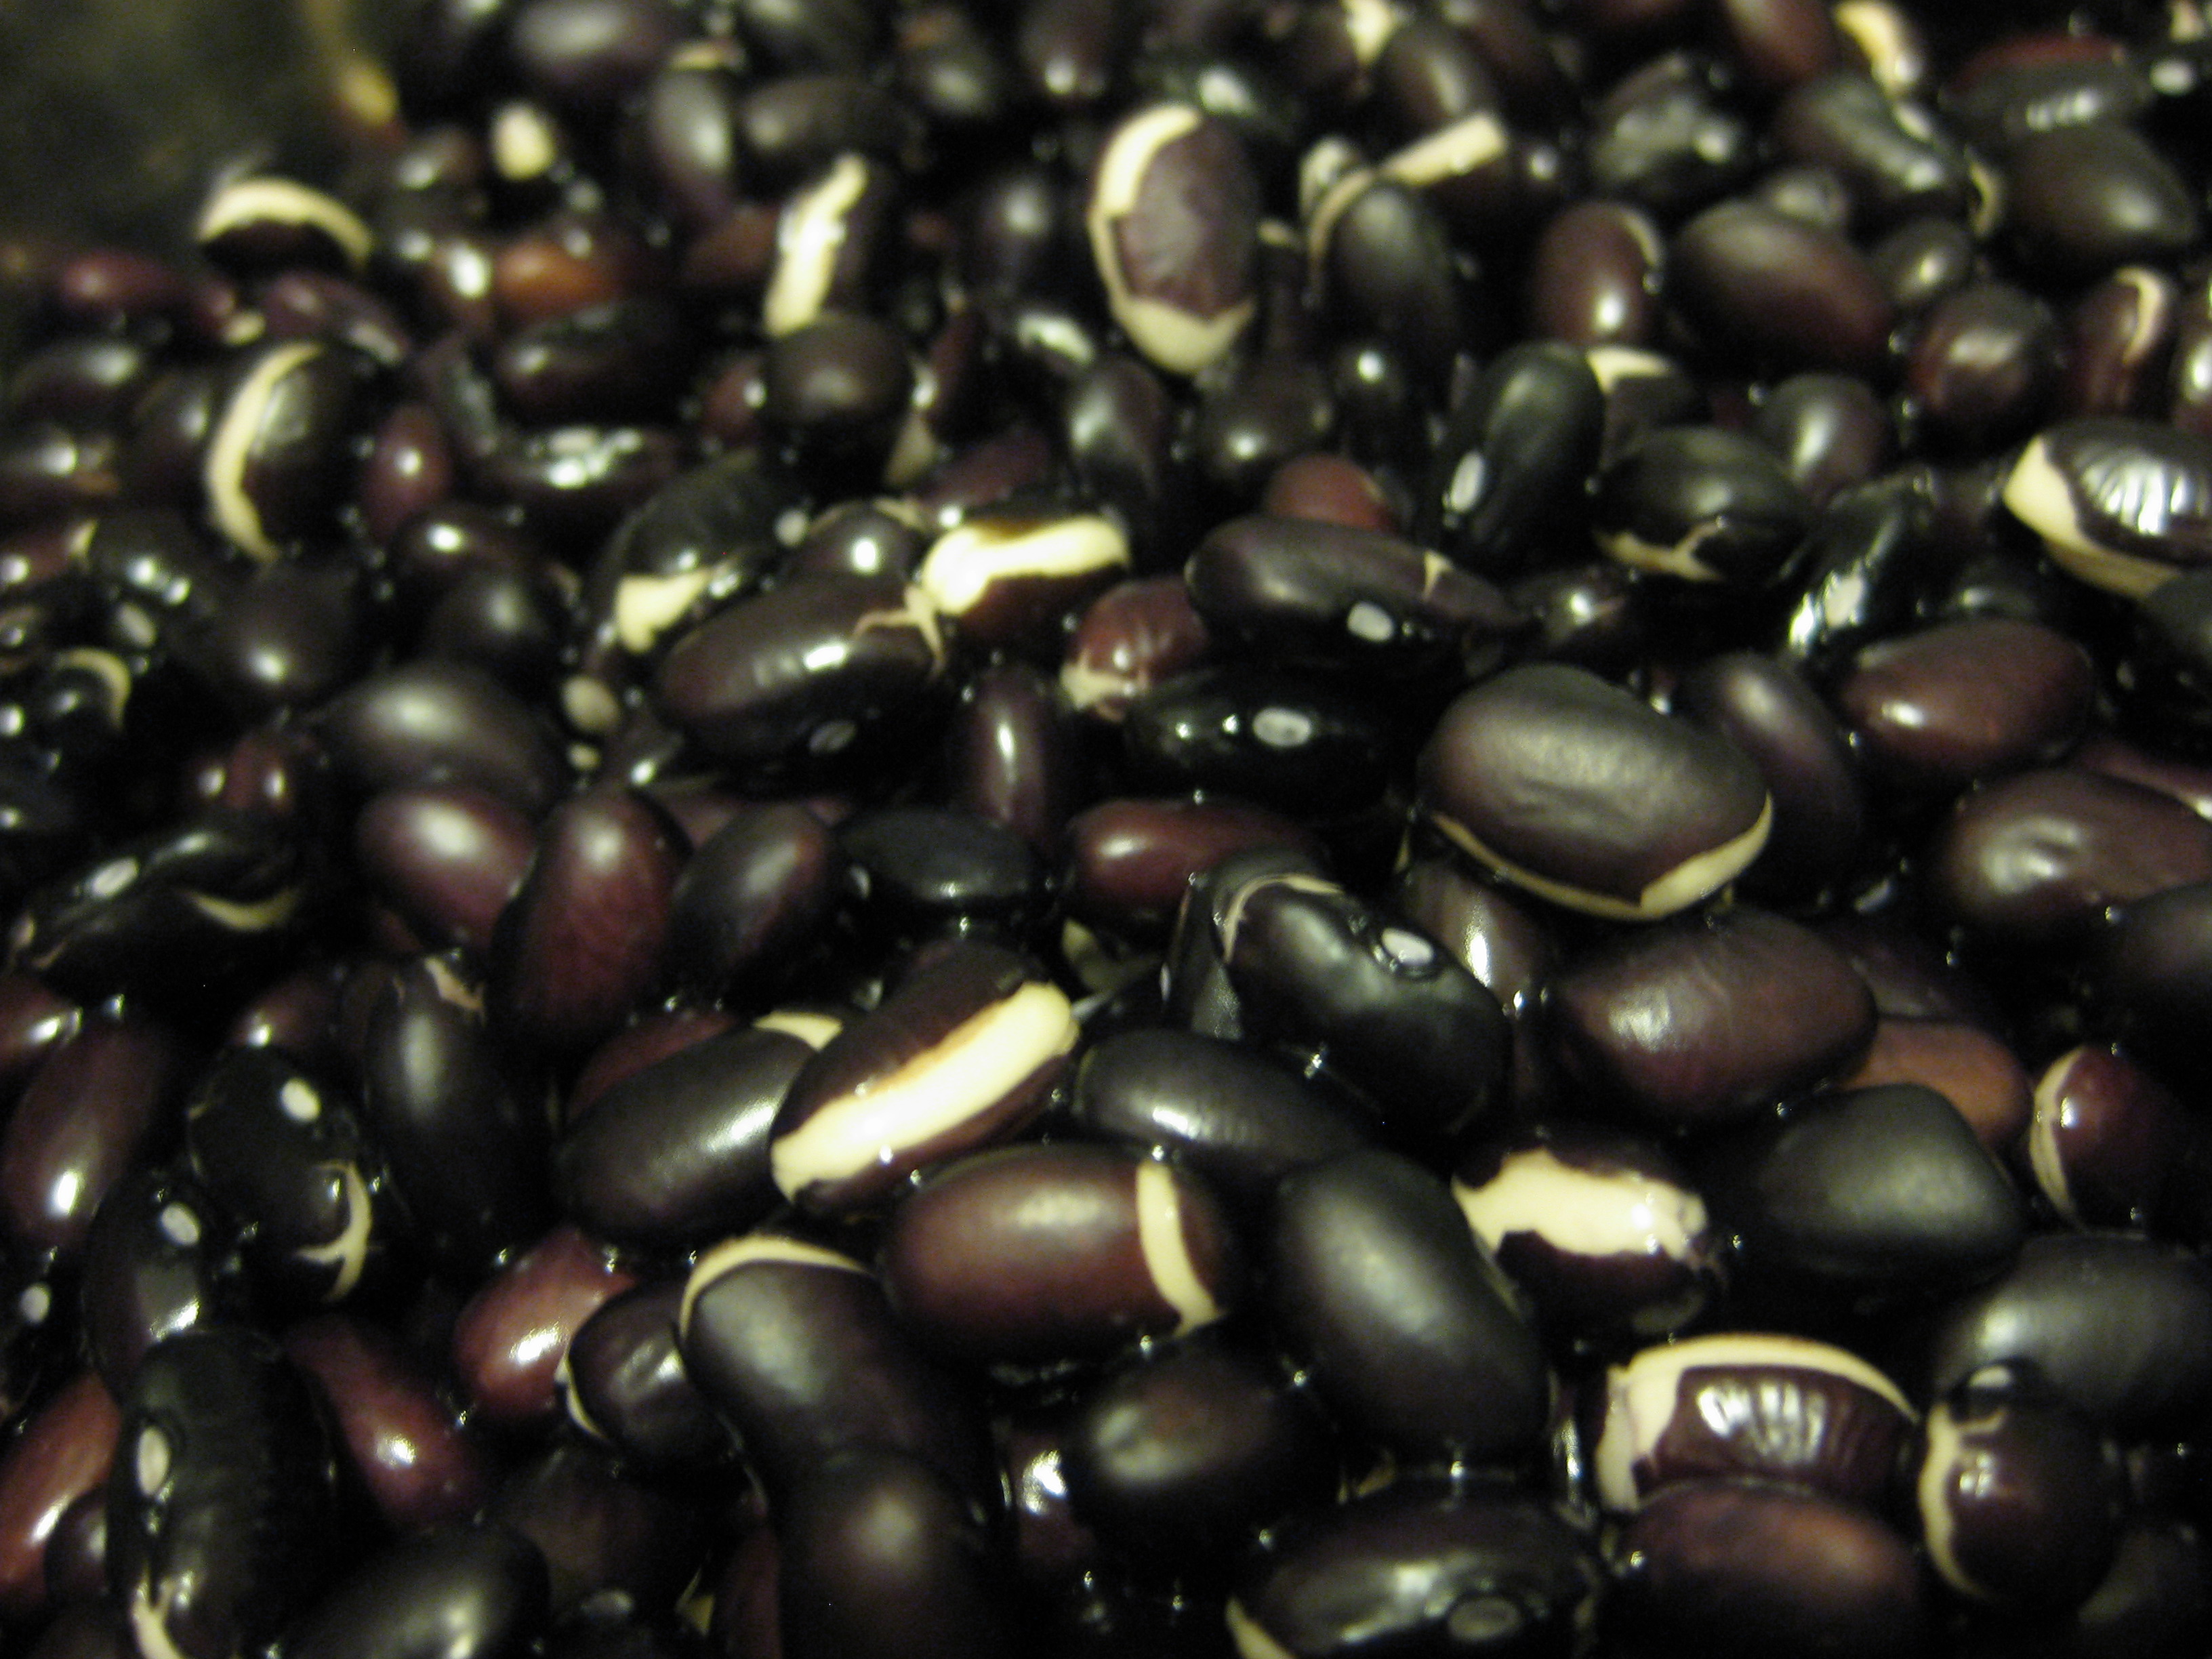
It was Stephy who introduced me to black beans, and I’ve never looked back. Black turtle beans have a dense texture, unlike the starchy flouriness of pinto beans, and stand up to flavours well. They require lengthy cooking, but are very low-maintenance and the end result is a delicious, inky, creamy and deeply flavoursome dish.
Frijoles negros
250g dried black beans
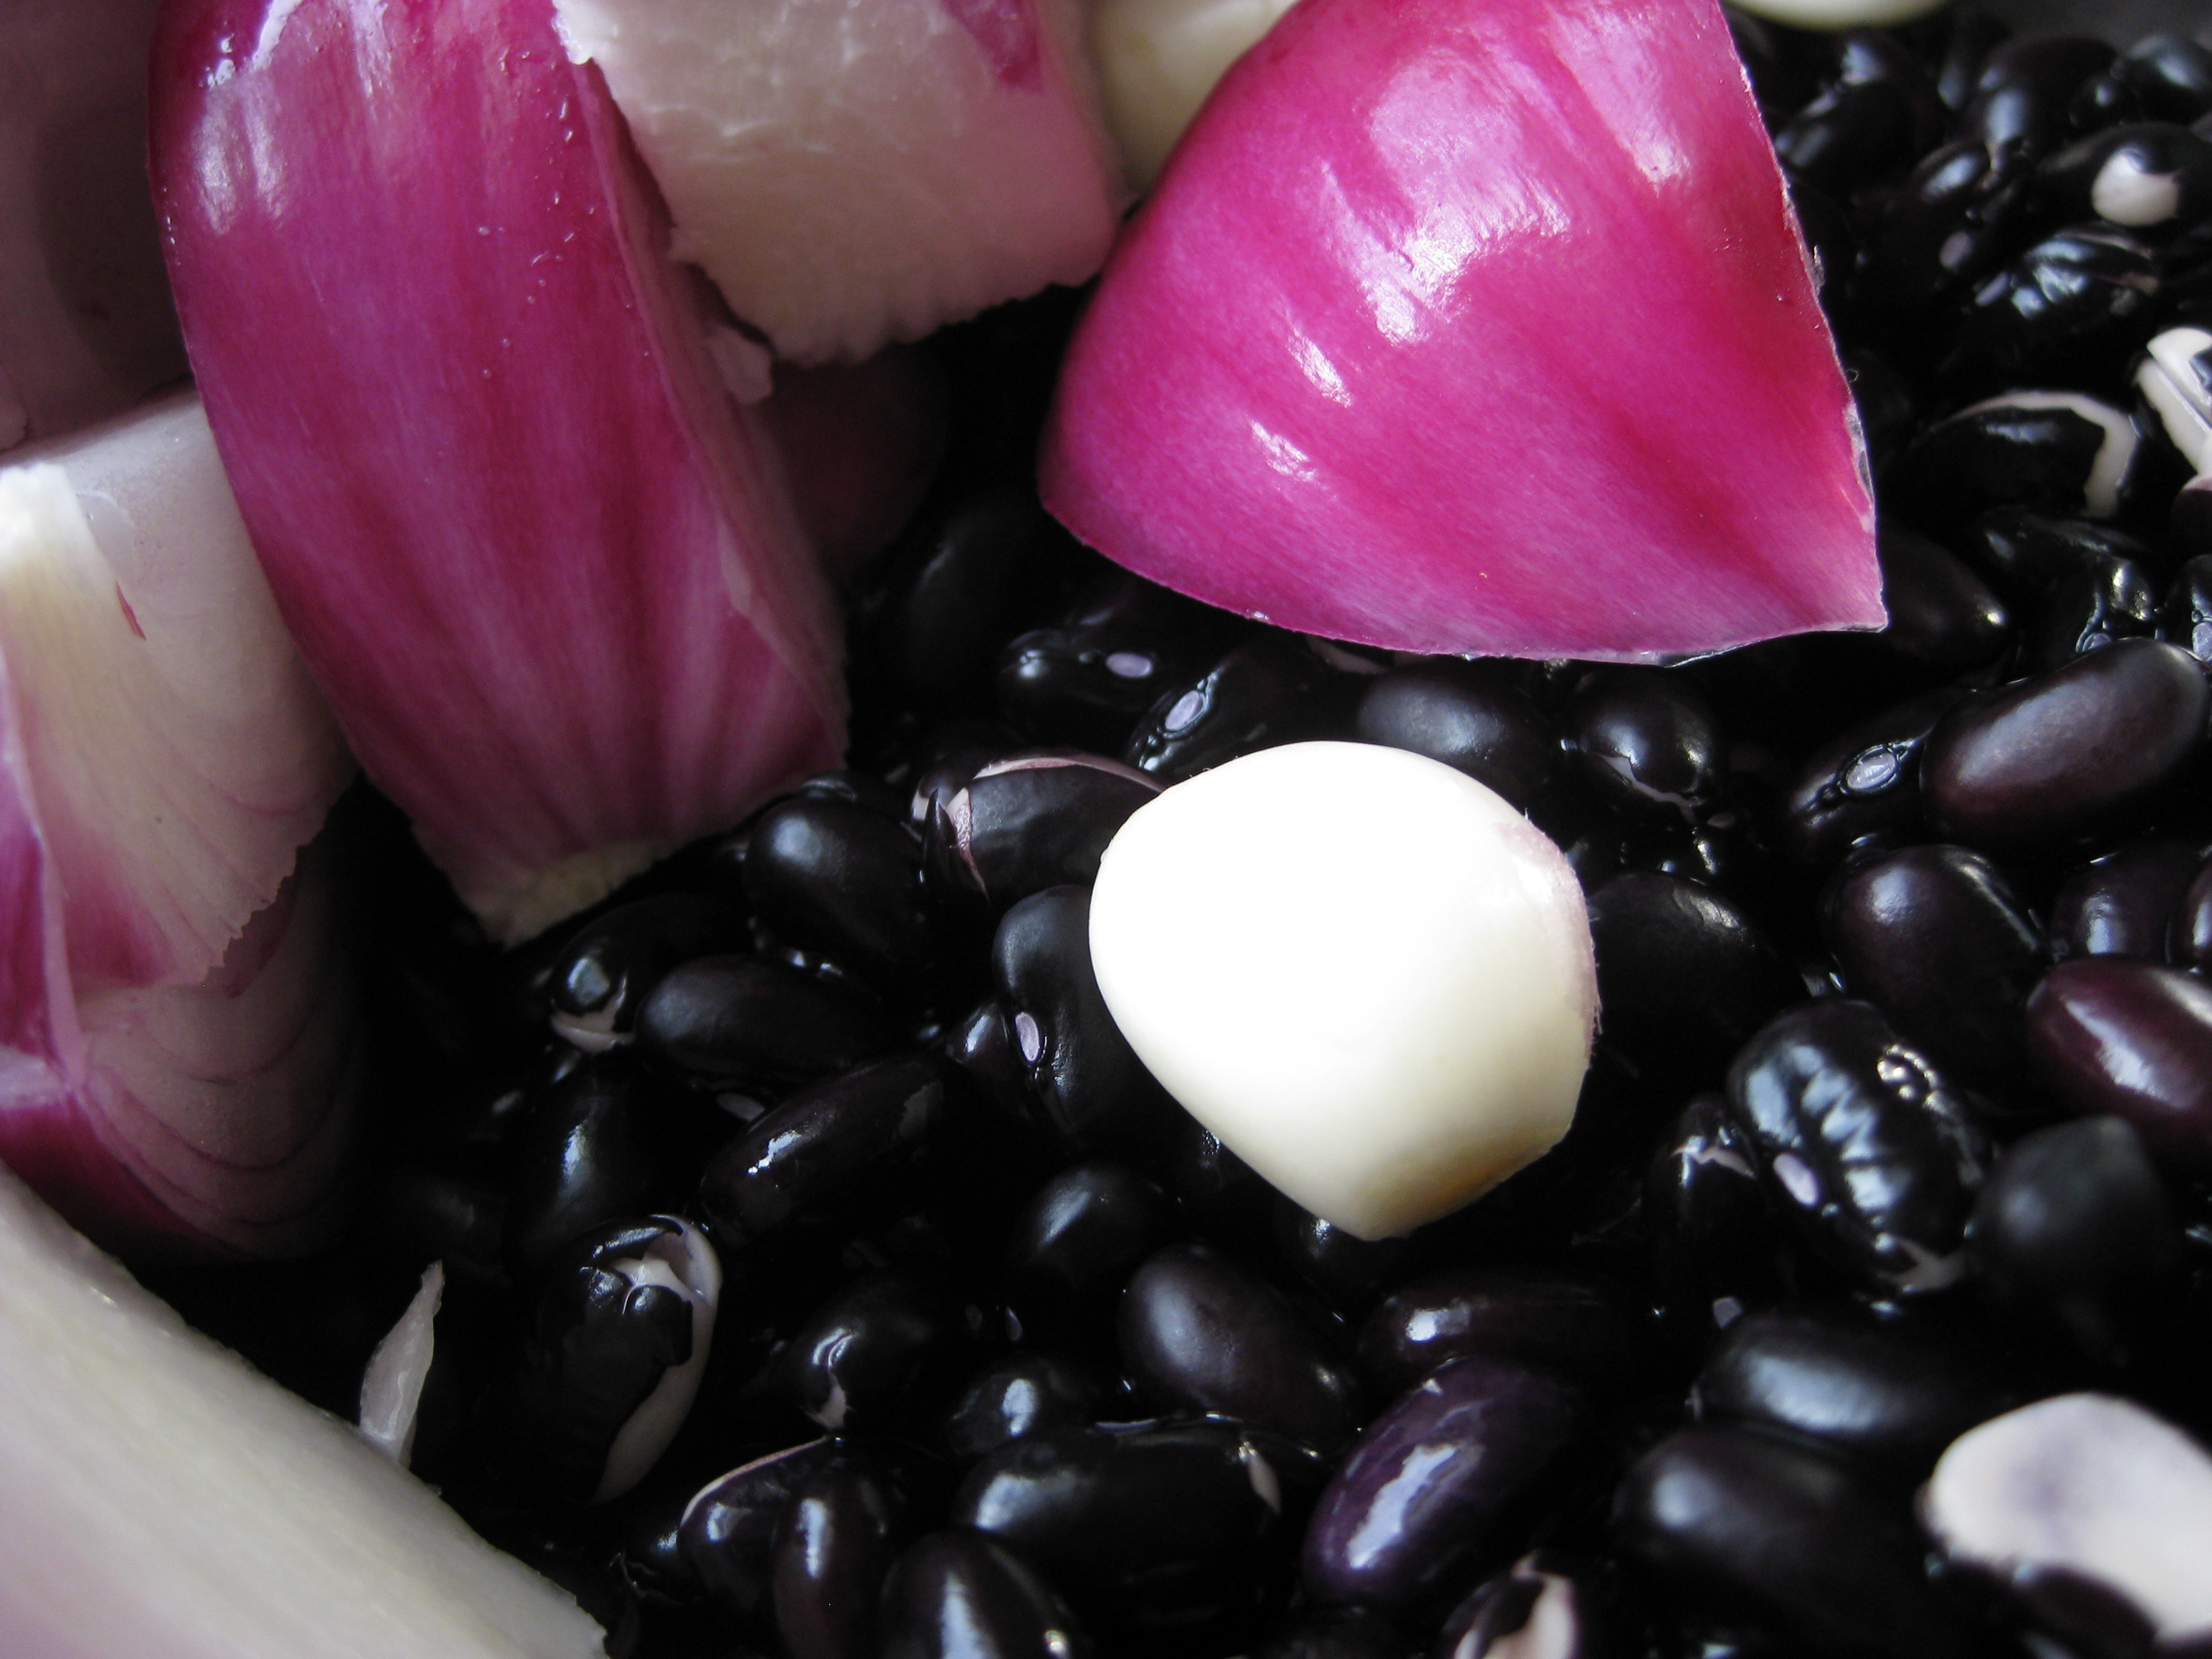
1 onion, cut into eighths
5 cloves garlic, peeled
Six large sprigs of thyme
Five bay leaves
Two slices of bacon
oil
salt
Bay leaves and thyme are essential to this dish.
Normally, you would begin a bean-based recipe by soaking the beans to reduce your risk of being poisoned by the toxin phytohaemagglutinin. With this particular recipe there’s no risk of that since you cook them for ages anyway, but you can soak them for a few hours to reduce cooking time. If you don’t have time for that, it doesn’t matter – you might just have to keep them on the stove for a bit longer.
Place the onion, garlic into a pot with a splash of oil and cook gently for a few minutes.
So beautiful in the pot!
Add the black beans, thyme and bay leaves and cover with water. Bring to a boil and simmer for one hour. Skim off any scum that appears on top and make sure they’re not boiling dry, adding water if necessary.
After an hour, add the bacon and a pinch of salt and return to a simmer for another hour. You can leave the bacon out if you’re vegetarian, but I find it provides a good weighty saltiness to the beans.
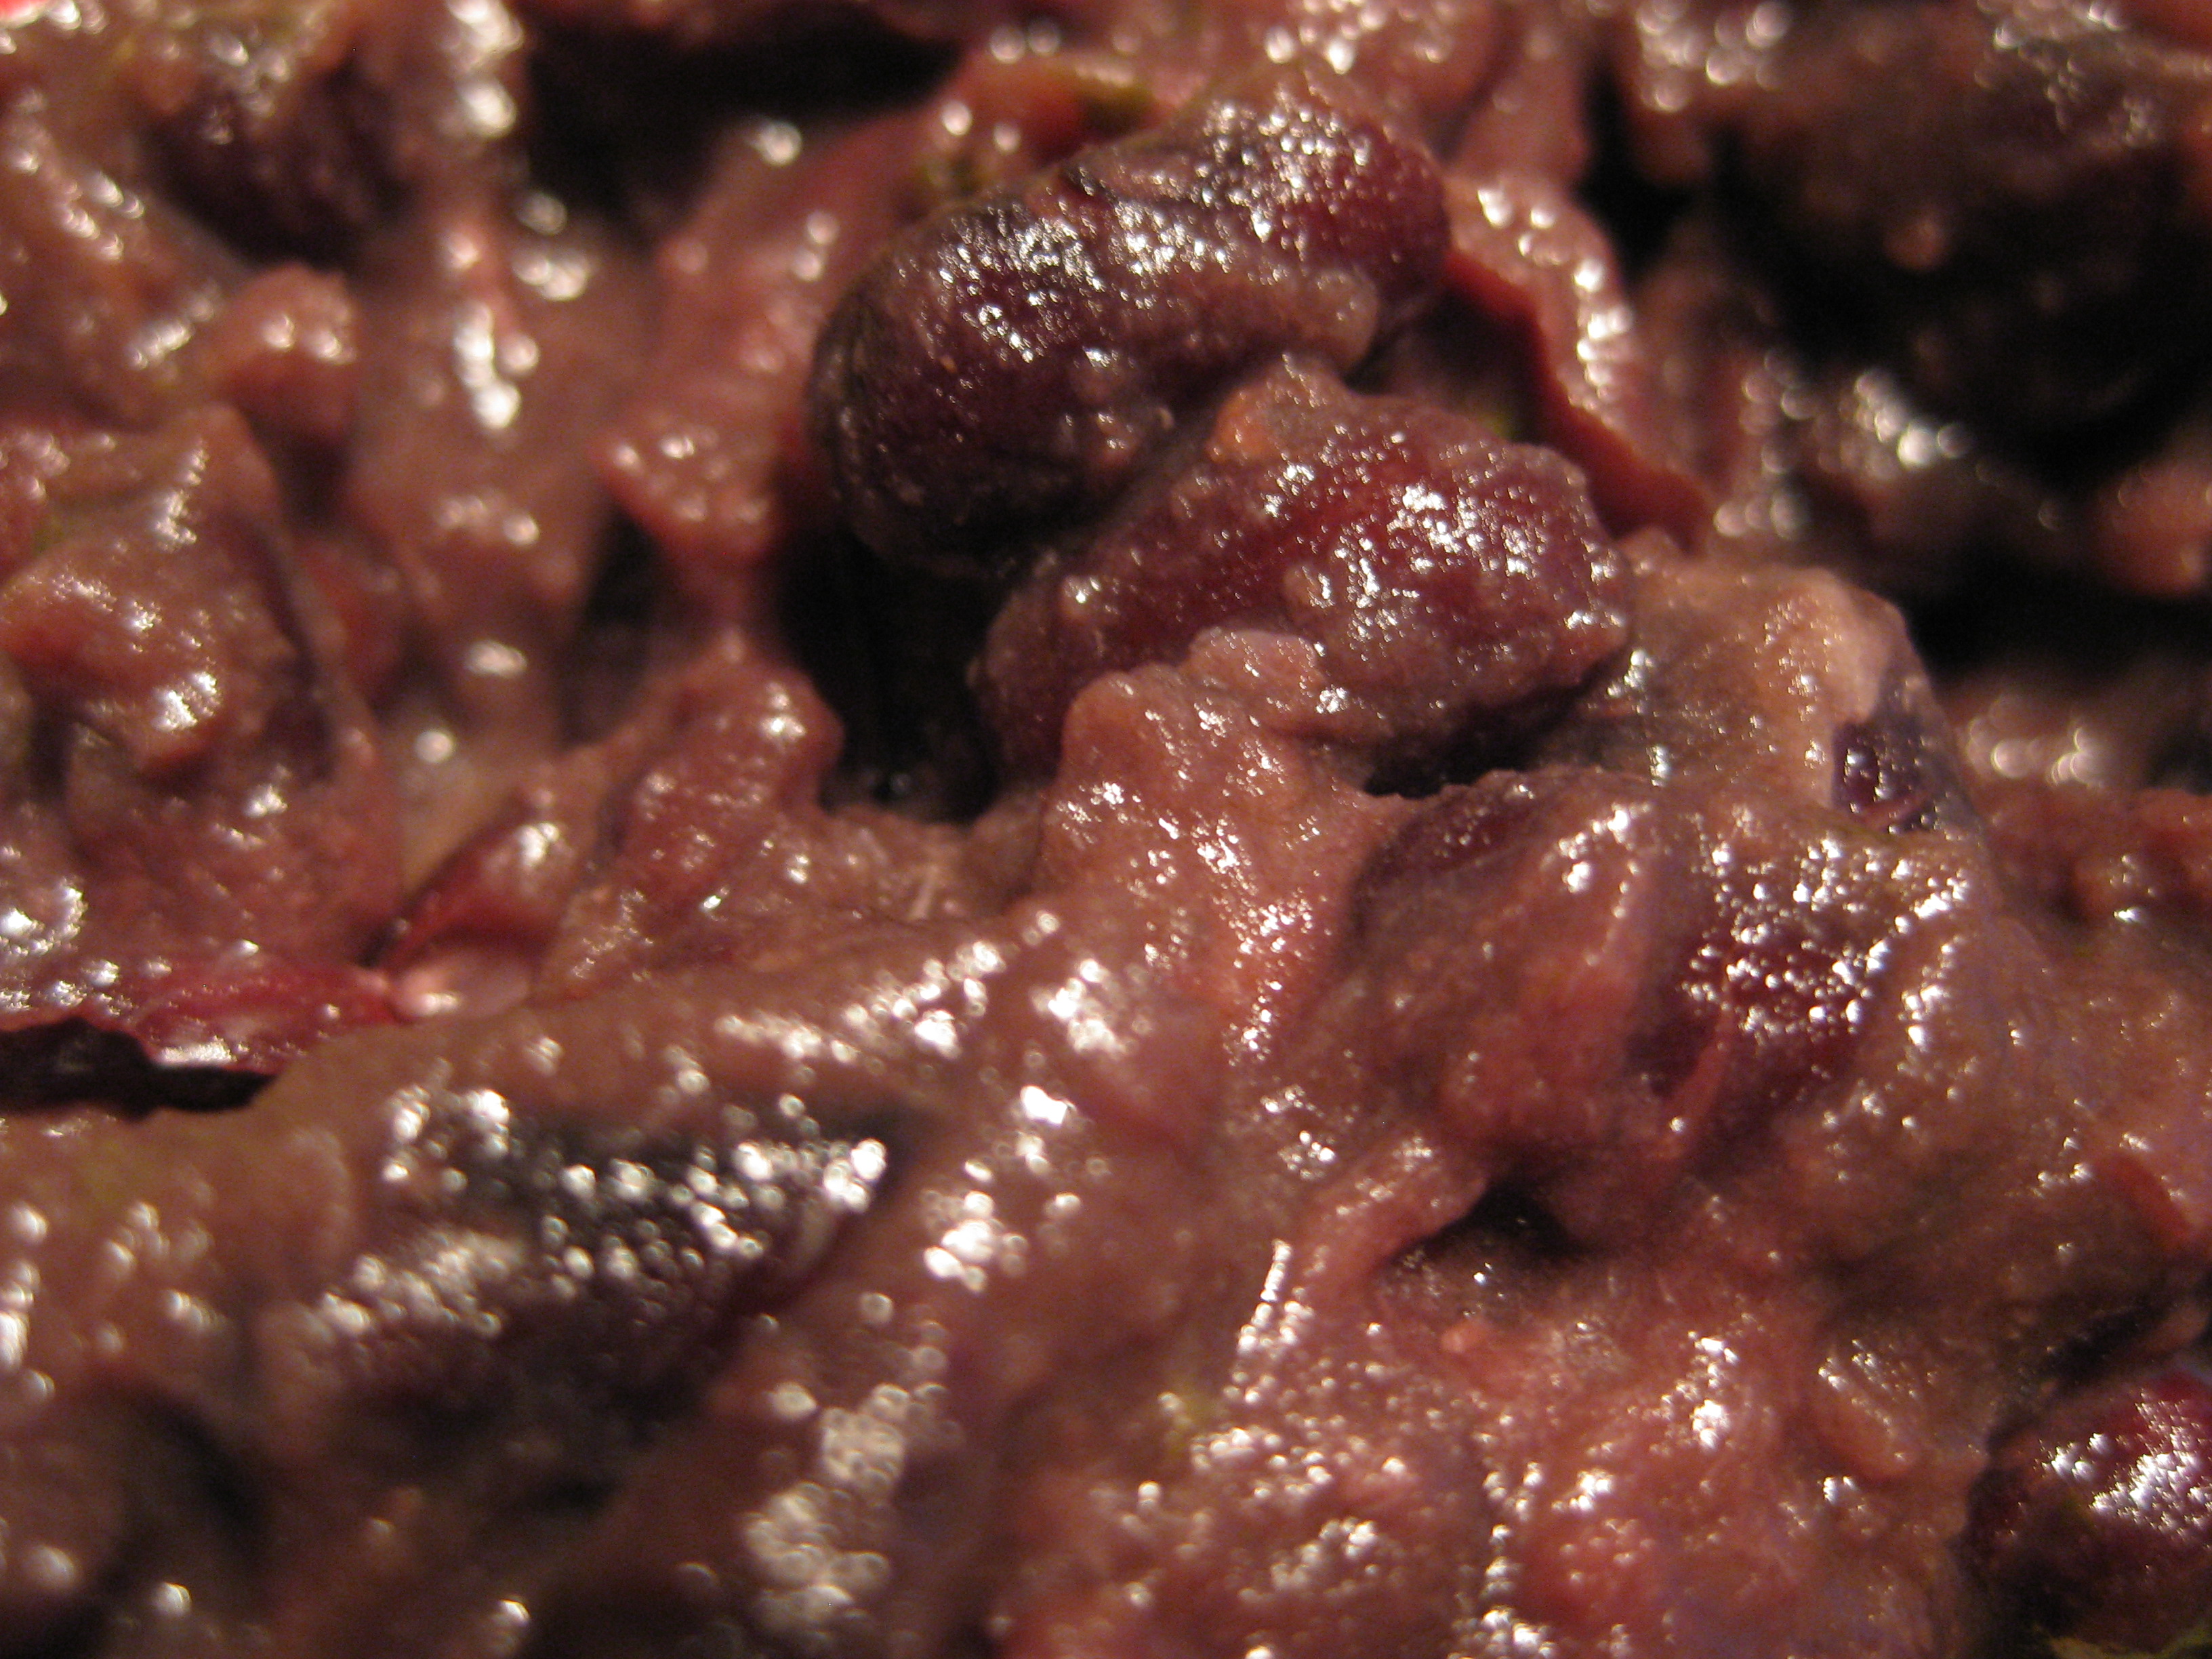
Beans reach a stage where the skin begins to lift off if you blow on them. You actually want to take these beans beyond that stage, to the point that they provide no resistance when you want to mash them.
After the beans are cooked, you’ve got a few options. The Mexican culinary goddess Thomasina Miers, of Wahaca fame, takes the cooked beans and fries them with a large amount of lard or butter plus additional onion and garlic, then processes them until smooth. She serves them with sour cream and a crumbled mature cheese.
Frijoles on salad.
I absolutely love Wahaca’s frijoles and they have never failed to transport me to the heights of culinary bliss, but at home in the tiny kitchen I find the second stage too fiddly and guilt-inducing. Instead, I take a fork to the cooked beans and mash until creamy. Don’t drain the cooking liquid, as you’ll need it to store the beans and to mash any leftovers the following day. Before reheating in a microwave, cover the beans with a little water to prevent them from drying out.
I like to serve frijoles negros on a pile of fresh, crunchy salad topped with pickled jalapenos and guacamole. A handful of corn chips rounds everything off nicely.