pulled pork

Pulled pork: the ultimate comfort food.

‘So here’s the deal,’ I said. ‘I’m going to set this up right. I’m going to do the work, give you a lot of love, and make sure you’re all good to go. But once you’re in that oven, it’s over to you, buddy. I’ve done my bit. And we both know that if you don’t pull correctly at the end of it, that is not entirely my fault.’

Such is the conversation I had with a shoulder of pork this morning.

Sugar and spice. And a few other things.

Slow cooking is meant to be a relaxing process, but I can’t deny that there’s a little anxiety that always goes along with making pulled pork. Will it actually pull? Will it burn before it gets to pulling stage? At the end of this rather nerve-wracking day of cookery, will I have something to show for all my patience and devotion?

If you read any articles about the art of barbecue, you’ll discover that there’s an entire science behind it. You need a good amount of fat in the cut of meat, because there needs to be plenty of collagen running through the muscle fibres. The pulling texture occurs when the network of collagen denatures, turning into gelatine. This starts to happen at 70C (160F), so most recipes recommend cooking pork low and slow until it reaches an internal temperature of 87C (190F).

Wonderful. But do I sound like the sort of person who would have a meat thermometer handy?

Is pulled pork that hasn't been pulled just a roast?
Is pulled pork that hasn’t been pulled just a roast?

Reassuringly, I’ve never made pulled pork that hasn’t – well, pulled. Sometimes it’s been slightly more difficult than other times, sometimes it needs a bit of extra cooking, but it always comes good in the end.

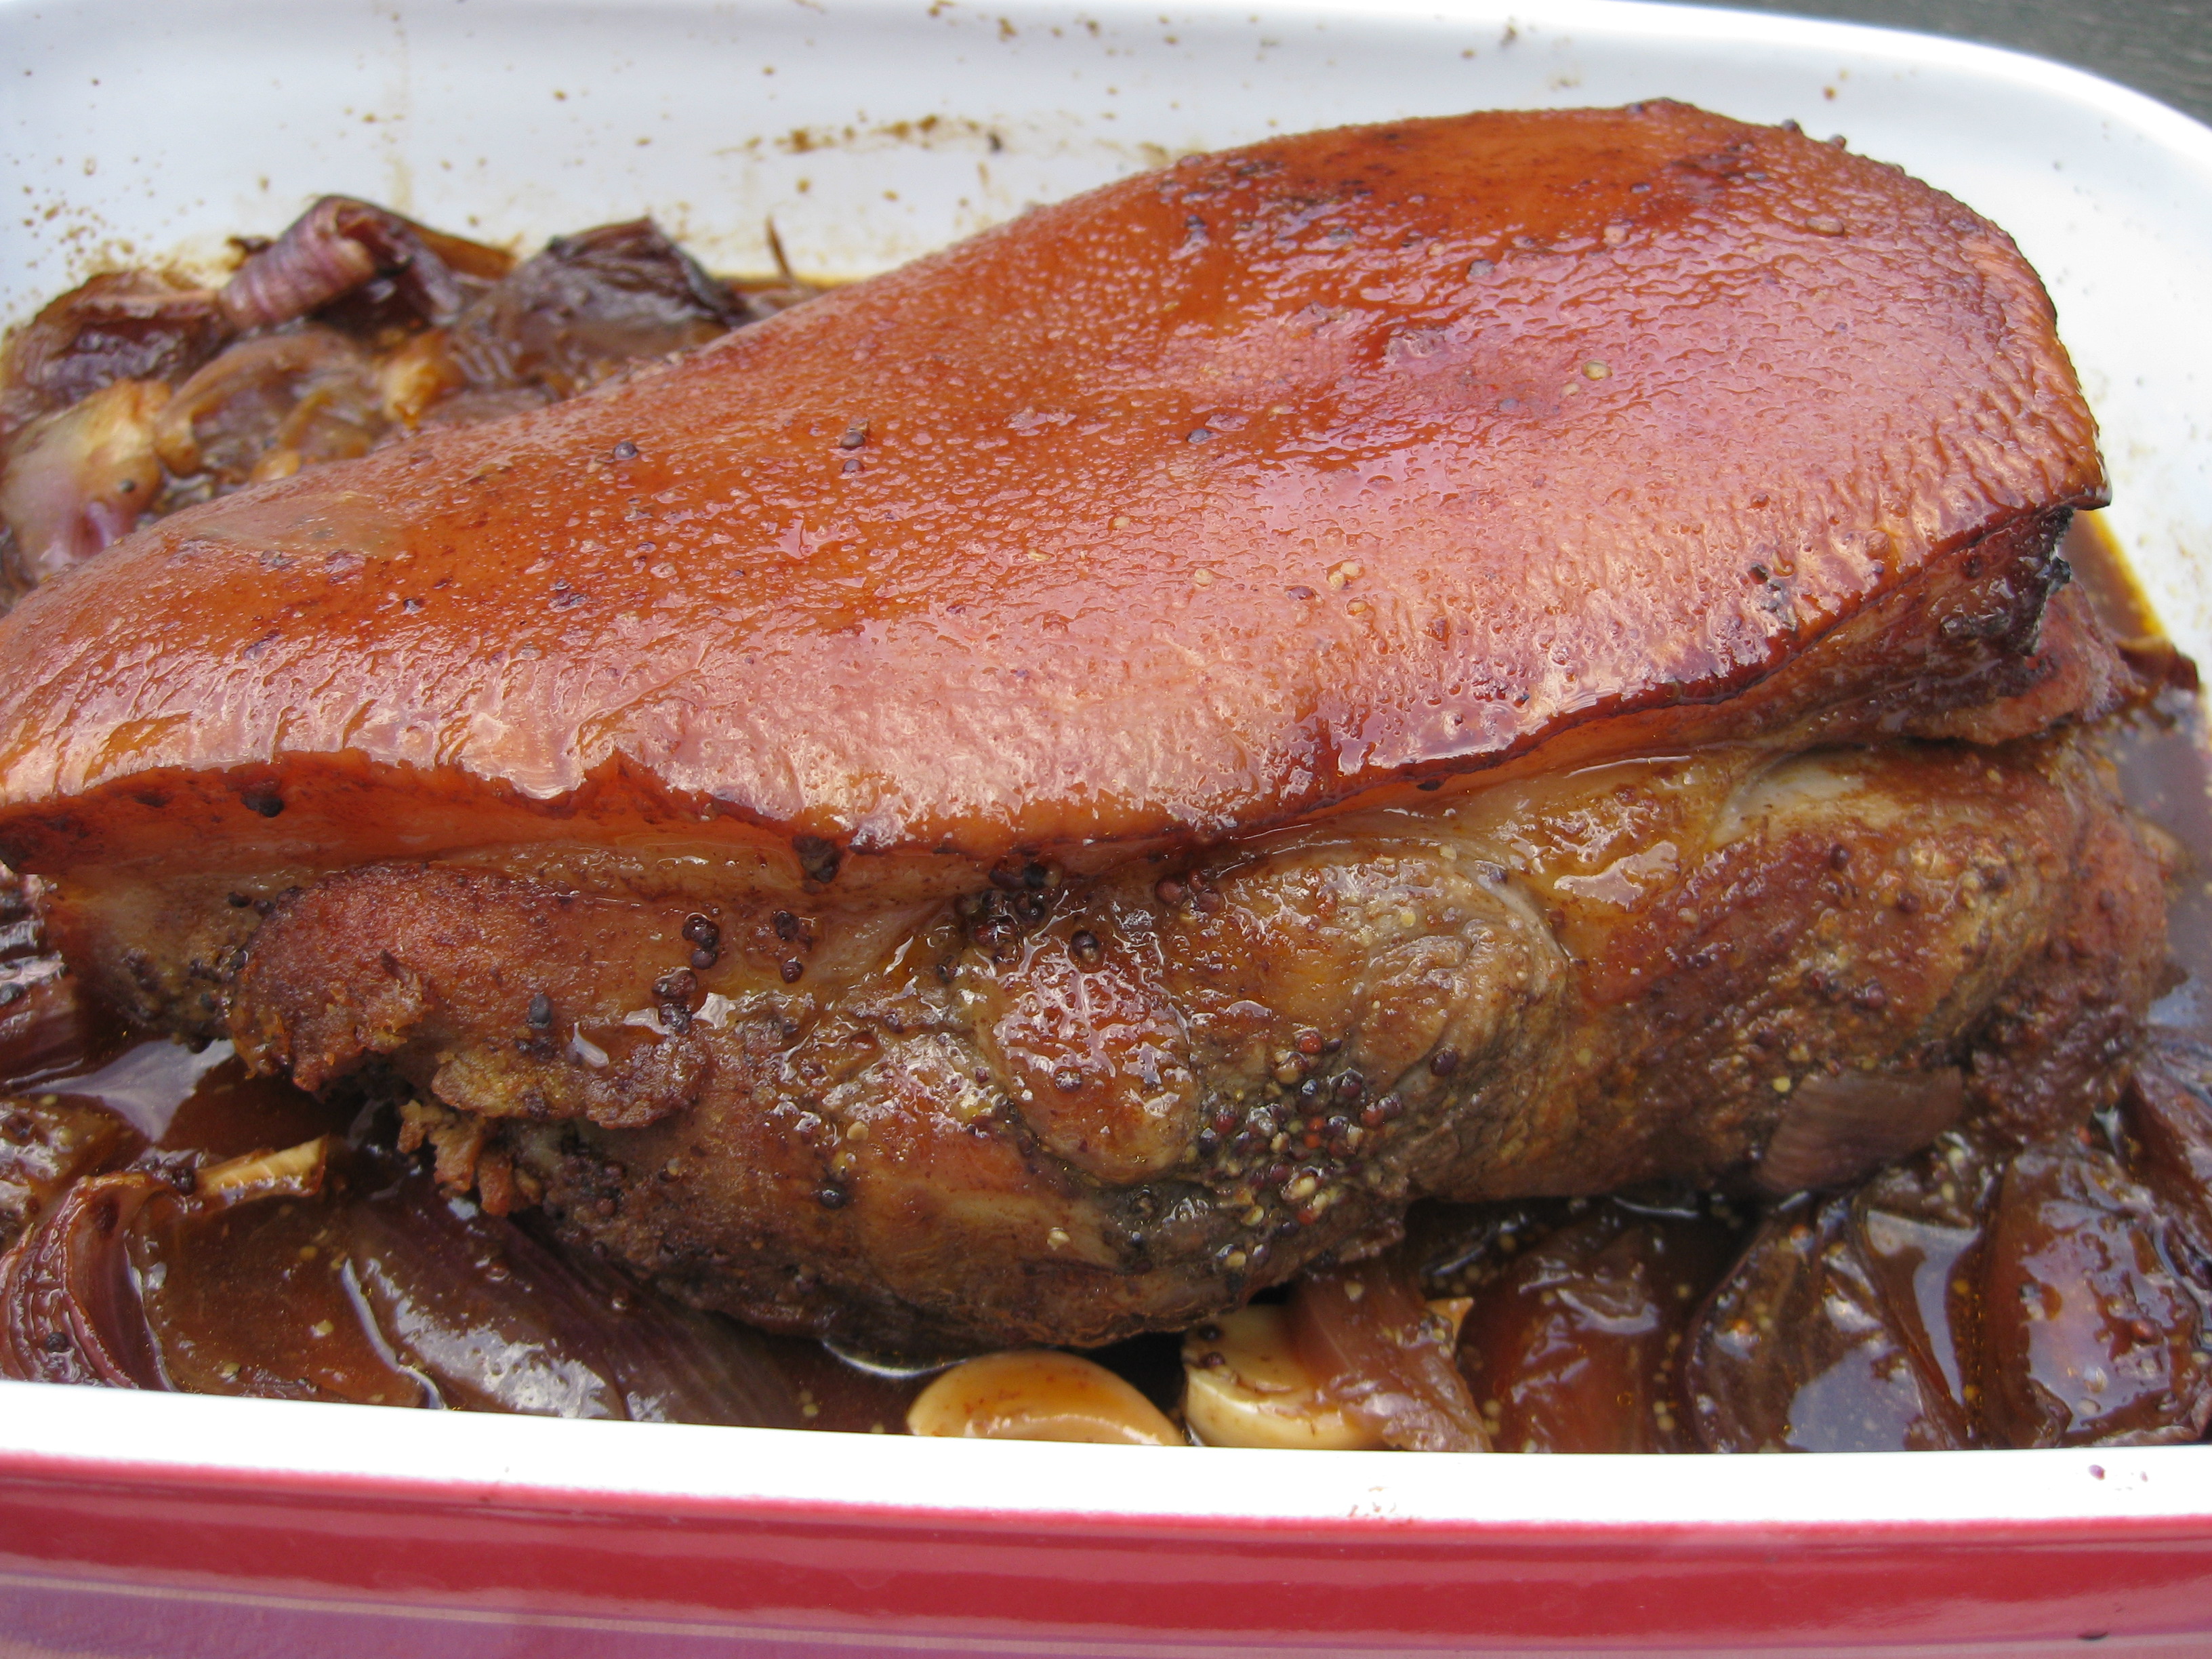
Good pulled pork is smoky and rich, sweet and dense, moreish and juicy with that silky mouthfeel from all that gelatine. It speaks of long summer evenings with friends, a barbecue and an icy beverage, as well as cold nights huddled over deeply satisfying winter suppers. Since it’s cheap to make and feeds more people than you’d expect, it almost always features on my party menu.

Rich, dense and moreish – who can resist pulled pork?

Pulled pork
1.5kg pork shoulder
2 tbsp salt
2 tbsp dark muscovado sugar
1 tbsp smoked paprika
1 tbsp wholegrain mustard
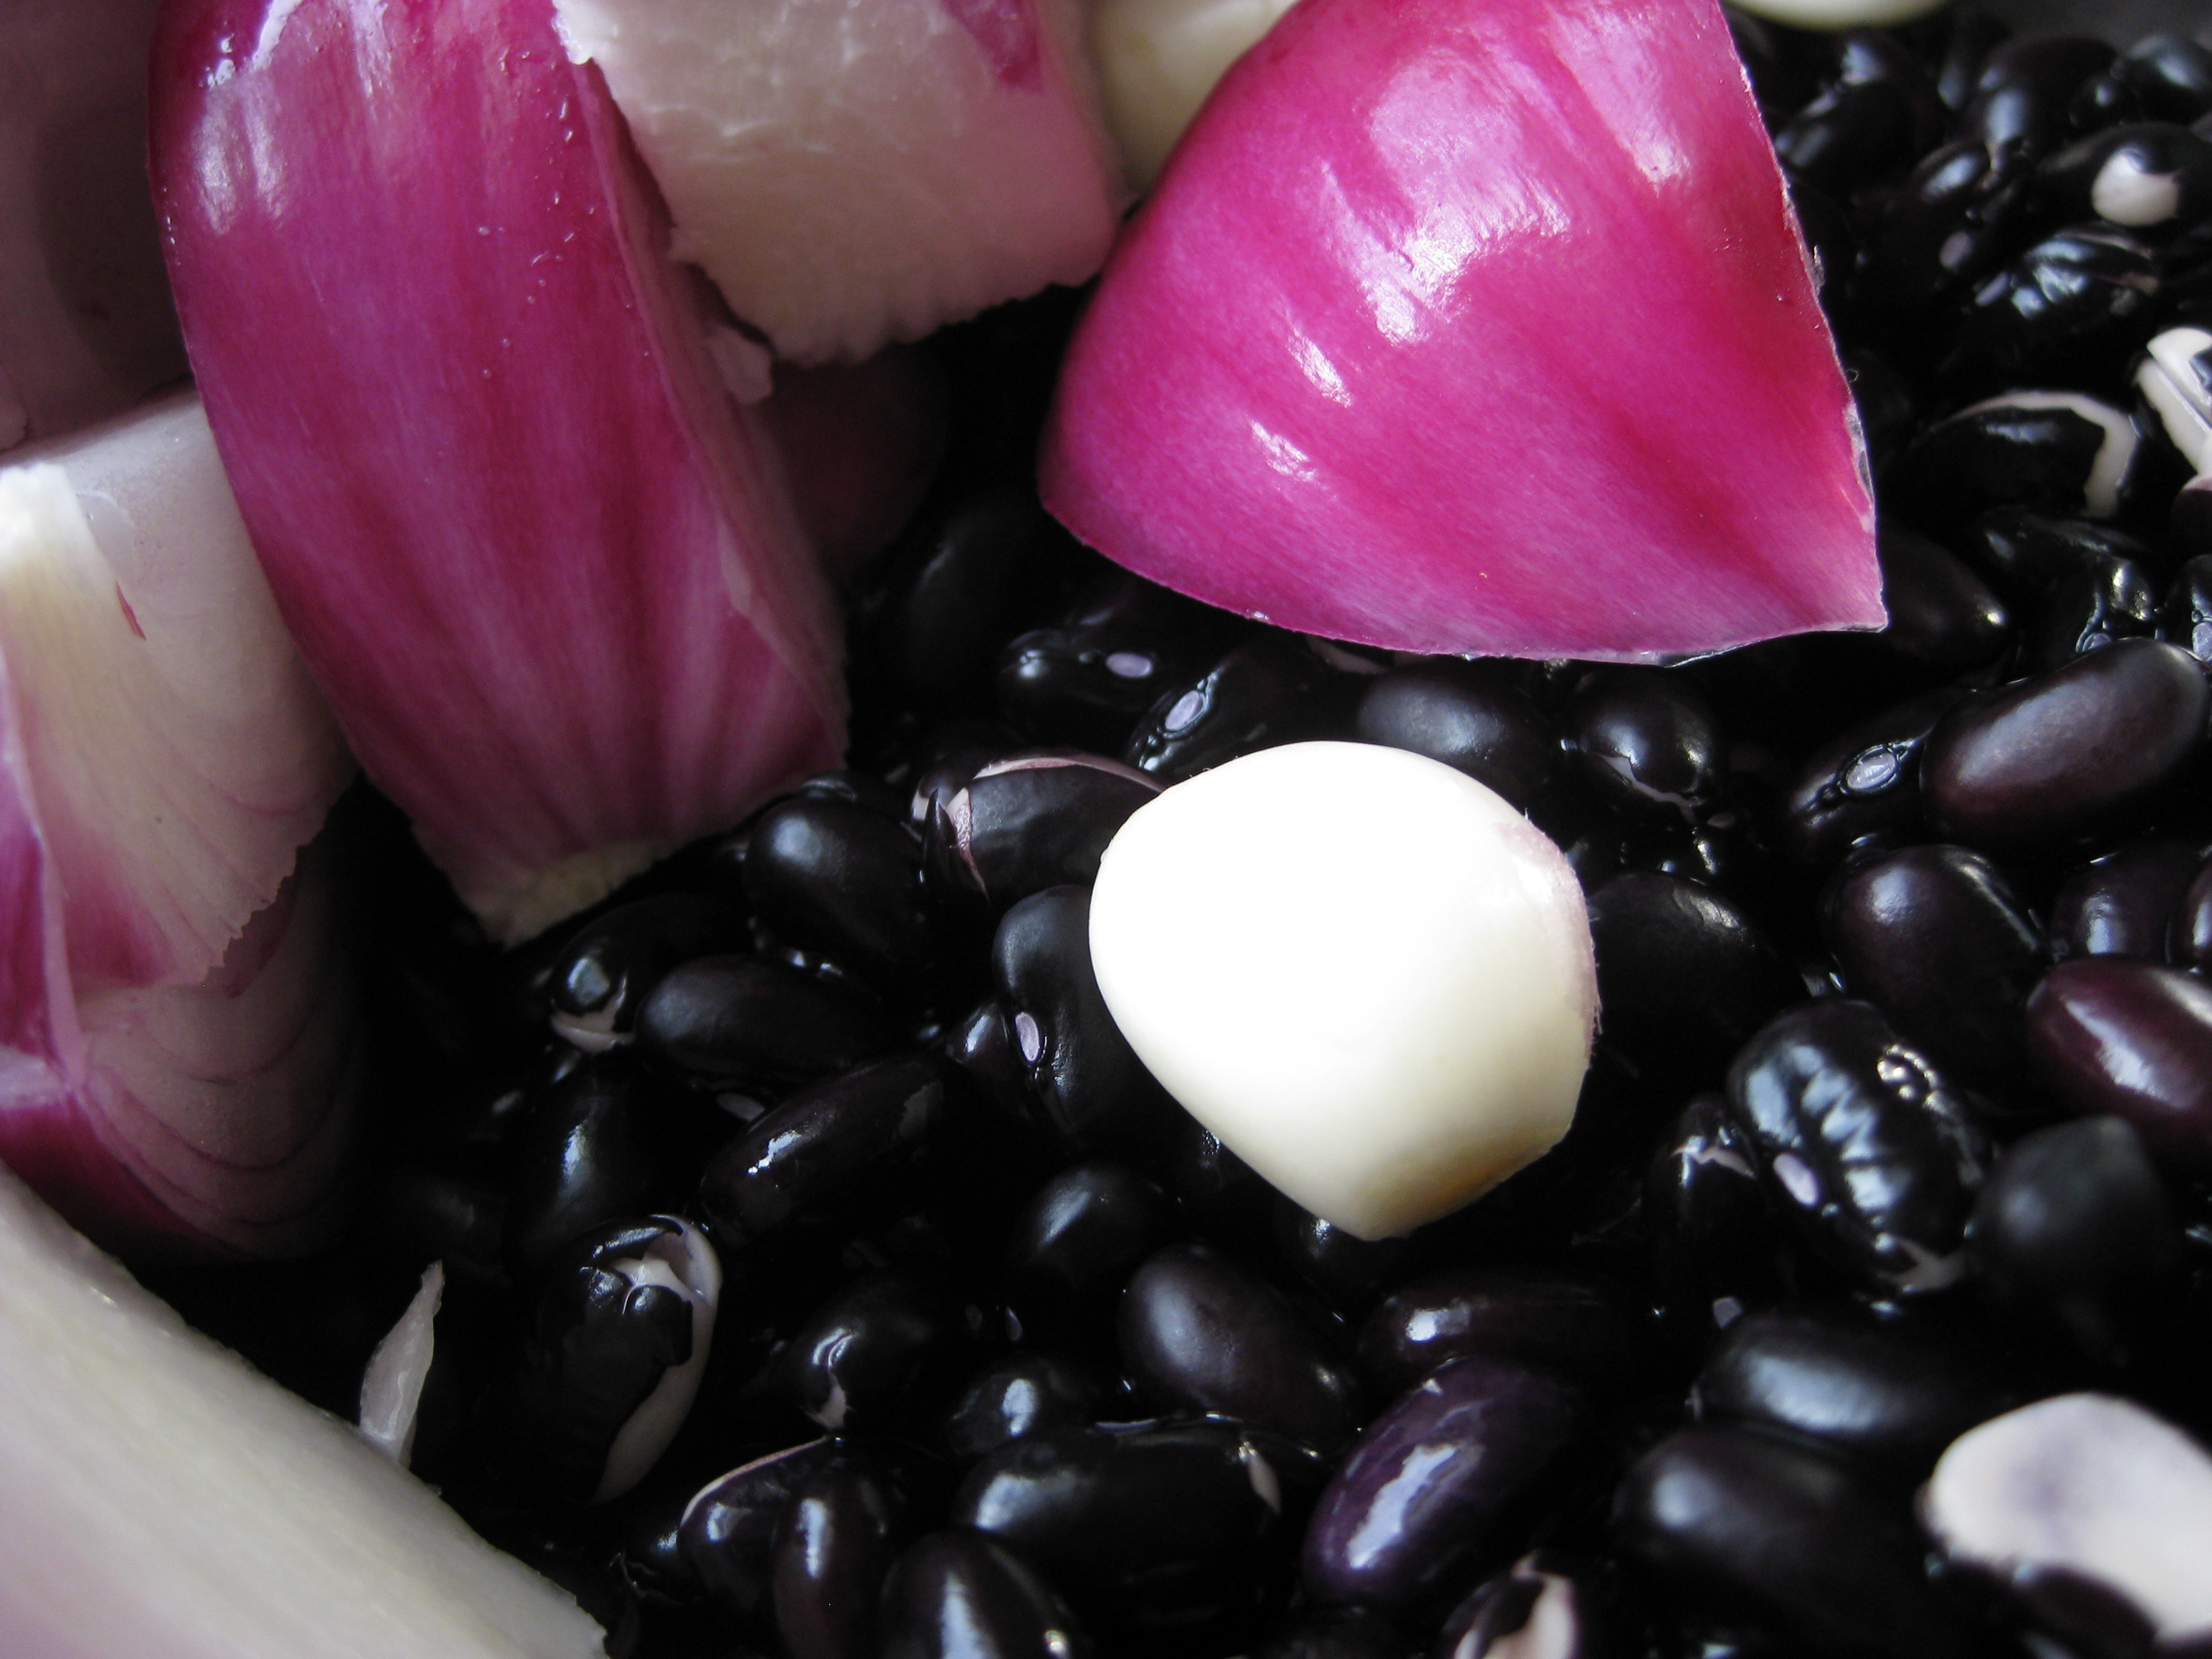
3 onions, roughly sliced
6 cloves garlic
1-2 cups apple juice

Preheat the oven to 220C.

Oil the bottom of a baking dish and place the onions and garlic in it.

Rub the mustard into the pork, then mix the salt, sugar and paprika together and work it over the shoulder. Make sure you get it into the nooks and crannies.

Place into the baking dish, skin side up.

You want to blast the shoulder at a high temperature for about 1 hour. After that, take it out, add a cup of apple juice and cover with foil.

Cook at 150C for 4-5 hours. The hotter your oven, the more likely it is that you’ll need the extra cup of apple juice, so check it halfway through. If you’re away all day, you can lower the temperature to 125C for 8-9 hours. Always give yourself an hour at the end before you need to serve it, in case it hasn’t cooked to pulling temperature.

Remove from the oven and stand with foil on for 20 minutes. This helps the meat relax so you can pull it. It’s easiest to do this with two forks – I do it in the pan so the meat soaks up the juices at the bottom.

Advertisement

gluten-free lemon cake

gluten free lemon drizzle cake
I confess: I really only got into baking because of the pretty pictures.

I’ve always had this endless enthusiasm for potatoes. Where others would look longingly towards the dessert section, I would revel in the salty crunch of fries. Crisps filled my dreams at night and roasties haunted my days. My comfort was a sea of creamy mash, my excitement a bed of rosti. Oh yes. Leave no chip behind.

Was it inevitable, then, that I’d eventually find a way to incorporate potato into everything, including a lemon cake? I’ll admit I was slightly dubious when I found this recipe for a gluten-free lemon cake – sorry, you want me to put what in it? – but allow my own incredulity to reassure you: it sounds completely batty, but it works. Potato is a friend that keeps the cake light and reassuringly moist and doesn’t get in the way of the lemon at all.

It's lemon cake with a surprising helper: the humble potato.
The humble potato gives this lemon cake a light moistness.

Lemon, for me, is tremendously exciting. Its ability to enhance and be enhanced by the contrast of salt or sweet, to lurk pleasantly in the background or take centre stage as the main flavour, to hold fragrant oils and piquant juice in the one fruit – well, it’s kind of amazing. Somehow the moreish tang of lemon tempered with sugar dangles you precariously between the worlds of sharp and sweet, each clamouring for attention and yet working together in a curious harmony.

And harmonious is just how this cake turns out. It’s such a surprising and unexpected marriage between lemon and potato, but it’s a joyous celebration nevertheless and you get to be good to your coeliac and IBS friends.

Share the lemony love this summer (with a tall glass of Pimms, naturally).

Grab a fork. I promise you won't taste the potato.
Grab a fork. I promise you won’t taste the potato.

Gluten-free lemon cake
For the cake:
200g butter, softened
200g golden caster sugar
4 eggs
175g ground almonds
250g mashed potatoes (cooled)
zest of 3 lemons
2 tsp baking powder

To drizzle:
4 tbsp sugar
Juice of 1 lemon

Preheat the oven to 180 degrees celcius, and grease a 20cm cake tin.

Beat the butter and sugar together and then add the eggs one at a time, beating after each egg.

Add the baking powder and mix, then fold in the mashed potato, almonds and lemon zest.

Pour into the cake tin and bake for 45 minutes, or until the skewer comes out clean. Remove from the oven and allow to cool in the tin for 10 minutes, then transfer to a wire rack to cool completely.

Put the cake on the serving tray before you drizzle, and serve with double cream.

low-fodmap meatballs

low-fodmap meatballs are comforting, delicious and safe for friends with IBS
Low-fodmap meatballs are comforting, delicious and safe for friends with IBS

One of my dearest friends is following the low-FODMAP diet to combat IBS, and it can be a little challenging to stick with the ‘no wheat, onion and garlic’ rule when you’re eating out. It’s not impossible, but I’ve seen the struggle – poring over menus, referencing the extensive list of prohibited foods and interrogating waiters as to the contents of a dish while your dining companions wait to order. A menu becomes a minefield and what should be a lovely, free and happy choice based purely on what you feel like eating becomes stressful, difficult and a little isolating.

Serve with rice or rice pasta for a FODMAP-friendly meal

So sometimes we eat in, and whenever I have her around I like to make something she can eat safely and share with everyone else. It’s maybe a little complicated, but with a bit of creativity and an understanding of good substitutions, everyone can tuck into the same dish.

The simple act of sharing – good food, a cheeky glass of wine and lots of laughter with friends – is a powerfully healing experience. I can’t think of a better way to spend a weekend!

Low-FODMAP meatballs (makes 60)
For the meatballs:
500g beef mince
500g pork mince
2 bunches spring onions (green part only), finely diced
5 sprigs of parsley, finely diced
1 tbsp mixed herbs
1 tbsp garlic oil
4 tbsp parmesan
4 eggs
1 tbsp salt
1 tbsp pepper
2 tsp baking soda
3-4 tbsp cornstarch

For the tomato sauce:
2 x 400g tins chopped tomatoes
2 x 500g passata
1 bunch spring onions (green part only), finely diced
3 bay leaves
3 mozzarella balls, to bake

Put it in the oven to bake and go and join your friends for a chat.

Mix all the ingredients except the cornstarch together with a fork.

The cornstarch is there to regulate the wetness of the mix, so start with 2 tablespoons, mix thoroughly and see how wet it is. You want it to be moist, but easy to handle.

Roll into small balls.

From here, there are a few ways to go about cooking the dish. The easiest is to place them directly into the sauce, top with mozzarella and bake the whole thing for 90 minutes in a 200 degree oven.

Alternatively, you can bake your meatballs separately for 30 minutes so they brown nicely, then place them into the sauce and bake for 30 minutes. This is also a good method if you like to drain the fat from your mince.

Finally, if you don’t have an oven, you can simmer them in the sauce. Don’t stir them at the start as they’ll break up – wait until the egg has cooked and will hold them together. Total cooking time is about 30 minutes, starting with a fast simmer for the first 15 minutes and coming back down to a low simmer.

Serve with brown rice or mashed potatoes.

FODMAP notes: I’ve included parmesan in the recipe, because even though lactose is a no-go, parmesan has very little lactose. I’m not quite sure what it is about the ageing process, but hard cheeses have far less lactose than soft cheeses and milk.

Having just said that, mozzarella is also on the safe list for FODMAP. Nevertheless, some people are super-sensitive to lactose, so leave it out if you have to.

summer rolls

Start - err, spring - with summer rolls.
Start – err, spring – with summer rolls.

As I write this, I’m keenly aware that there is a pile of washing up behind me that closely resembles a small mountain.

I’m breaking the rules a bit here, because although it’s certainly achievable to make these even in a small space, this isn’t exactly an ideal tiny kitchen recipe. It’s time consuming, a little fiddly and uses more plates than I would like – but I have to include it, because I simply can’t have you going into Spring without the deliciousness of summer rolls.

In truth, my love affair with Vietnamese food began with these rolls. Gỏi cuốn, nem cuốn or bánh tráng cuốn, as they’re known, are rice paper rolls stuffed with bún (rice noodles), herbs, vegetables and meat. They’re best served at room temperature with a dipping sauce – I personally think that you can’t beat the classic nước cam, but you can also serve them with a sweet hoisin or chilli sauce and peanuts.

Gluten-free and easily adapted to suit vegans and meat-eaters alike.

Summer rolls embody everything I think is amazing about Vietnamese cuisine. Light and zingy, crunchy and softly dense, summer rolls have a certain balance of tastes and textures designed to bedazzle the palate. They’re commonly served as an entrée, and they make a beautifully bright introduction to the stronger flavours of phở and cơm tấm.

So while there may seem like there’s a lot of ingredients and a load of washing up to do at the end; persist, friends. It’s most definitely worth it.

There's something exceptionally light, fresh and tasty about summer rolls.
There’s something exceptionally light, fresh and tasty about summer rolls.

Summer rolls
10 rice paper sheets
100g rice vermicelli noodles
1 carrot, julienned
Small bunch of coriander
Small bunch of mint
Three lettuce leaves
Bean sprouts (optional)
Cooked prawns (three per roll) – for a vegetarian alternative you can use fried tofu

Prepare all the ingredients so that they’re ready to roll. Start with the noodles; you can cook according to directions but in my opinion you almost never need to boil them. Soaking them in boiling water is fine. Like pasta, make sure the noodles are al dente – they should be springy but not chewy. Drain well.

While the noodles are soaking, take the carrot and blanch in equal parts water and vinegar. If you’d prefer to save time and not to pickle your carrot, that’s fine too.

Finely chop the lettuce.

Pull the mint and coriander into leaves and pick over the bean sprouts.

When you’re done, you should have a crowded-looking plate of noodles, carrot, lettuce, herbs and bean sprouts. The key is to make sure that all the filling ingredients are as dry as possible.

To prepare the rice paper, have a bowl of very hot water and a clean tea towel next to your rolling surface. Dip the paper in the water until it softens and carefully fish it out, trying not to break it. Lay it briefly on the clean towel to absorb the excess water and then lay it flat on the board.

Assemble your summer roll. I use three prawns or one tofu puff sliced into three, plus a few shards of everything else. Try to make it as compact as possible as this will help when you roll.

Rolling is an art. I’ve rolled plenty of spring rolls, but they’re a cinch compared to the fiddly nature of the summer roll beast; all the lightness and springyness that we love about a summer roll seems to work against us here in a very irritating manner.

My tip is to flip up one end over the ingredients and use it to push them into as compact a roll as possible. Using one hand to keep the roll tight, fold up the sides and then push the roll forwards to complete.

Also, be careful about flipping rice paper – running a close second to the nasty possibility of the paper tearing is it sticking to itself. Once it does that, it’s very difficult to unstick it without tearing.

Serve with nuoc cam.

banoffee pie

I know I was supposed to whip the cream. It was a long day, ok?
I really did mean to whip the cream, but sometimes loose & unstructured is just fine.

Even the most savoury-toothed person would have to admit that there’s something quite delightful about the idea of banoffee pie.

The name immediately conjures up all sorts of lovely images: golden, sticky caramel cascading onto a bed of crunchy biscuit crumbs; smooth slices of pale sunshiney banana; and curls of rich, bittersweet chocolate raining down in a dark flurry onto fluffy clouds of whipped cream.

You may think I’m waxing ridiculously lyrical, but you’ll understand when you eat it.

There are lots of variations of banoffee pies, but all of them involve the delicious combination of banana and toffee, and most will advise you to add whipped cream to the top. I feel, however, that there would be no great crime in adding chocolate or nuts or honeycomb pieces or even a smattering of peanut butter. These things are meant to evolve.

This banoffee pie doesn’t need to be baked, so it’s perfect for the oven-free amongst us. Who said that tiny kitchens need be deprived?

You can make this gluten-free if you like.

Banoffee pie
250g digestive biscuits (I used gluten-free biscuits, but feel free to go ahead and use whatever digestives you like)
2 x 100g unsalted butter
100g dark brown sugar (I used muscovado)*
400g can of condensed milk
4 bananas
300ml double thick cream

Grease a 20cm loose-bottomed springform cake tin.

Crush the digestives into powder; I used a freezer bag and a Vegemite jar to work off some aggression, but a rolling pin would probably be faster.

Melt 100g of butter and add to the digestives, mix into a soft, damp sand.

Press the biscuit mix into the cake tin, coming slightly up the sides and making sure it is packed tightly. You want to form a hollow that is about 1.5cm deep.

A biscuit base doesn't need to be baked
a biscuit base doesn’t need to be baked

Place the tin into the freezer for at least 20 minutes.

Meanwhile, place 100g of butter and the sugar into a pot and melt together, stirring constantly.

When you can no longer feel the sugar granules, add the condensed milk and bring to a rapid boil, stirring constantly. Boil for at least two minutes, until the mix forms a golden, caramel colour.

thick, luscious caramel

Allow to cool slightly, then pour the caramel into the biscuit base and place in the refrigerator for at least one hour.

at this point, it's just a toffee pie
at this point, it’s just a toffee pie

Before serving, top with sliced banana and whipped cream.

Note: A few of my guests thought this pie was a little too sweet, so I’d say you could safely reduce the sugar content. I haven’t tried it out to see how it goes, but next time I’d try halving the sugar. I mean, that almost makes it healthy – right?

big kitchen roast chicken

tiny kitchen gone wild.
tiny kitchen gone wild. in poultry heaven.

Greetings from Australia!

Australia has many great things, including my parents, my sister, my friends and a full-size kitchen. Before I left London, I dreamed of the big oven in my parents’ kitchen and had plotted and schemed many dishes that I wanted to cook – one for each day of the week – a captive set free at last, if you will.

garlic roast potatoes

Of course, I underestimated the strength of pent-up parental affection, which is taking form in a tidal wave of soups, stir-fries and special cakes that I ‘just don’t get in London’. (It’s true. There’s nothing quite like braised pork made with mushrooms and love.)

My presence has kept both my parents in the kitchen for weeks, toiling away, and I’ve been begging to have a turn at the stove if only to give them a break. Tonight, I got my chance… so I went all-out with the ultimate winter meal: a roast with all the trimmings.

winner winner chicken dinner.
winner winner chicken dinner!

If you’re not fortunate enough to have an oven in your tiny kitchen, just commandeer a friend’s. Who doesn’t love a roast bird?

Roast chicken
1 large chicken (or 2 small chooks)
1 onion
3 cloves of garlic
1 tablespoon of mixed herbs
2 tablespoons of butter (or Proactiv)
1 lemon
Olive oil

Take the chicken out of the fridge and let it rest for an hour before preparing it. This helps it to stay moist.

Preheat a fan-forced oven to 180°C.

Wash the chicken and pat dry with kitchen paper. Make sure the skin is really dry because it will help it to crisp up.

Finely chop the onion and garlic, then mix with the herbs and butter. I used Proactiv Light, and it worked just fine.

Place the lemon into the cavity of the bird (or chop in half and place into the two smaller birds). Take the Proactiv mix and place a small amount into the cavity, then slide the rest under the skin of the bird.

Place the chicken breast-side-up onto a roasting tray and bake for 90 minutes. Turn it over at 60 minutes, and then again at 80 minutes. Test that the bird is done by poking a skewer or fork into the thickest part of the breast and checking that the juices run clear.

honeyed roast carrots

If you want to serve with the holy trinity of the roast vegetables – roast potatoes, honeyed roast carrots and peas – then the best time to add the potatoes and carrots to the oven is at the 30-minute mark. When you take the chicken out of the oven to rest (15 minutes), flick the grill on high to crisp the potatoes up.

nothing in the world like roasties.
nothing beats roasties.

haloumi omelette

haloumi omelette
The highly photogenic use-everything-up fridge omelette.

Let’s face it: everything in my fridge has seen better days.

How could I have let it come to this? Well, there’s a good reason for the very-unlike-me paucity of food in the tiny kitchen; I’m moving next week and I’m struggling to clear my cupboards to make things as simple as possible. That means the half-bags of pasta, cup of lentils, highly ambitious biryani mix, on-special kilo of chickpeas – it all has to go. I’ve been doing all sorts of odd culinary contortions (chicken bourgignon, anyone?) in an effort to use everything up.

So at the end of a determined month-long embargo on buying goods, my fridge is in a pretty sad state. What a creative and nutritional challenge!

Haloumi omelette
100g haloumi
Half a pointed pepper
3 eggs (2 yolks, 3 egg whites), lightly beaten

Chop the haloumi into small chunks (rather than the slices used in a haloumi salad). Place in a non-stick frypan over medium-high heat. If your pan is properly non-stick, you won’t need oil.

Fry the haloumi until it begins to brown. This should take around 5 minutes. Make sure you flip the pieces so both sides get browned.

Meanwhile, slice the pointed pepper into slivers. Add them to the pan once the cheese is browned, then cover with the eggs.

I am not a great omelette-maker. That perfect omelette shape eludes me, especially since I don’t have a grill to finish the top. But I make up for this by not caring in the slightest what shape my omelette turns out to be. I wait until the edges of the omelette turn pale, meaning it’s safe to flip, then I flip it with two spatulas onto its other side and give it thirty seconds. Then I slide it onto the plate, attempting to fold it in half as I go.

The haloumi is really salty, so no seasoning is required. Serve with a drizzle of balsamic if you like, and a pile of pickled baby beetroot if it’s there just waiting to be used.

frijoles negros

Black turtle beans.
Black turtle beans.

If you’re ever in Sydney’s inner west, swing by a restaurant known as Baja Cantina in Glebe and you’ll understand why the top end of my food-rating spectrum is food for which you would consider moving countries.

Is that a little extreme? You might think so if you had never eaten the nachos at Baja Cantina. The first time I tried them, my little head exploded with the colours, tastes and textures of a country I had never seen; the salty crunch of thick, hand-cooked corn chips, creamy, gently spiced beans, fire-laced salsa and jalapenos and zesty guacamole married in perfect harmony by smatterings of mature cheese and a dollop of sour cream.

I’m getting a little emotional just thinking of it.

My bestie and I have been to Baja Cantina hundreds of times, the colourful walls bearing silent witness to our laughter, tears, venting sessions, tantrums, dramas and soul-searching conversations that can only occur over a plate of Sydney’s finest nachos.

They're not exactly photogenic now. But you'll understand when you taste them.
They’re not exactly photogenic now. But you’ll understand when you taste them.

It was Stephy who introduced me to black beans, and I’ve never looked back. Black turtle beans have a dense texture, unlike the starchy flouriness of pinto beans, and stand up to flavours well. They require lengthy cooking, but are very low-maintenance and the end result is a delicious, inky, creamy and deeply flavoursome dish.

Frijoles negros
250g dried black beans
1 onion, cut into eighths
5 cloves garlic, peeled
Six large sprigs of thyme
Five bay leaves
Two slices of bacon
oil
salt

Bay leaves and thyme are essential to this dish.

Normally, you would begin a bean-based recipe by soaking the beans to reduce your risk of being poisoned by the toxin phytohaemagglutinin. With this particular recipe there’s no risk of that since you cook them for ages anyway, but you can soak them for a few hours to reduce cooking time. If you don’t have time for that, it doesn’t matter – you might just have to keep them on the stove for a bit longer.

Place the onion, garlic into a pot with a splash of oil and cook gently for a few minutes.

So beautiful in the pot!

Add the black beans, thyme and bay leaves and cover with water. Bring to a boil and simmer for one hour. Skim off any scum that appears on top and make sure they’re not boiling dry, adding water if necessary.

After an hour, add the bacon and a pinch of salt and return to a simmer for another hour. You can leave the bacon out if you’re vegetarian, but I find it provides a good weighty saltiness to the beans.

Beans reach a stage where the skin begins to lift off if you blow on them. You actually want to take these beans beyond that stage, to the point that they provide no resistance when you want to mash them.

After the beans are cooked, you’ve got a few options. The Mexican culinary goddess Thomasina Miers, of Wahaca fame, takes the cooked beans and fries them with a large amount of lard or butter plus additional onion and garlic, then processes them until smooth. She serves them with sour cream and a crumbled mature cheese.

Frijoles on salad.
Frijoles on salad.

I absolutely love Wahaca’s frijoles and they have never failed to transport me to the heights of culinary bliss, but at home in the tiny kitchen I find the second stage too fiddly and guilt-inducing. Instead, I take a fork to the cooked beans and mash until creamy. Don’t drain the cooking liquid, as you’ll need it to store the beans and to mash any leftovers the following day. Before reheating in a microwave, cover the beans with a little water to prevent them from drying out.

I like to serve frijoles negros on a pile of fresh, crunchy salad topped with pickled jalapenos and guacamole. A handful of corn chips rounds everything off nicely.

almond flour pancakes

Sunday breakfast means pancakes.

What is a Sunday without pancakes? Just another day of the week that ends in ‘y’, obviously.

When I was growing up, there was always a flurry of excitement when pikelets entered the house. Pikelets are really pancakes, but Down Under pancakes are the size of a small dinner plate, whereas pikelets are a neat, manageable handful. Each member of my family pretty much eats them the same way; slathered in peanut butter, or toasted and slathered in peanut butter.

It wasn’t until much later in life that I learned the ‘proper’ way of eating them in Australia is with golden syrup, and by then it was too late – the lifelong habit of eating savoury goods with these little gems had stuck. Eventually I happened upon the Canadian way of eating them with bacon and maple syrup, and it became a close second to the peanut butter breakfast rally.

Pancakes should be light, fluffy and served with something equally delicious.

Of course, making pancakes is pretty simple, but the primary ingredient is flour. Not only do I rarely keep flour in the house (there’s a bad weevil experience behind that), but one of my good friends has recently been diagnosed with both IBS and coeliac disease, and it has been my mission over the past few weeks to look at things she can eat, which is trickier than you might expect.

Coeliac disease is at least consistent, although painful: no gluten, which means no wheat, barley, rye, spelt, flour derived from any of those, nothing that has come into contact with gluten products. Restrictive, but straightforward. Lots of things are marked gluten-free and the label will generally tell you if gluten is present in the product.

IBS is a whole different beast. Following the FODMAP diet seems to help her, but it’s difficult to remember what to avoid. It’s also supremely tough to eat out when you have to avoid onion and garlic and that’s present in almost everything in a commercial kitchen.

I wanted to try out a recipe that would help my buddy put the spark back into her Sunday breakfast. So here it is: taken from about.com, these almond flour pancakes are gluten-free, IBS-friendly, low-carb, easy and very filling.

I probably did not need to eat all four pancakes, but hey, it’s a Sunday.

Almond flour pancakes (makes 4)
Half a cup of almond flour
1 egg
10 drops of liquid stevia (you can substitute with liquid sucralose or just use half a tablespoon of sugar)
1/8 cup of water
1 tablespoon oil
small sprinkle of salt

Warm your non-stick frying pan over medium heat whilst you mix all ingredients together.

Place two tablespoons of mixture into the pan. The good thing about this is that it doesn’t spread far, so if your pan is big enough you can do two at a time.

The pancake needs about 2-3 minutes on the first side before you flip it. They don’t really bubble the same way a pancake does, but you’ll know when it’s ready to turn because the edges will become lighter as they cook – once the pancake has a white ring all the way around, it’s ok to flip. It will need about a minute on the other side.

Serve with bacon, peanut butter or if you must, drizzled with golden syrup, and relish the Sunday-morning feeling.

The perfect Sunday breakfast.

A note about cooking for coeliacs: this is probably an obvious point but if you’re cooking for a coeliac, make sure the pan, all your utensils and crockery are ultra-squeaky-clean. The slightest bit of gluten can make them seriously ill.