Well, this is different. How many times do you get to say it’s really hot in London? Summer has found its confidence and is blazing away at a temperature that makes the thought of a pasta dinner just slightly uncomfortable. Thankfully, though, there’s haloumi – glorious haloumi – the delicious squeaky cheese that renders all who consume it instantly voluntary vegetarians.
Ok, so it feels like cheating to call this a recipe. But when it’s hot, the very last thing I feel like doing is cooking, so it’s gotta be simple: three ingredients (very Hugh Fearnley-Whittingstall) and there is zero chance of the oven going on. Slip it onto a plate, dress with balsamic or lemon juice, and slide out the door to enjoy the rest of the summer evening.
Simple haloumi salad
Half a 225g block of haloumi
Spinach leaves
Plum tomatoes
Balsamic vinegar or lemon juice
Fry the haloumi over a medium heat until brown, turning once to fry the other side.
Arrange the spinach on a plate and slice the tomatoes. Top with the grilled haloumi and drizzle with balsamic vinegar.
Remember when you were growing up, and a salad was eternally comprised of a sad, round tomato, circles of cucumber and wads of damp iceberg lettuce, drowning in a sea of sharp, vinegary dressing? Oh, that salad. Sometimes it was accompanied by a ring of pungent onion, or a lonely olive that was also wondering why it was there. They weren’t particularly bad or good, they were just something that had to be heroically endured to get to the good stuff, like pizza and chicken and lasagne.
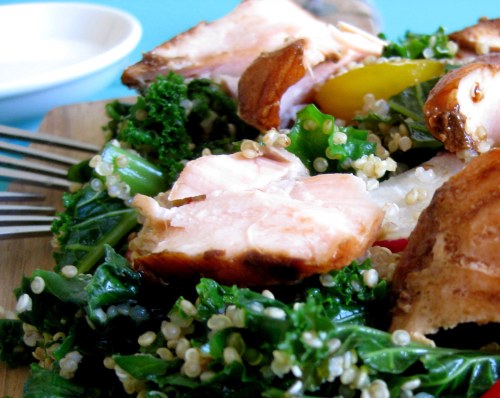
grilled salmon is a delicious indulgence
I’m not sure when it all started changing, but Australia probably owes a great debt to its multicultural history. Greek salad. Caesar salad. Someone heard a rumour of this amazing stuff called tabbouleh, others murmured words like panzanella and fattoush and niçoise.
And thus salads were set free, and we were all a lot happier for it.
Say yes to salads.
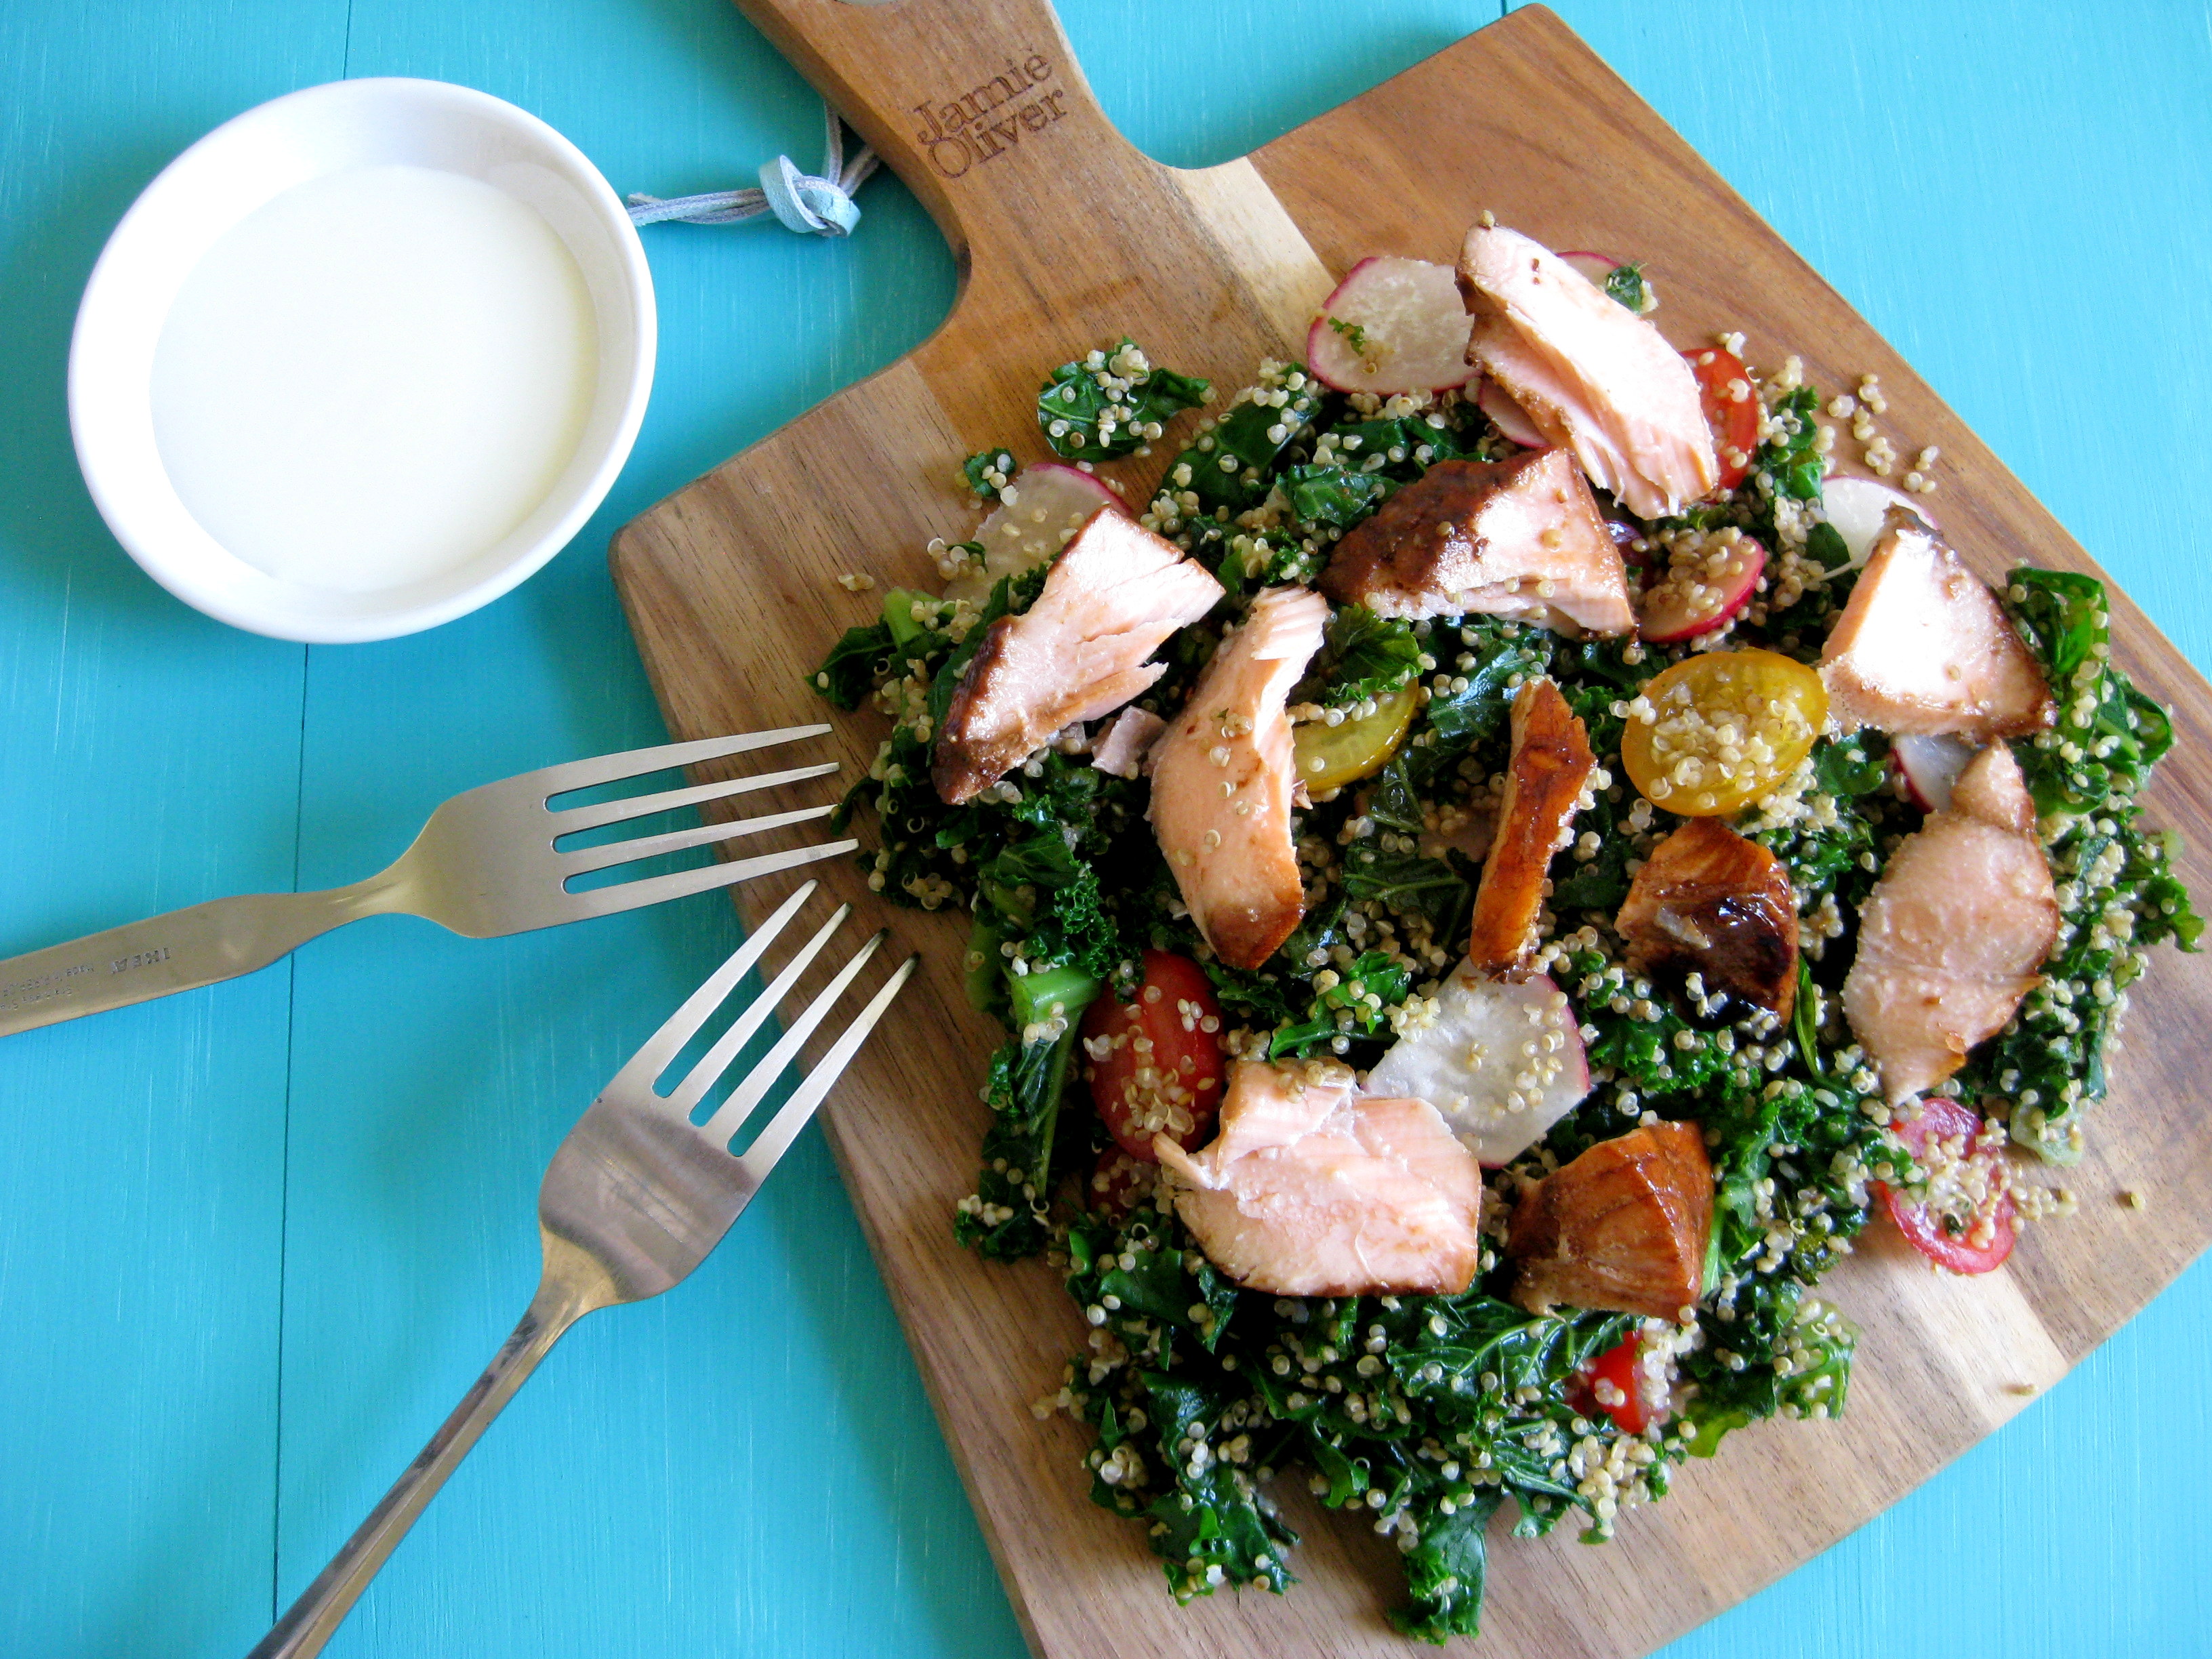
I love using kale as an alternative to salad leaves, because it feels so much more substantial than biting into lettuce (although don’t get me wrong, I also love lettuce). Quinoa is often a feature in my salads, not just because it’s excellent for my gluten-free friends, but also because it lends a brilliant texture, holds dressing well and gives the salad a certain heft.
And if you need something else to convince you, let me just say that the grilled salmon is a deliciously indulgent affair that means you’ll never have to dread eating a salad for dinner ever again. I promise.
Kale and quinoa salad with grilled salmon (serves 2) For the salad:
1 x salmon fillet, grilled (try honey soy salmon)
100g kale
150g quinoa
5 baby radishes, sliced
100g plum of cherry tomatoes
For the dressing:
250g low-fat Greek yoghurt
Juice of a lemon
1 tbsp honey
Rinse the quinoa well and cook until just tender. This is quite often a much shorter cooking time than they suggest on the packet, so check it at 5 minutes.
Steam the kale (if your pot is big enough, you can steam it above the quinoa) and dry using a clean teacloth or a salad spinner.
Slice the radishes and tomatoes.
Combine all the salad ingredients and make the dressing by stirring the juice of a lemon into a cup of yoghurt, then sweetening with the honey.
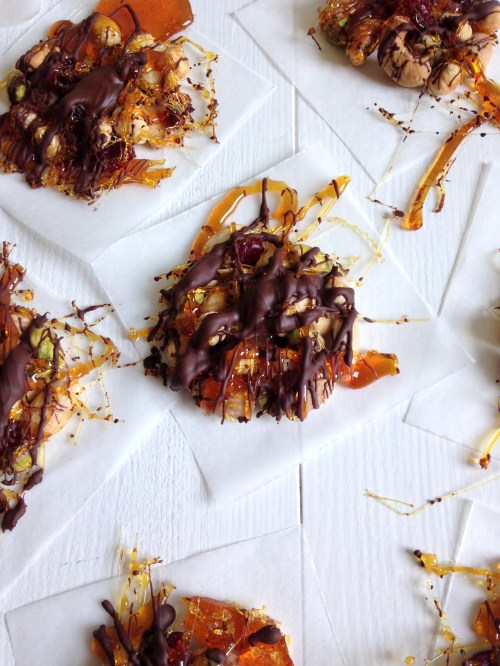
I had this idea in my head that I couldn’t let go. A florentine, but not exactly. Something gluten-free and nutty, something biscuit-sized and circular, something delicate held together with a caramel cage and strands of chocolate.
That was the idea in my head. Of course, in execution it was maybe a little more Pro Hart than Raymond Blanc.
I feel Pro Hart would have approved.
What happened? Well, I’ve never made caramel before. Several recipes advise that you make it, then put it into cold water to stop it from cooking. I dutifully followed instructions, waiting for it to turn the requisite dark gold colour and plunged the base of the saucepan into cold water. And then promptly panicked when the caramel started to set and I hadn’t even gotten around to drizzling it over the nuts.
(Will I spoil the story if I tell you you can actually re-liquify caramel by heating it? – naturally, something I found out the hard way.)
Beautiful neat circles, waiting to be adorned.
After the panic had cleared, my beautiful Londontine dream lay in golden puddles rather than wispy cobwebs. The whisk was firmly stuck to the bottom of the saucepan with caramel and a distinct air of permanence. Shards of caramel pointed threateningly towards the ceiling. I had sugar strands on my face.
Oh, what a mess.
My inner perfectionist could have cried. But I had this wonderful, valuable conversation with my bestie this weekend, where she reminded me that it doesn’t do to take everything so seriously all the time. ‘Don’t sweat the small stuff, Kahmen,’ she said, and she’s right. I cook because I love to create, and share, and it fills me with a sense of joy and fulfilment and happiness. And sometimes recipes don’t quite do what you want them to. But that’s perfectly ok; in fact, sometimes it takes you somewhere just as good anyway.
Glorious mess.
With that in mind, the not-quite-Florentines are going to work with me tomorrow, and I’ll stand by them in their misshapen glory and all. What a beautiful London weekend it’s been!
A little messier than I envisaged, but still beautiful.
Not quite florentines
500g mixed nuts, lightly roasted
25g dried cranberries (optional)
300g sugar
6 tbsp water
100g dark chocolate
Line a large area with baking paper.
Arrange the nuts and fruit in circles – use a glass to get a good shape. Make sure they’re only in one layer, otherwise they won’t take the caramel and they’ll fall when you lift it.
Make sure the nuts are in a single layer.
To make the caramel: place the sugar and water in a saucepan with a light-coloured heavy base. Swirl a few times to roughly combine. Place over a high heat until the edges start to bubble. It’s very important that you don’t touch the sugar or water with your hands at all, because it’s extremely hot.
Swirl the pan a few times to make sure the sugar melts properly and take care that it doesn’t burn. When it begins to colour, slow the heat down until it’s a dark amber, then remove from heat.
Dip the base of the pan briefly into cold water, then remove. If this cools the caramel too much and it becomes hard, just return to heat until it liquifies again.
Too light, and it’ll just be sweet. Too dark and it’ll taste burnt.
Working quickly, use a whisk to drizzle strands of caramel over the nut rounds. Make sure you connect each nut in the round, otherwise it’ll fall apart when you lift it.
Melt the chocolate in a bowl over boiling water and drizzle over the rounds. Allow to cool and set, then carefully lift from the paper with a knife.
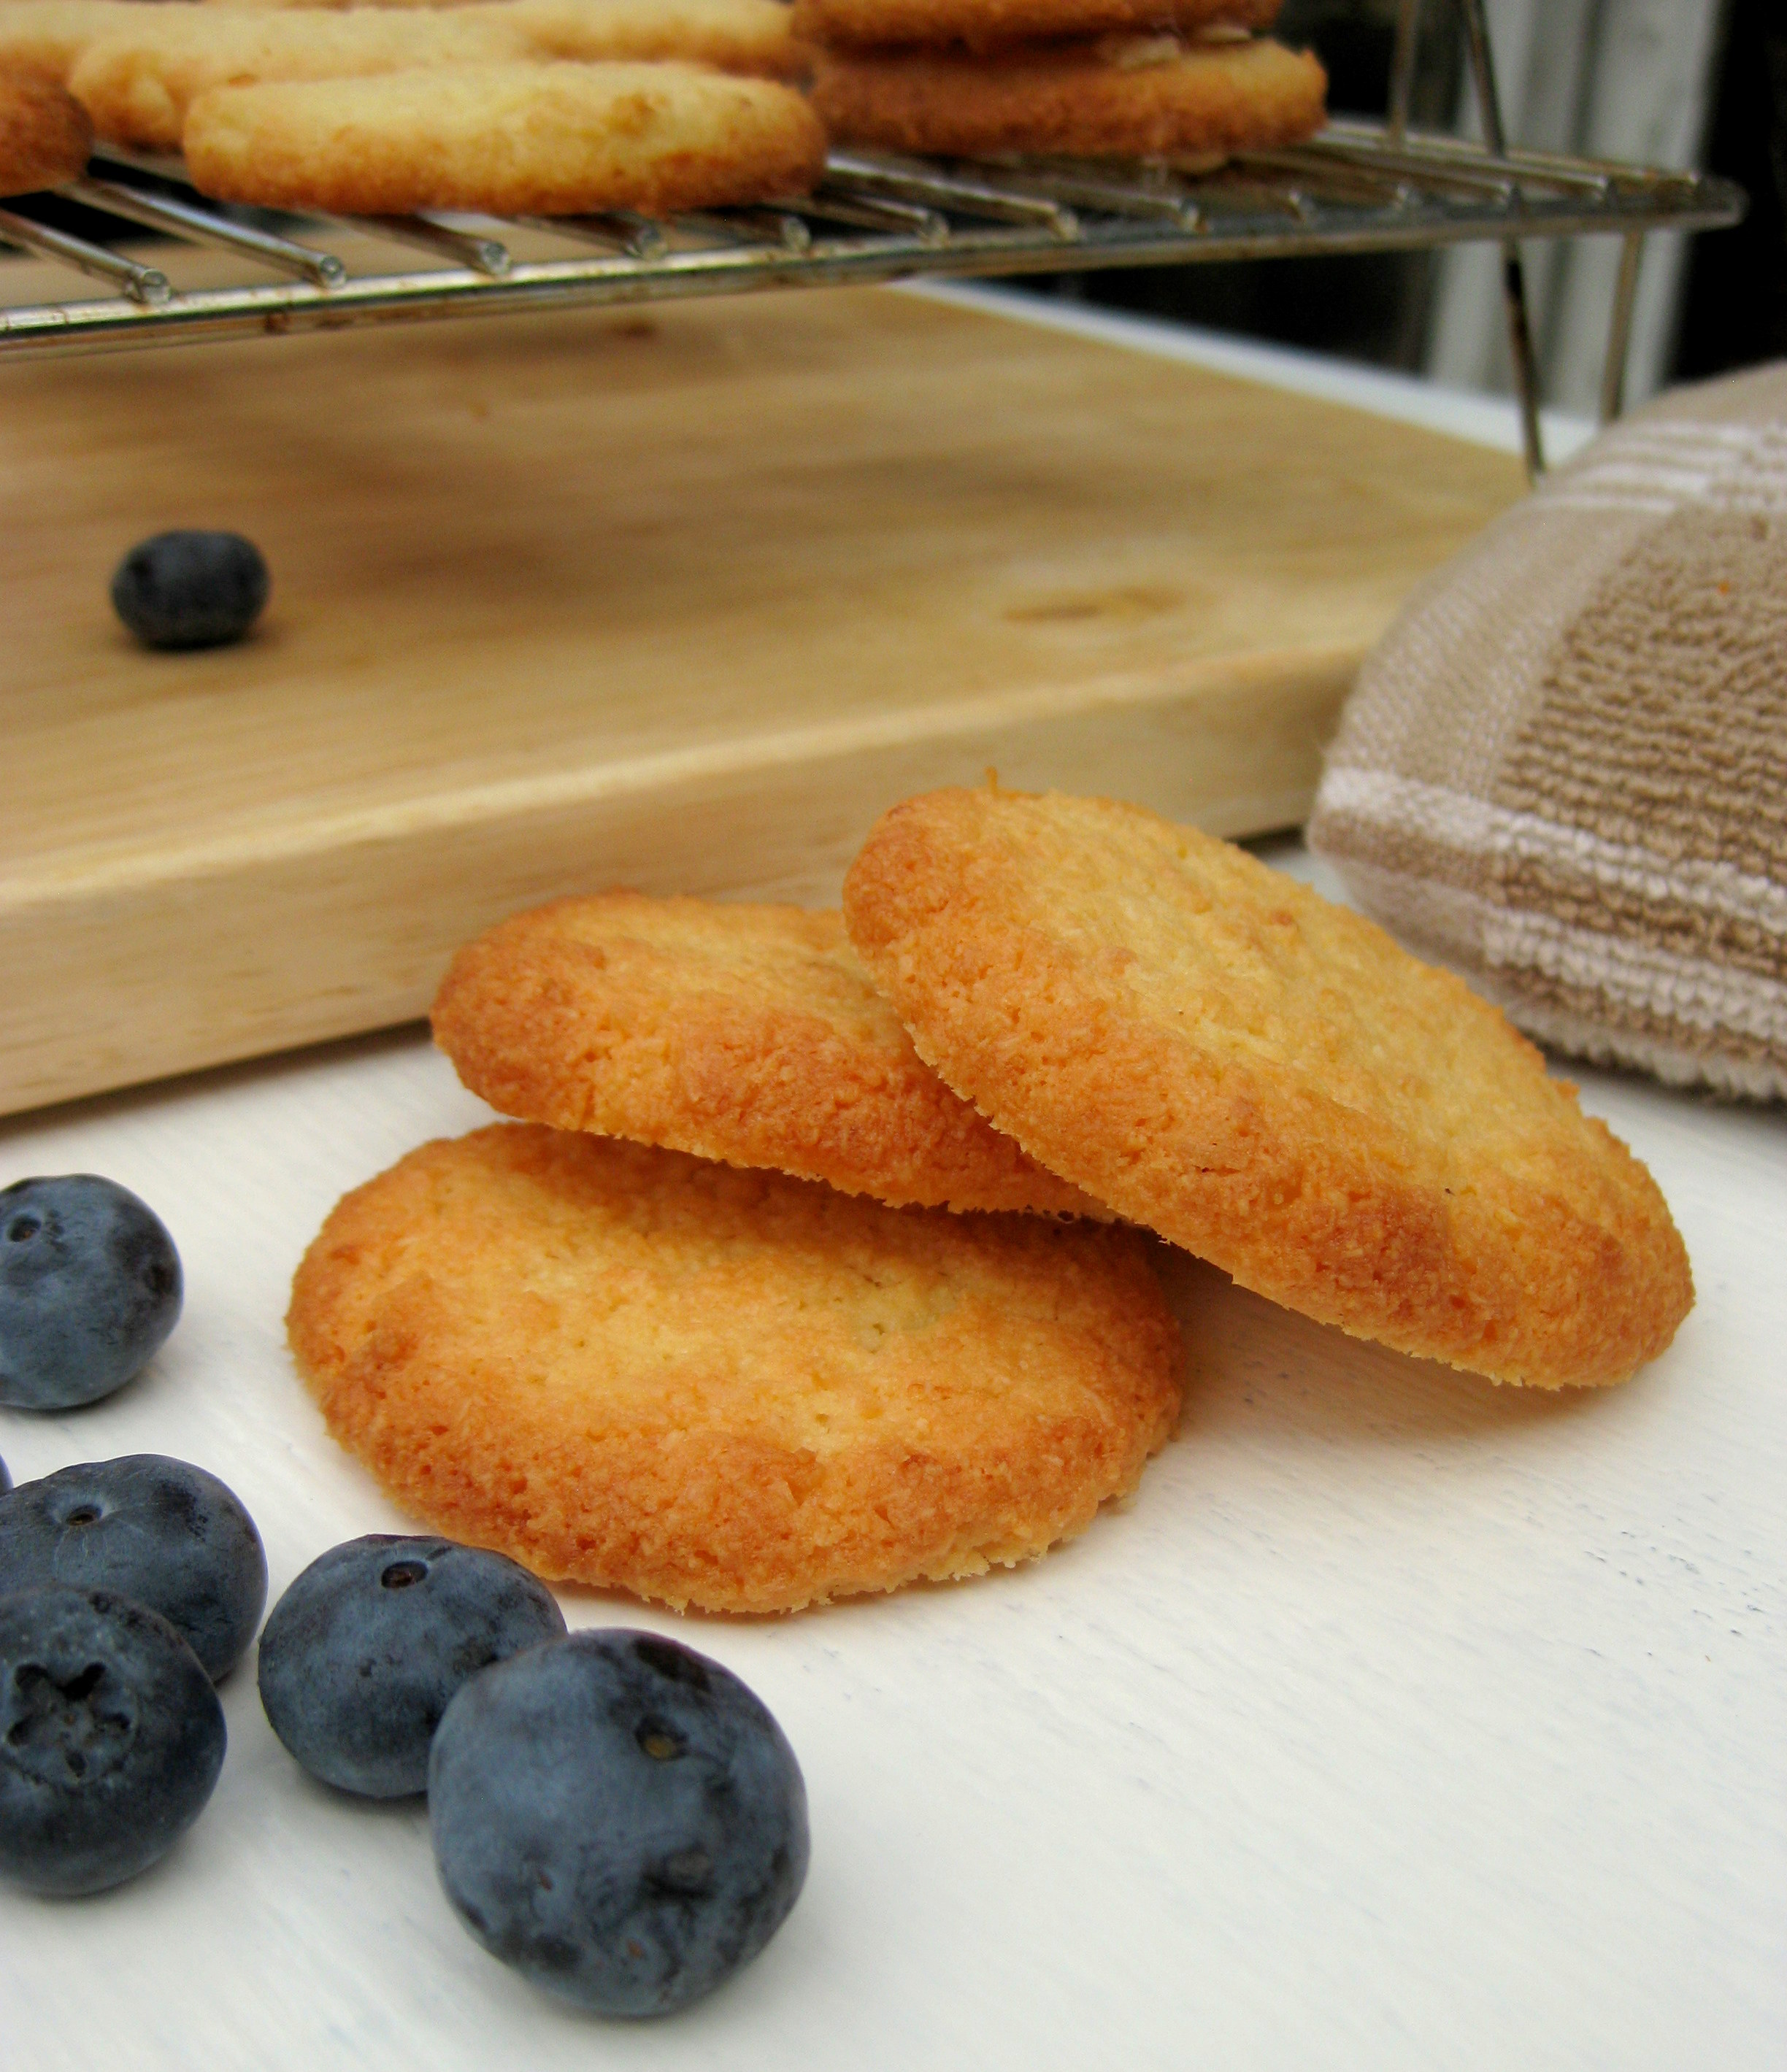
Is it cookie time again already? Well, when isn’t it?
I have a weakness for lemony desserts and lately I’ve been spending a little time indulging in the sweeter side of life. As the cooler weather sets in, traipsing through London’s streets in search of the next great party has taken a backseat to warm, intimate coffees and good conversation with friends. And how could you possibly have coffee without a little something to go on the side?
Moreish little morsels.
On days that start with frosty mornings and slip into rainy evenings, I like to sit on my couch with a really good book, a cup of coffee and a biscuit. The smell of lemon cookies wafts through my place, filling the air with something not unlike happiness.
Fill thy house with the scent of lemon biscuits. Go!
These lemon cookies are a variation on the chocolate chip cookies I did earlier. I urge you all to bake a batch, keep warm and embrace cheerfulness. The festive season is peeking around the corner – can you feel it?
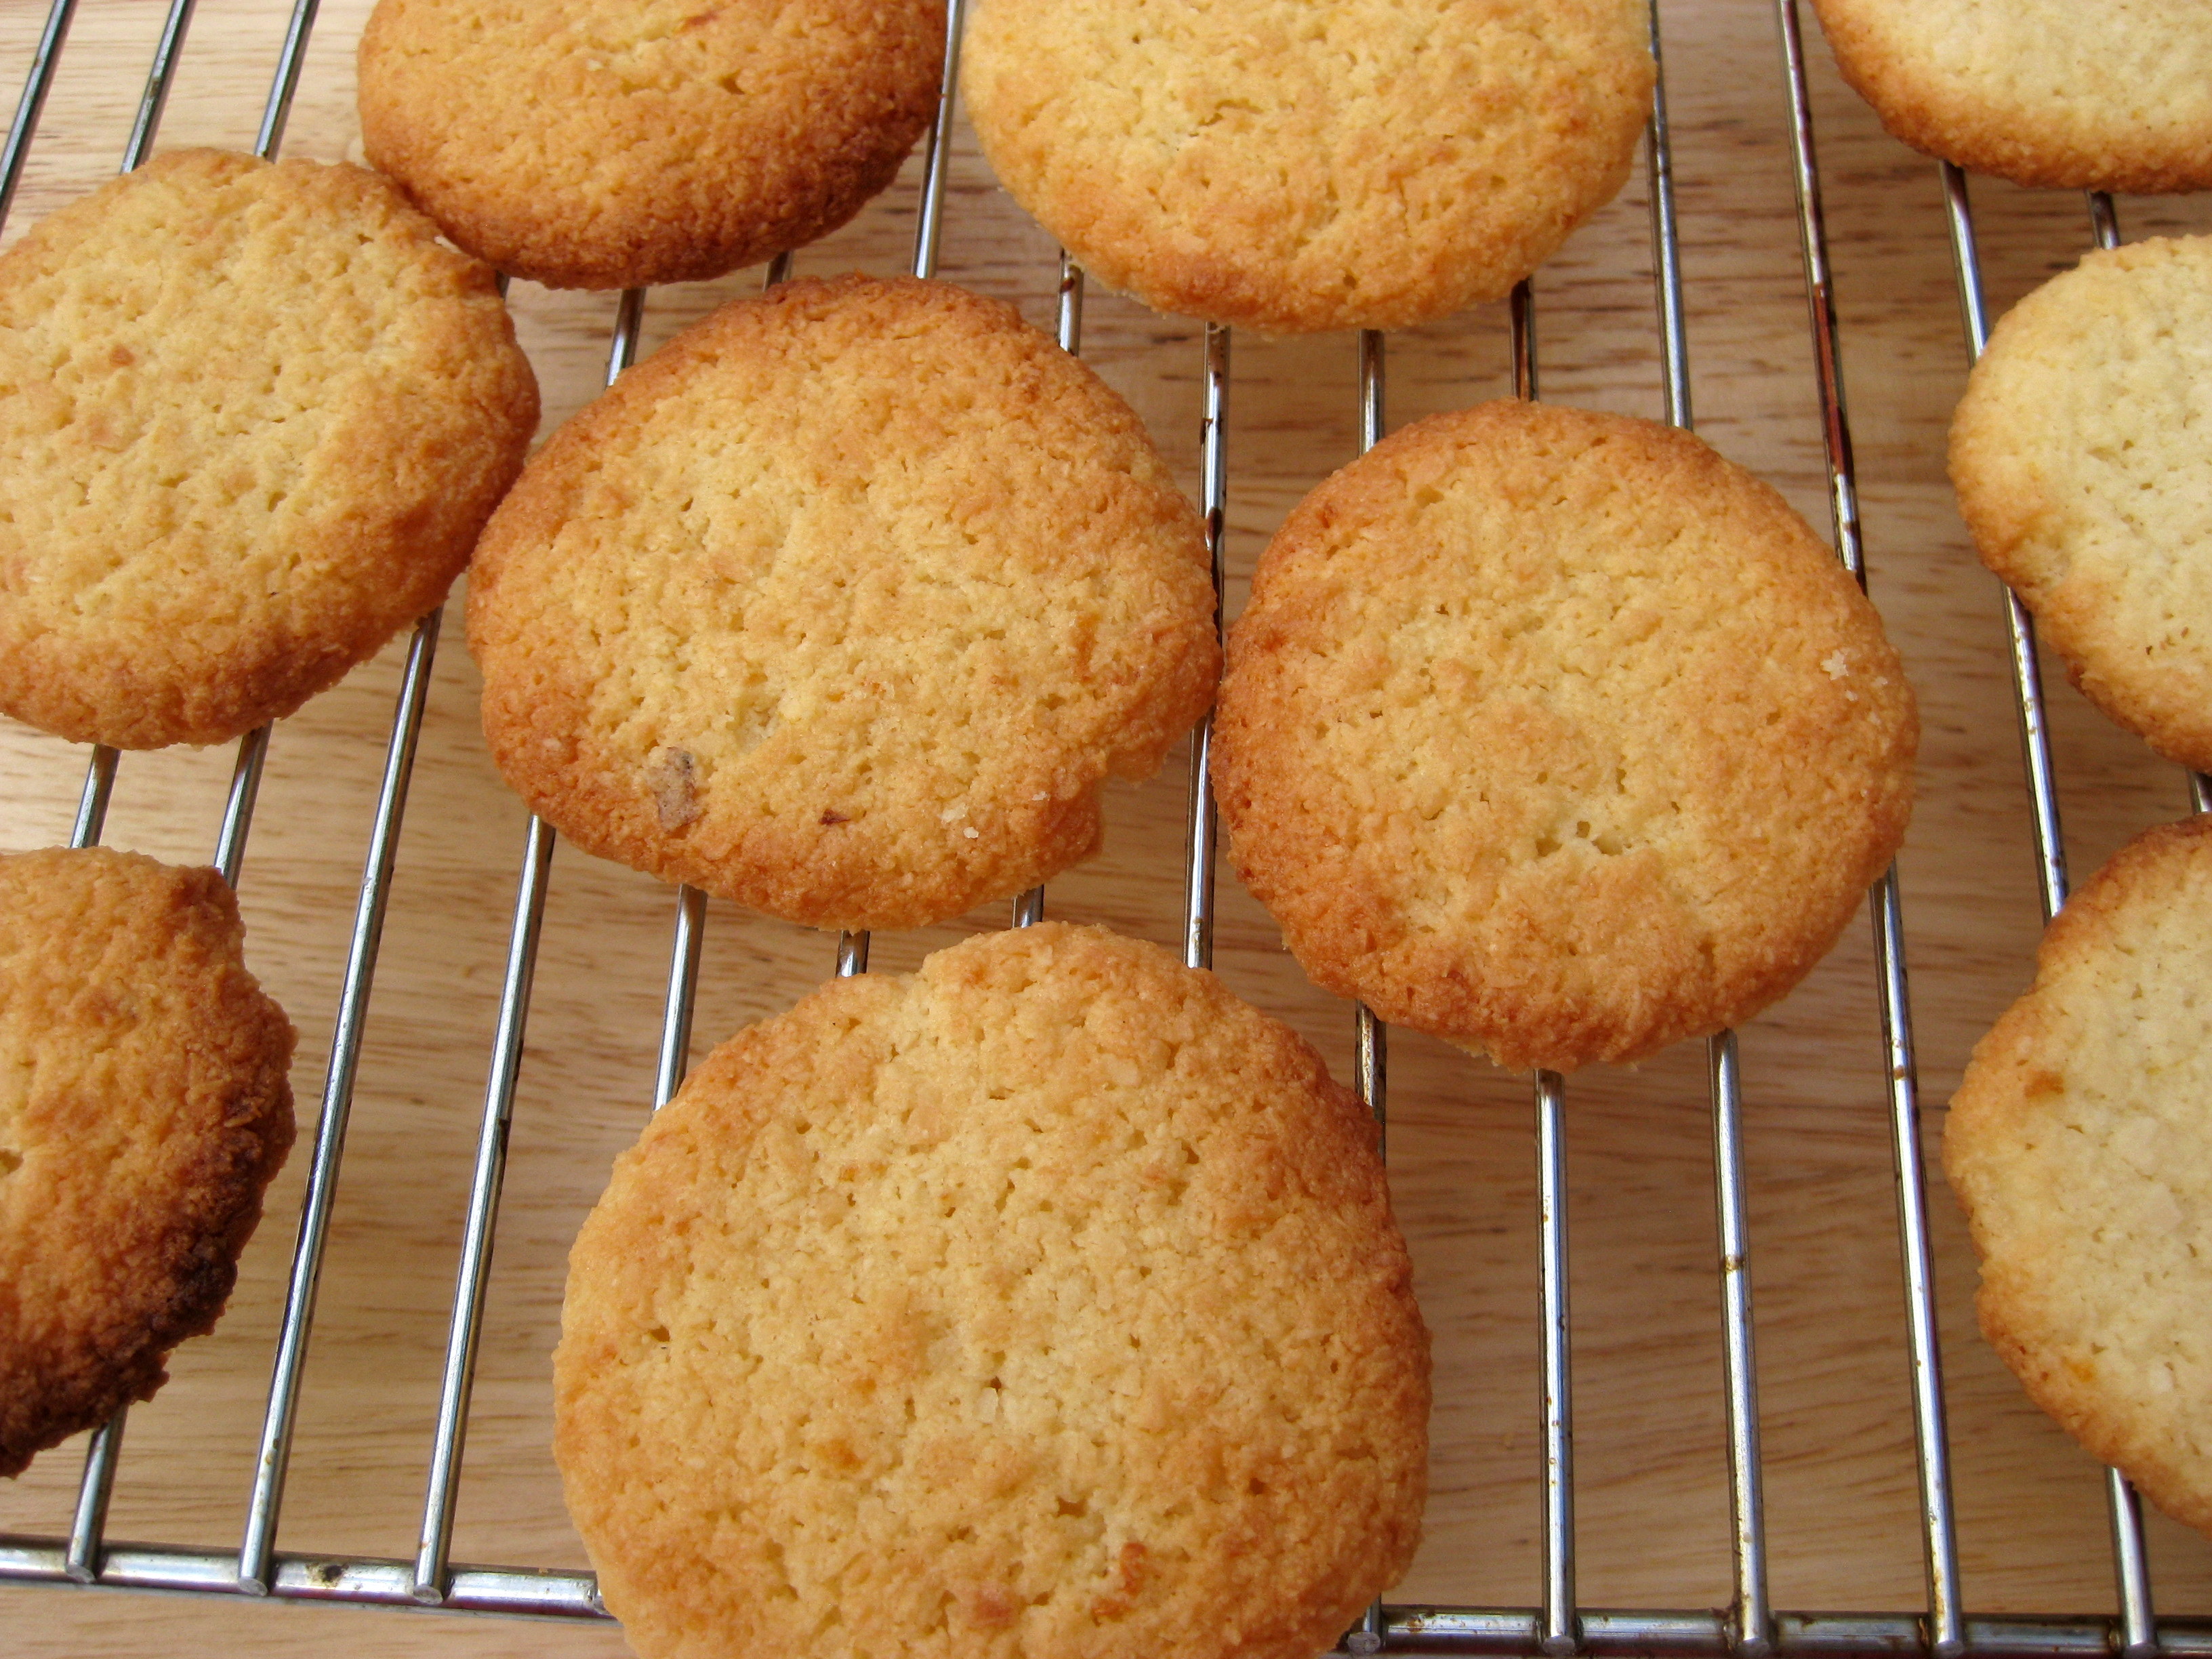
Gluten-free lemon cookies
1¼ cups almond meal
½ cup desiccated coconut
½ tsp baking powder
¼ tsp salt
1/3 cup caster sugar
1 egg
3 tbsp coconut oil, melted
½ tsp vanilla extract
Zest and juice of a lemon
Mix together the almond meal, coconut, baking powder, salt and sugar. Zest the lemon and mix well, making sure there are no clumps.
In a separate bowl, whisk the egg until fluffy and doubled in volume, then whisk in the coconut oil, vanilla extract and lemon juice.
Add to the dry ingredients and mix until combined.
Place in the fridge and chill for at least 30 minutes.
Preheat the oven to 200C. Remove the dough from the fridge and shape into flat 7cm discs. These will relax a little more than the chocolate chip cookies, so leave some room in between.
Bake for 7-10 minutes or until edges are brown. Remove and allow to cool on the tray.
These cookies should be eaten within two days. Not because they go bad or anything, but even in an airtight container they start to go soft, sticky and chewy.
My beautiful sister is a medical doctor, yoga teacher and busy business owner who, in addition to being an all-round nice person and a luxury handbag addict, runs a holistic health programme based on a blend of science and Eastern philosophy. Through the process of thought, movement, physical care and spiritual nourishment, the Global Goddess Project aims to encourage people to live healthier, more fulfilling lives.
And what could be a better way to begin that life than with oatmeal?
It takes just five minutes to make oatmeal.
Oatmeal is one of those beloved breakfast stalwarts you probably grew up with. On cold wintry days before the house had quite lost its chill, I would shiver my way into the kitchen and scant minutes later, sink into a pile of oats that warmed me from the inside out. It was not quite enough to make up for the fact that I was no longer snuggled under my doona, but it was a comforting consolation.
Hay there. Remember us?
If you need further motivation to embrace oatmeal, just think about the fact that oats are one of the best foods you could possibly eat. Oats are high in insoluble and soluble fibre, including a specific type of soluble fibre called beta-glucans, which are proven to lower LDL cholesterol and reduce the risk of heart disease. They’re low-GI, which means they are digested slowly and are an excellent choice for diabetics.
Oh, and they’re naturally gluten-free. More oats for everyone, I say!
If you’re looking for a breakfast that you can have on a detox, low-stress or immunity-boosting diet, look no further. The almond milk makes it dairy-free and the blueberries, which are high in vitamins C and K as well as cancer-fighting flavonoids, are tasty as well as being extremely good for you.
So take five minutes at the start of your day to treat yourself well. Don’t you deserve it?
It’s like a big hug at breakfast.
Oatmeal with almond milk
1 cup rolled oats
1 cup water
1 cup unsweetened almond milk
1 tbsp honey
Small handful blueberries
Place the oats and water in a saucepan over a medium heat, stirring until the water has been absorbed.
Add the almond milk and cook the oatmeal for 4 minutes, or until the milk has been absorbed and it achieves a thick consistency.
Stir through the honey and blueberries. Oh, and don’t forget to soak the oatmeal pan immediately – removing hardened oatmeal is a soul-destroying experience.
A few notes about oats. Rolled vs steel-cut: the difference here is in the process. Rolled oats are de-husked, steamed, rolled and then lightly toasted. Steel-cut oats are chopped before steaming so they retain bits of the bran layer. They’re chewier, taste nuttier, have a slightly lower GI profile and typically take longer to cook (about 30 minutes on the stovetop). You can pre-soak them overnight to reduce the cooking time if you want to use steel-cut oats.
Gluten-free: oats are naturally gluten-free, but can be cross-contaminated during growing if they’re next to wheat fields. If you’re gluten-intolerant, you can buy gluten-free oats that have been certified through growth and production as being free from gluten.
Cookies are one of life’s bite-sized little pleasures. I’m not even sure it matters, sometimes, what kind of cookie it is or even if it’s very good or elaborate or artisanal or experimental. On long days filled with an endless list of chores, on cranky days with befuddling annoyances, on rainy days with grey skies, what’s important is taking a minute to sit down with a cookie and a cup of tea and acknowledging that you deserve this.
You really do.
When was the last time you had a chocolate chip cookie?
I’m all for weird and wonderful flavours and bold, daring culinary contortions, but sometimes I crave a very simple treat: a chocolate chip cookie. Not one laden with three kinds of chocolate and cocoa powder everywhere, either, like you’re biting into an entire Cadbury’s factory. Standard, plain chocolate chip. It’s the simple things that are often the best.
Ready to bake
Of course, I couldn’t go very long without trying to find a gluten-free solution for my coeliac buddies, and happily I didn’t have to search very far: Sprouted Kitchen has crafted a wonderfully easy recipe that uses very few ingredients and makes delicious gluten-free chocolate chip cookies (the Minimalist Baker captures it beautifully here).
I’m not going to say that these cookies could possibly be better than regular cookies. But we both know that I’ll be thinking it, quietly, over here in the corner of my little kitchen.
Enjoy! xx
Everyone deserves these.
Gluten-free chocolate chip cookies
1¼ cups almond meal
½ cup desiccated coconut
¼ cup dark chocolate, chopped into small pieces
½ tsp baking powder
¼ tsp salt
1/3 cup muscovado sugar
1 egg
3 tbsp coconut oil, melted
½ tsp vanilla extract
Mix together the almond meal, coconut, chocolate, baking powder, salt and sugar.
In a separate bowl, whisk the egg until fluffy and doubled in volume, then whisk in the coconut oil and vanilla extract.
Add to the dry ingredients and mix until combined.
Place in the fridge and chill for at least 30 minutes.
Preheat the oven to 200C. Remove the dough from the fridge and shape into 7cm discs. They don’t flatten very much during cooking, so how they go into the oven is pretty much how they’ll stay. They do relax slightly, though, so make sure you leave a little room between the discs.
Bake for 7-10 minutes or until edges are brown. Remove and allow to cool on the tray.
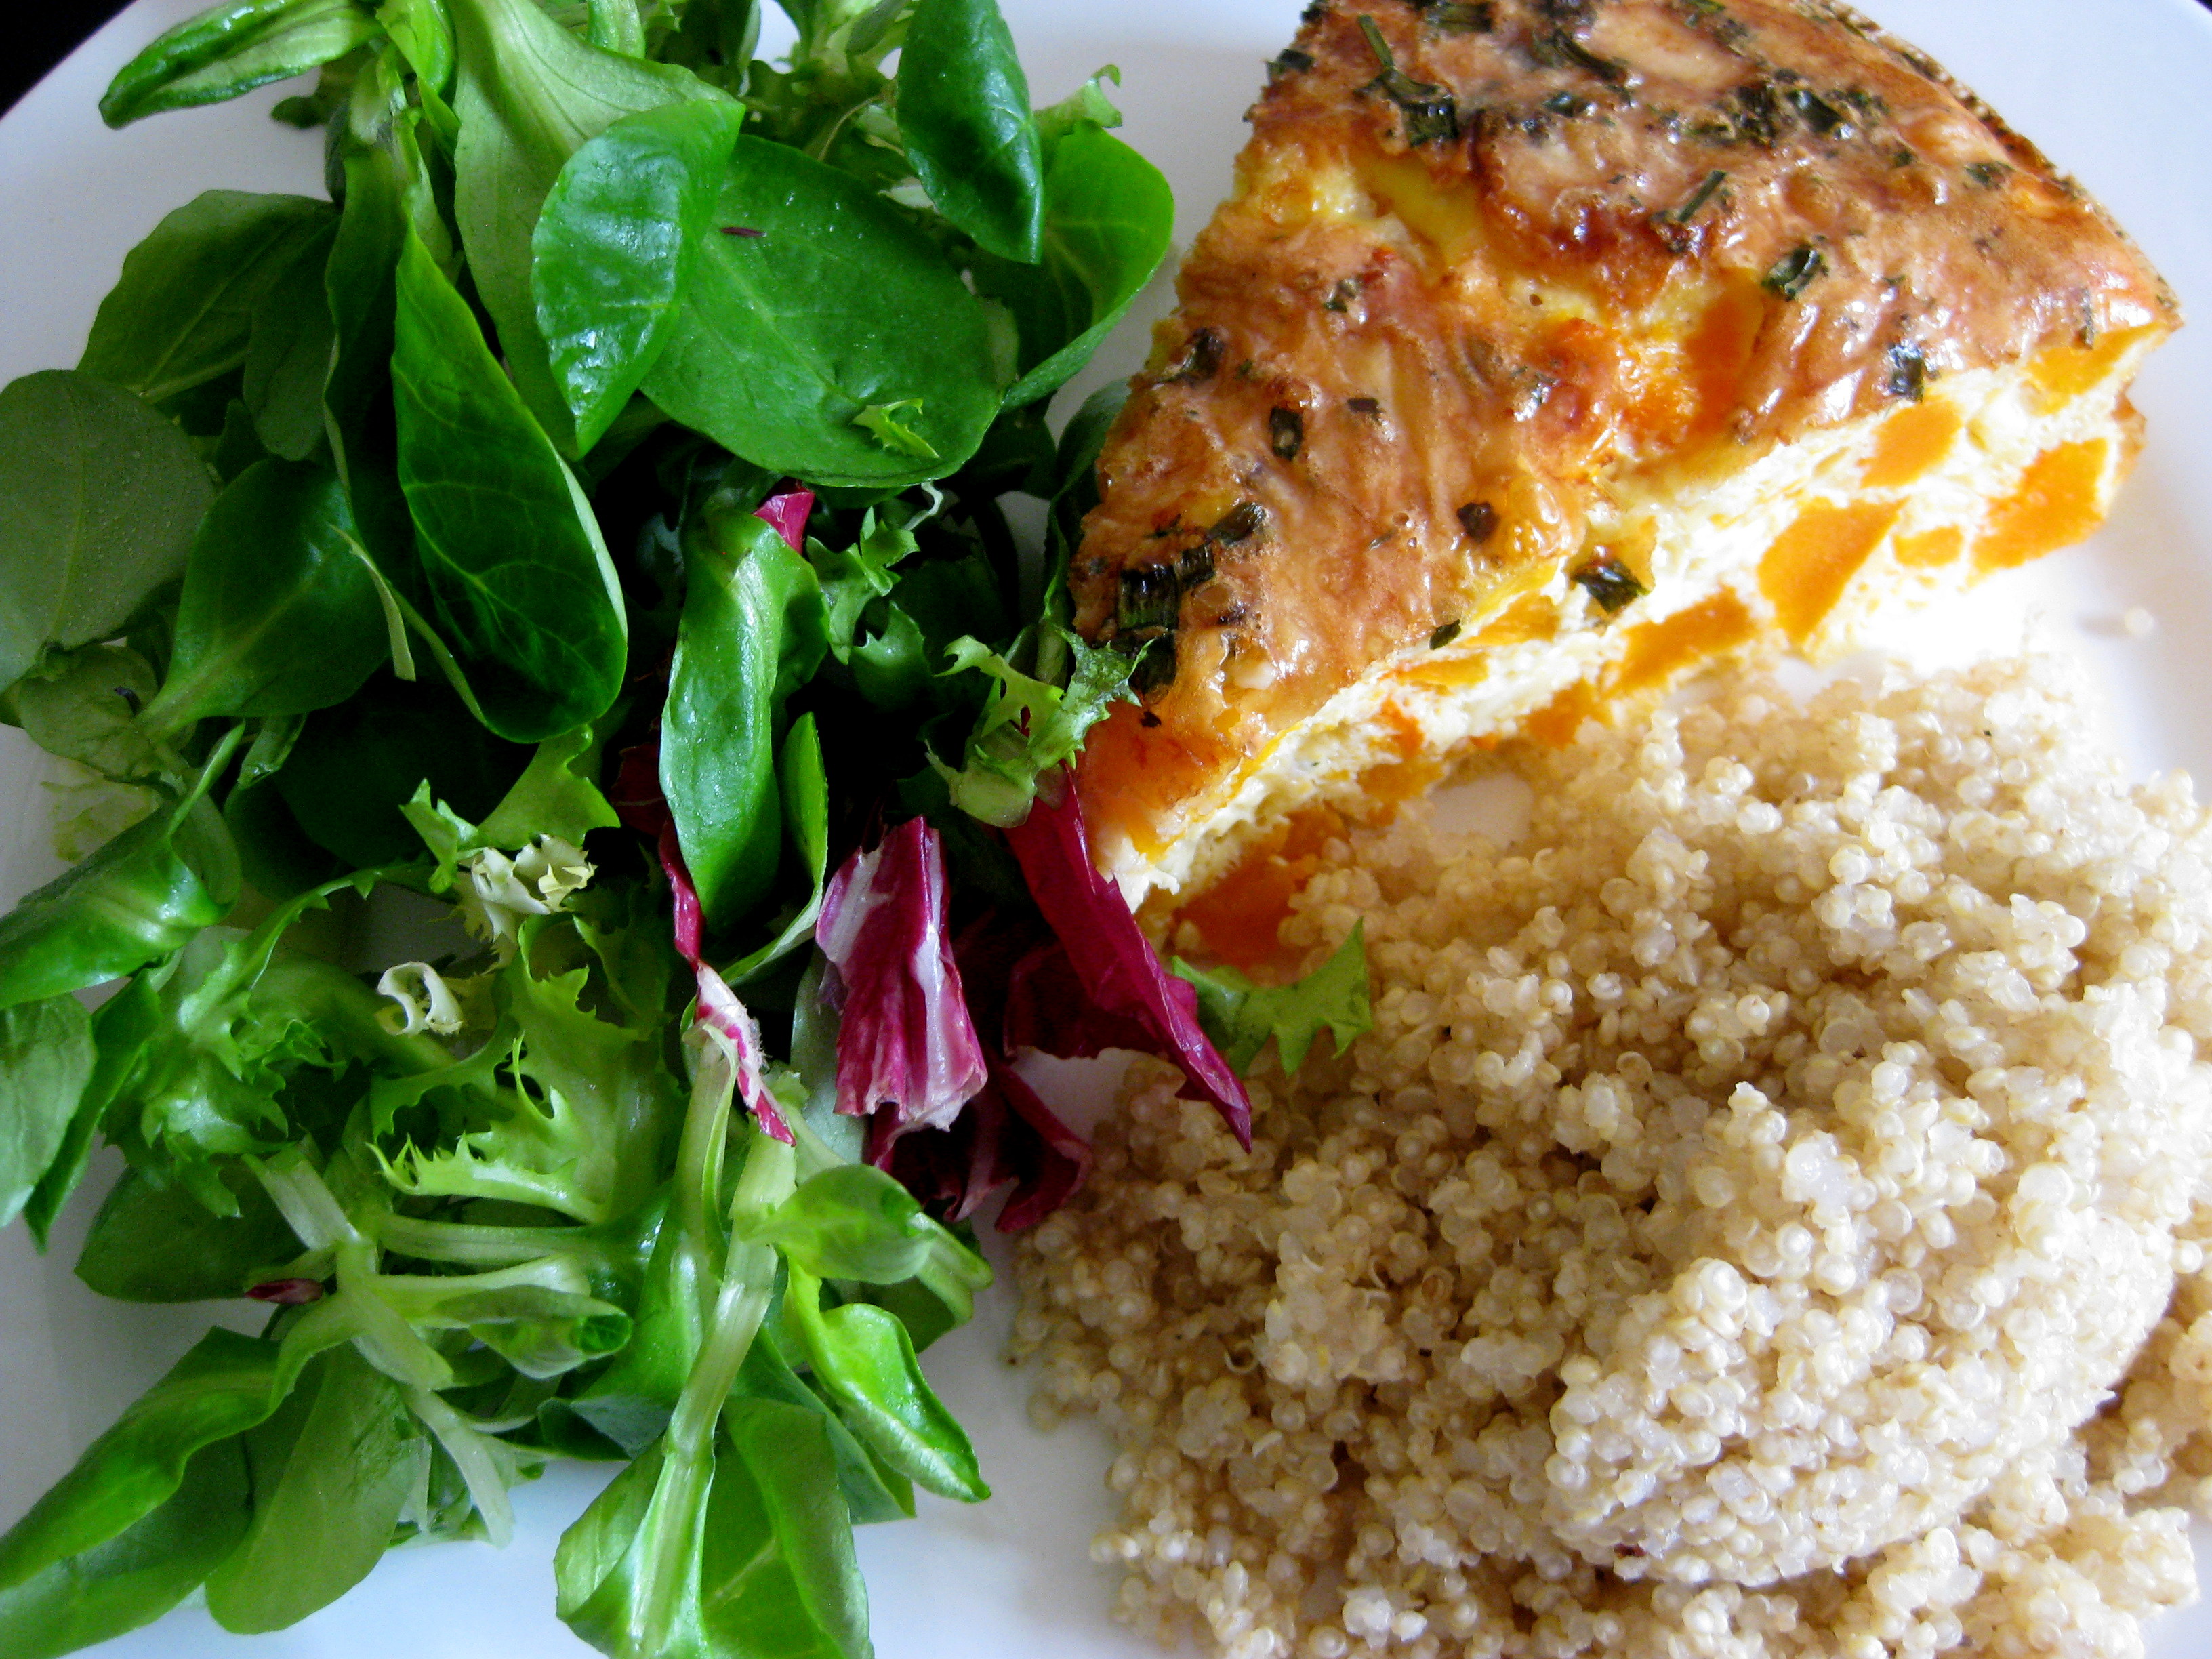
Frittatas are gloriously summery. Sweet and eggy, deliciously filling and incredibly versatile, frittatas are this lovely golden yellow that always makes me think that they’ve found a way to catch Italian sunshine and smuggle it back for the rest of us. Somehow, despite being basically a collection of eggs and odds and ends, they’re unfailingly cheerful. I challenge you to stare at a frittata and not feel uplifted by its simple goodness.
It’s pretty difficult to stray too far off the path with a frittata, even if you’re not following a recipe. They’re the kind of thing you vaguely know how to make almost instinctively, and they’re fairly forgiving, so they’re the ultimate in stress-free cookery. What’s not to love?
I love making frittatas with sweeter vegetables like pumpkin and zucchini to bring out the natural sweetness of eggs. You can serve frittatas hot or cold and they’re great accompanied by a fresh salad, beans or some quinoa.
Serve with salad and quinoa.
Pumpkin and cheddar frittata
1 x medium butternut squash
200g cheddar cheese, half grated, half cubed
9 eggs
Small bunch of chives
Salt and pepper
Cut the butternut squash into small chunks and roast in a 200C oven for around 20 minutes, or until soft.
Take it out and remove the skin – I find it easier and faster to do after it’s been cooked, but you do lose a little more pumpkin flesh.
Chop into cubes and place into a cake tin (one that doesn’t leak is helpful!) with the cubes of cheddar.
In a bowl, beat the eggs until light and fluffy, then snip the chives in and add a good strong pinch of salt and white pepper. Stir in the grated cheese and pour the lot into the cake tin.
Once upon a time in a vegetable patch far far away, a pumpkin fell in love with a potato. Their eyes met across a crowded plot and after a sweepingly romantic courtship amidst the tubers and the squash, they got married and started a happy little Plantae family.
And that, boys and girls, is how we came to have sweet potato.
Brilliant rows of delicious low-GI goodness
Okay, so the story isn’t at all scientifically sensible or even morphologically accurate, but it’s as good an explanation as any as to how sweet potatoes manage to combine the best elements of two wonderful vegetables: the caramel-toned taste, gently yielding yet toothsome texture and brilliant orange hue could only be a result of true love.
We never grew up eating sweet potato. I vividly remember my sister cooking them for us once, baked whole in the oven with cinnamon sugar and butter, which was sadly far too sophisticated for my twelve-year-old tastebuds. I didn’t like them, didn’t understand how they could be starchy-but-not-really and sweet-but-not-really, and it all seemed to me to be a rather confusing, unwelcome distraction from my love of potatoes.
So I have a lot – a lot – of catching up to do.
Ready for the oven
And yes, it is really pushing it to call this a recipe, but it’s how I finally came to understand sweet potatoes in all their glory. I like to enhance the sweetness of the potato with brown sugar, and the savouriness with smoked paprika. If I want to go crazy with the complexity of flavours, I’ll finish it off with a sprinkling of sea salt before serving to create a sweet-salty-savoury mouthful, slightly crispy on the outside and soft on the inside – the perfect accompaniment to pulled pork and coleslaw.
And they all lived happily ever after.
Baked sweet potato wedges
1kg sweet potatoes, cut into wedges
1 tbsp oil
1 tbsp brown or muscovado sugar
1 tsp smoked paprika
Toss the wedges in the oil, sugar and paprika.
Bake the wedges at 200C for 45 minutes-1 hour, until golden and the edges turn crisp.
You know you need serious help when you’re rifling through the vegetable bin on a mad search for a ‘photogenic carrot’.
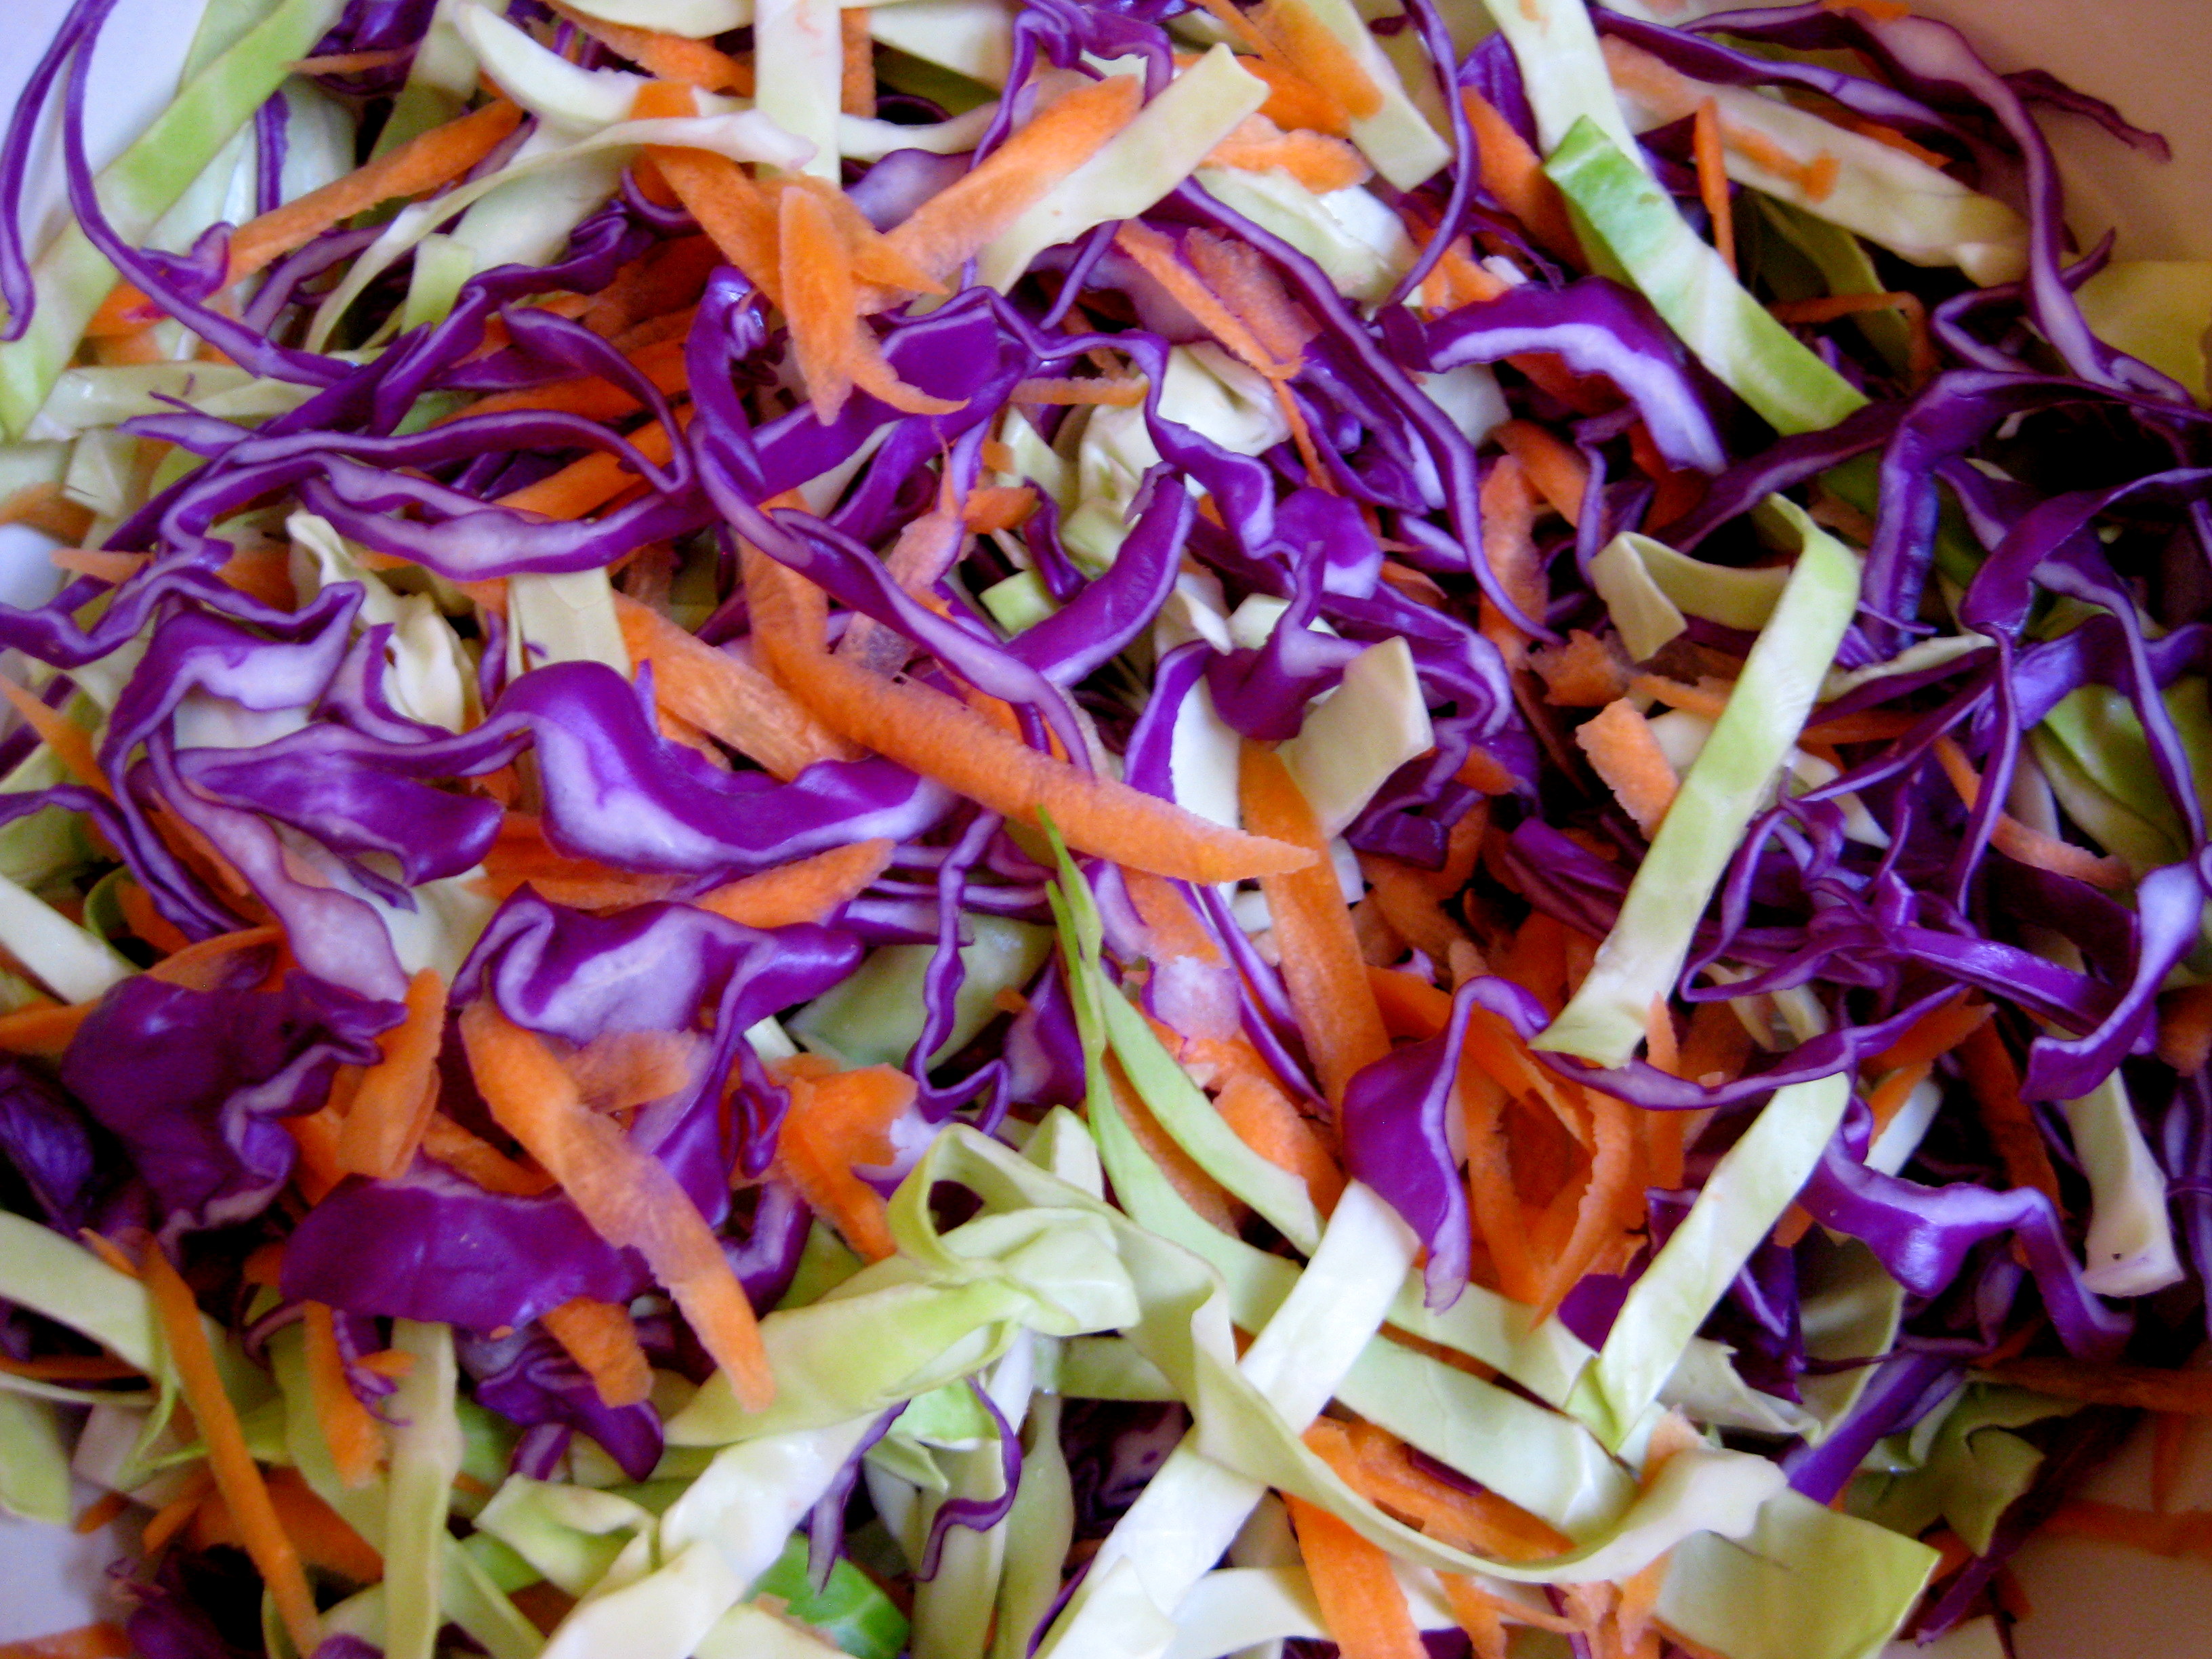
I get the feeling that it’s not quite cool to love cabbage. I mean, there’s the trendy purple sprouting broccoli, showy rainbow collards and the ultra-chic kale, but you don’t really hear about artisanal cabbages, do you? And that’s a little sad. It always strikes me as somewhat underappreciated and overlooked; a steady and consistent performer, but hardly ever invited to be the star of the show.
Except, of course, in coleslaw.
Coleslaw is one of those mad concoctions that has the rather unexpected capacity to blow your culinary socks off. It’s a riot of colours and textures, a positive festival of flavours. Homemade coleslaw is a world away from its commercial counterpart, which tends to be a damp and colourless collection of mystery vegetables swimming in a sort of mayonnaise soup. If you have the chance, it’s worth the extra effort.
It’s time to celebrate the humble cabbage, don’t you think?
Since it’s so often served with meat (like the weekend’s pulled pork), I think it particularly important that it be able cut through that rich density with a bright, crisp zingyness.
This mayo-free coleslaw is all zesty freshness and isn’t remotely heavy. You can serve it as a traditional side dish, but in my opinion it also stands on its own as a delicately balanced, intensely crunchy salad.
Mayo-free coleslaw
For the slaw:
4 x spring cabbage leaves, finely sliced into ribbons (you can use a quarter of a white cabbage if you prefer)
Quarter red cabbage, finely sliced into ribbons
Half a red onion, very finely sliced
1 carrot, grated
Juice of half a lemon
For the dressing:
4 tbsp olive oil
Juice of a whole lemon
1 tbsp honey
Half tbsp wholegrain mustard
To take the punch out of the onion, squeeze half a lemon over it and leave it to soak as you get on with the other ingredients. You can skip this bit if you’re fond of the taste.
In a large bowl, toss all your salad ingredients.
In a separate bowl, whisk the salad dressing ingredients together (you can also shake in a jar). The juice output of lemons varies, but you’ll know when you’ve got it right because it will form a light, citrusy emulsion. Season with a pinch of salt, or to taste.
Pour the dressing over the coleslaw and mix well. I tend to like mixing it ahead of time so the cabbage has time to lose a little of its rawness. The dressed or naked salad keeps well overnight.