shakshuka

shakshuka - for breakfast, lunch or dinner.
Shakshuka – for breakfast, lunch or dinner.

Breakfast is a great meal. Roll out of bed, spend the first few minutes of each day yawning, stretching, and then you can get to thinking about cheerful items like freshly-brewed coffee, fruit, cereal and the all-important question of what breakfast spread you’ll have. Is it a Nutella morning? Will there be peanut butter in my life today? And surely every day is a Vegemite day…

(Between you and me, sometimes toast is the only reason I get out of bed.)

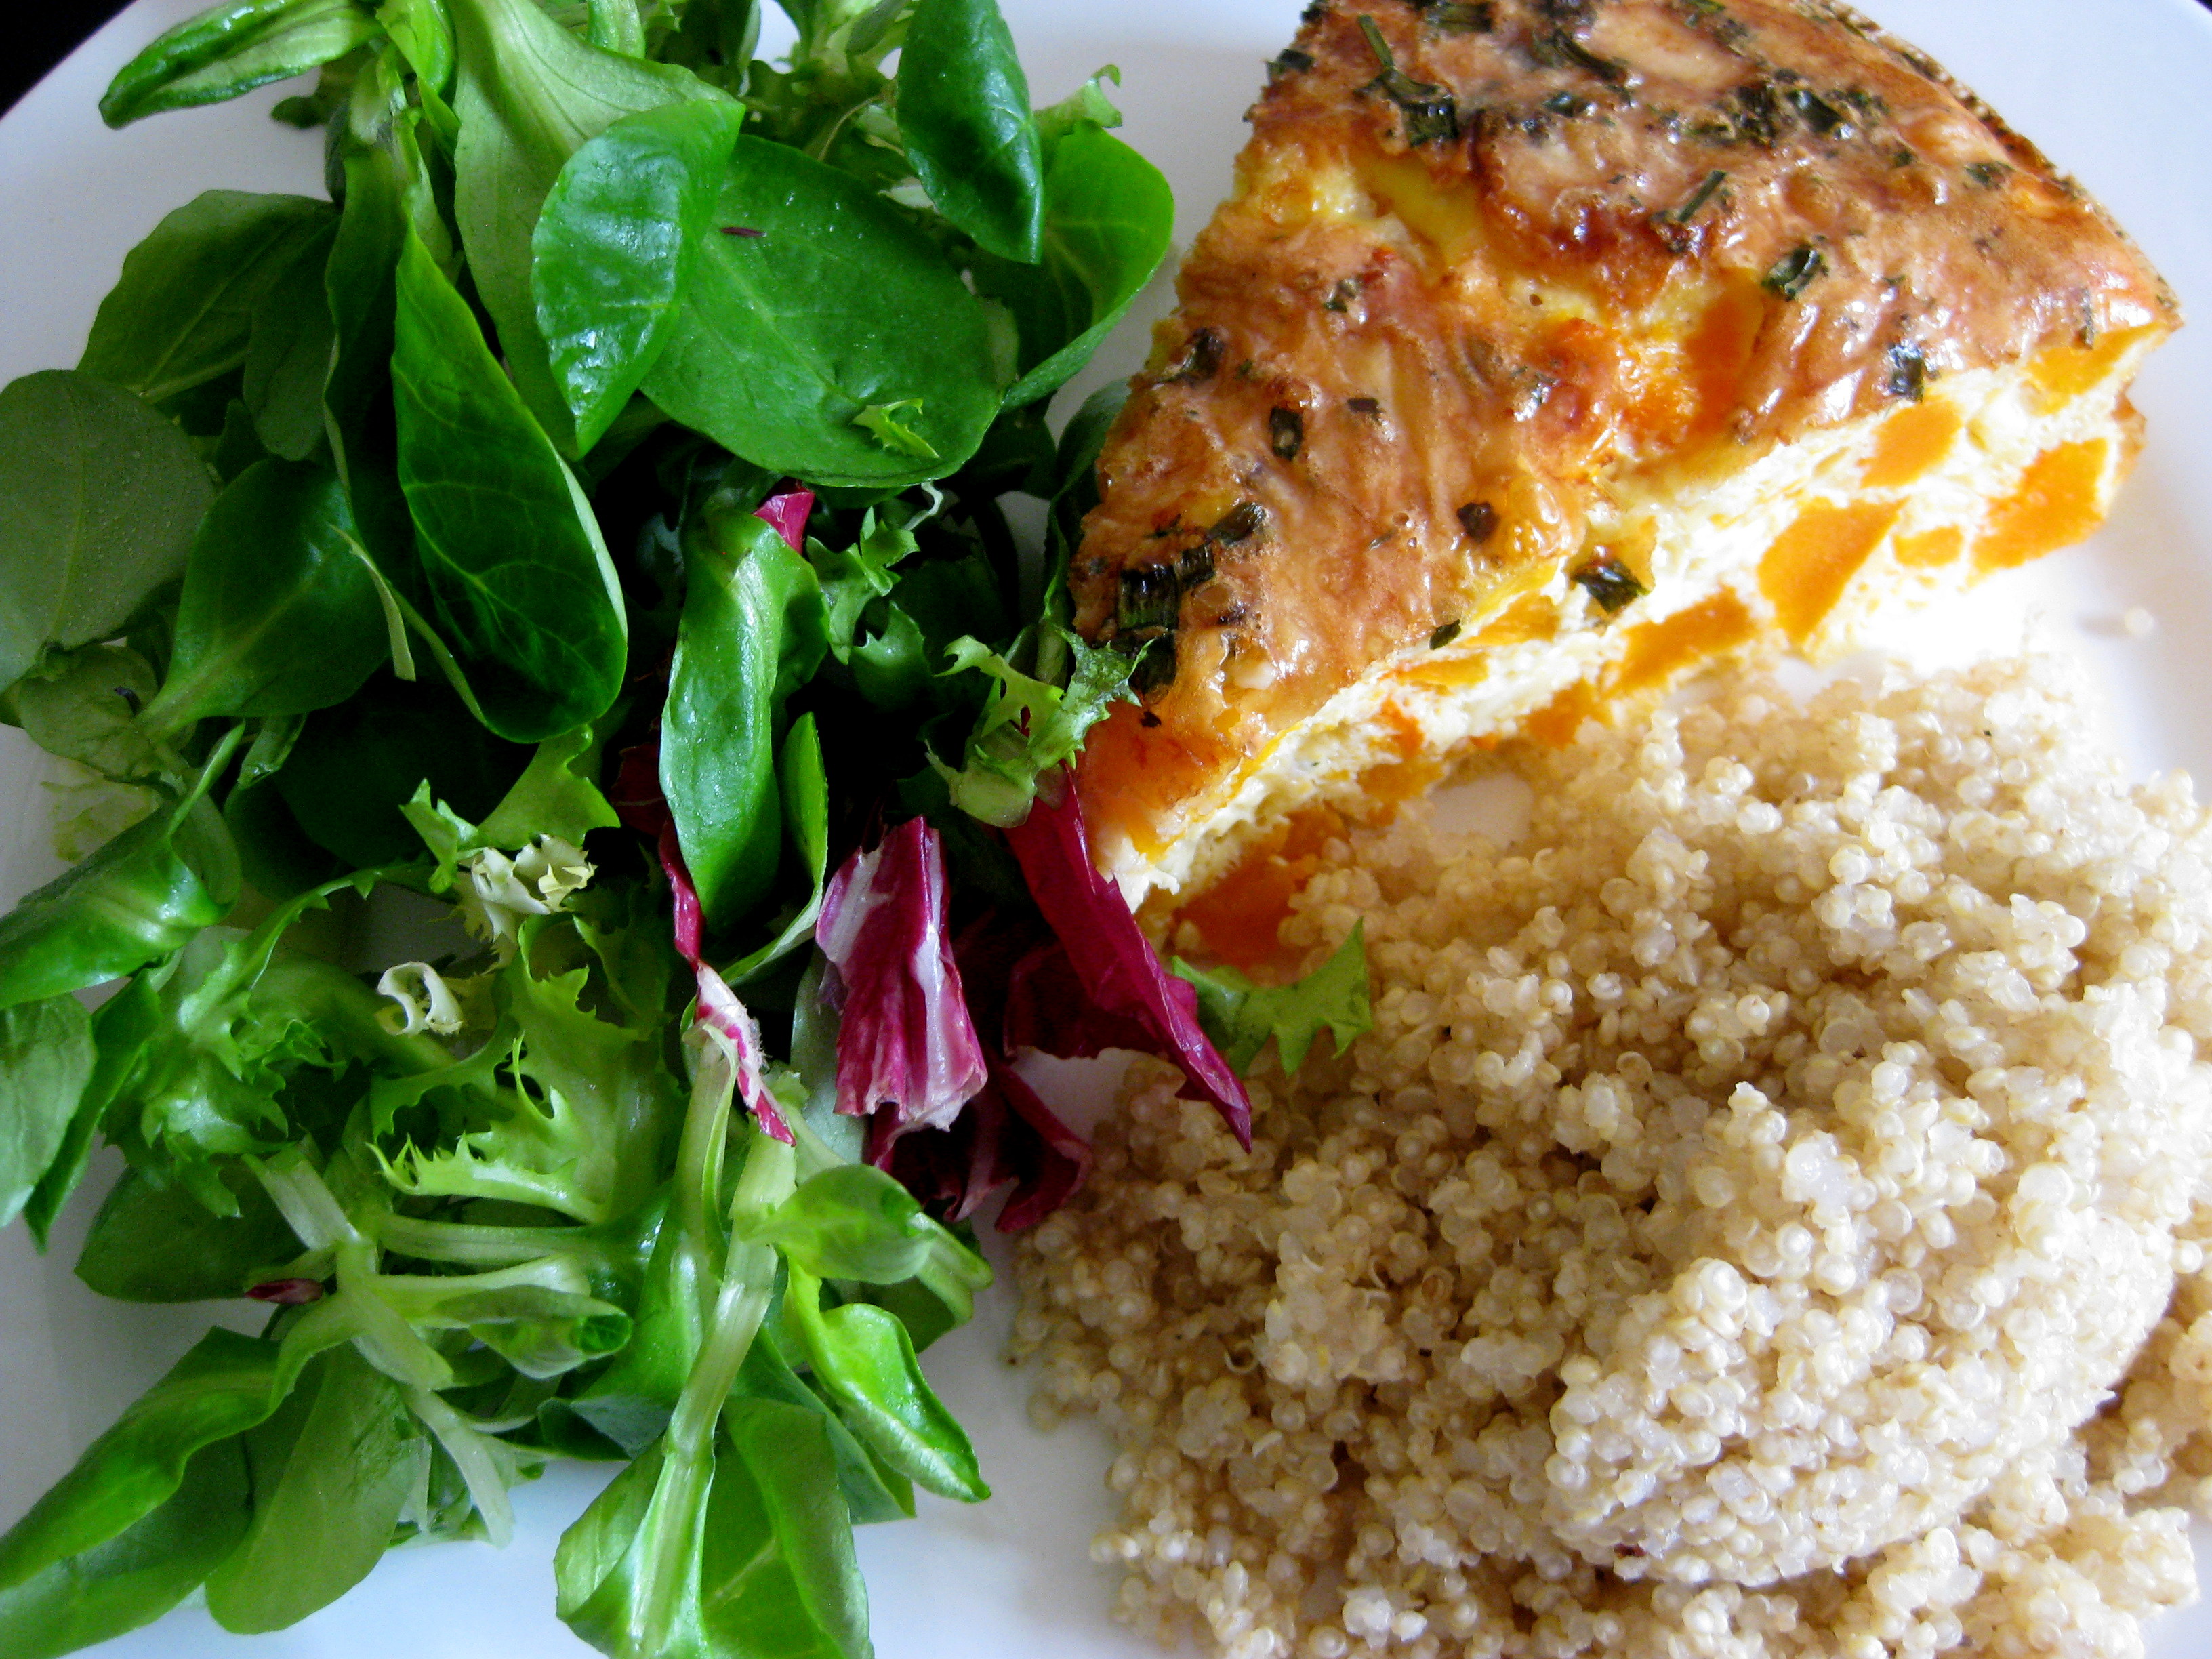
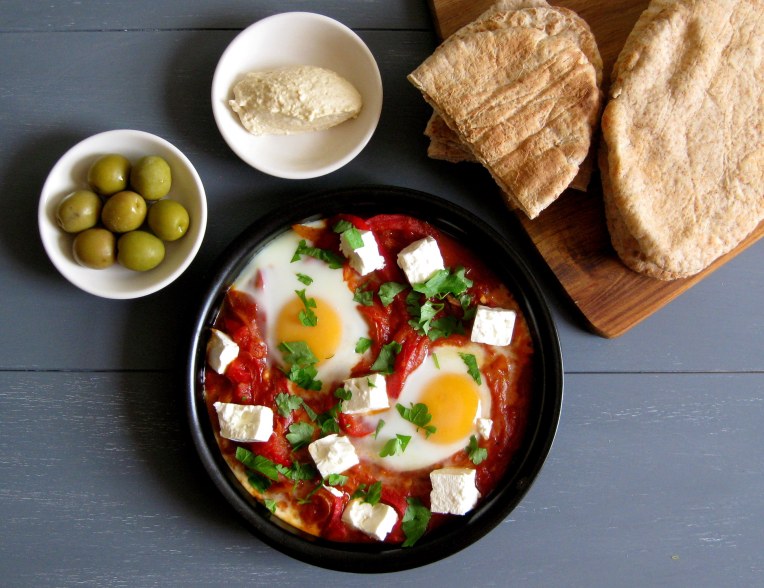
Weekend breakfasts are especially joyful, because eggs get involved. I’m a huge fan of including eggs in breakfast, and while the full English is a force to be reckoned with, I think the Israelis have it down pat. Imagine kickstarting the day with spiced tomatoes and peppers, eggs with runny yolks and custardy whites, creamy hummus and sharp olives and crusty bread. Yes.

shakshuka
Versatile. Simple. Nutritious. What’s not to love?


Shakshuka is thought to have originated in Tunisia, and is popular throughout the Middle East and in Israel, where it is commonly eaten for breakfast. In its simplest form, the dish is made by poaching eggs in a sauce made from tomatoes, onions and peppers. Other versions include harissa, cumin, salty cheeses like feta, or a spicy sausage like merguez.

It’s a perfect breakfast dish, but also works well at lunch and dinner. The meal scales really well and it’s incredibly easy to prepare. And as if you needed another reason to love shakshuka, the dish is low in fat, high in vitamin C and lycopene, and is said to be an excellent hangover cure.

Plus, there’s something immensely, greedily satisfying about plunging your pitta into the heart of the pan, and watching the golden-yellow yolk mingle with the fiery sauce. Oh, you so want to make this.

These delicious Queen Green olives are the perfect accompaniment.

Shakshuka (serves 2)
For the tomato sauce
1 onion, finely sliced
2 red or yellow capsicums, sliced
2 x 400g cans tomatoes
4 cloves garlic, chopped
1 tsp cumin
1 tsp paprika
½ tsp chilli flakes
Pinch sumac

To serve
2 eggs
Parsley
Feta (optional)

The sauce can be made well in advance. Fry the onion in a little olive oil, adding salt to stop it from burning. After a minute, add the peppers and fry for three minutes.

Add the rest of the sauce ingredients and simmer over medium-high heat for 10 minutes. Taste and adjust the seasoning, then simmer for another 10 minutes.

To make the shakshuka on a stovetop, put the (warm) sauce into a frypan and make two wells for the eggs. Crack the eggs into the wells and simmer for 5-7 minutes, depending on how runny you like your eggs.

To make the shakshuka in an oven, put the (warm) sauce into an ovenproof dish like a shallow pie dish, and make two wells for the eggs. Crack the eggs into the wells and bake in a 180C oven for 10-15 minutes, checking it at 7 minutes.

Top with parsley and cheese, and serve with pitta bread, olives and hummus or tahini.

Advertisement

pumpkin & cheddar frittata

It's sunshine in cake form.
It’s sunshine in cake form.

Frittatas are gloriously summery. Sweet and eggy, deliciously filling and incredibly versatile, frittatas are this lovely golden yellow that always makes me think that they’ve found a way to catch Italian sunshine and smuggle it back for the rest of us. Somehow, despite being basically a collection of eggs and odds and ends, they’re unfailingly cheerful. I challenge you to stare at a frittata and not feel uplifted by its simple goodness.

It’s pretty difficult to stray too far off the path with a frittata, even if you’re not following a recipe. They’re the kind of thing you vaguely know how to make almost instinctively, and they’re fairly forgiving, so they’re the ultimate in stress-free cookery. What’s not to love?

I love making frittatas with sweeter vegetables like pumpkin and zucchini to bring out the natural sweetness of eggs. You can serve frittatas hot or cold and they’re great accompanied by a fresh salad, beans or some quinoa.

Serve with salad and quinoa.

Pumpkin and cheddar frittata
1 x medium butternut squash
200g cheddar cheese, half grated, half cubed
9 eggs
Small bunch of chives
Salt and pepper

Cut the butternut squash into small chunks and roast in a 200C oven for around 20 minutes, or until soft.

Take it out and remove the skin – I find it easier and faster to do after it’s been cooked, but you do lose a little more pumpkin flesh.

Chop into cubes and place into a cake tin (one that doesn’t leak is helpful!) with the cubes of cheddar.

In a bowl, beat the eggs until light and fluffy, then snip the chives in and add a good strong pinch of salt and white pepper. Stir in the grated cheese and pour the lot into the cake tin.

Bake in a 200C oven for 40 minutes.

chocolate chip hot cross buns

A delightful little Easter treat.

It’s the end of the Lenten season, which always means hot cross buns.

When I was little, I liked the delicately spiced buns, but hated the sickly sweet hit of the raisins and currants. It would take me ages to eat one because I would have to pull it apart, picking out the fruit and eating the bread. Occasionally I would get impatient and try to eat too much at once, accidentally biting into a fat, disturbingly squishy saccharine pod or a slightly bitter piece of peel. I would have given up on them altogether, but there’s something very festive and special about the scent of a warm hot cross bun wafting through the house.

Chocolate chip hot cross buns: all fun, no fruity fuss.

It was a glorious day when Baker’s Delight introduced chocolate chip hot cross buns. To me, it’s the ideal substitute since the cinnamon and chocolate go together perfectly and there’s no unexpected fruit bombs going off where they shouldn’t be.

I’m completely new to making bread, which always makes for a few nerves. I tried my best to tinker with recipes, playing with wholemeal ratios, types of sugar and quantities of butter in an effort to make them healthier, but eventually I found that it’s best not to mess too much with hot cross buns – you just won’t get the same experience. Maybe someday I’ll be comfortable enough with baking to perfect a recipe for wholemeal low-sugar butter-free hot cross buns, but for now I’m going to sit back and enjoy a sweet treat.

Happy Easter!

For who can resist a hot cross bun, still warm from the oven?

Chocolate chip hot cross buns (makes 12)
For the buns:
1 tablespoon dried yeast
2 tablespoons of honey
100ml warm water
100ml warm milk
450g plain flour
2 teaspoons mixed spice
2 teaspoons ground cinnamon
1 teaspoon salt
50g caster sugar
1 egg
50g melted butter
200g dark chocolate chips
For the crosses:
50g flour
3 tablespoons water
1 teaspoon vanilla extract (optional)
For the glaze:
2 tablespoons sugar
2 tablepoons water

Dissolve the honey in 100ml hot water and 50ml milk. Make sure the liquid is comfortably hot and add the yeast, covering it with a clean tea towel. Leave for 5 minutes until it forms a good froth on the surface.

Meanwhile, sift the flour, sugar, salt, spices and chocolate chips together in a large bowl and make a well in the centre.

When the yeast mix is ready, pour it into the well with the egg, melted butter and 50ml of warm milk. Mix gradually until it forms a rough dough, then turn it out onto a clean surface.

The rough dough
The rough dough

Knead for about 7 minutes or until it is smooth and elastic.

Watching dough come together is kind of magical.
Watching dough come together is kind of amazing.

Place the dough into a lightly oiled bowl and cover with a cloth, leaving it in a warm spot in the kitchen. Leave until it doubles in size (takes about an hour).

Take the dough and knead it back to its original size, then cut it into 12 balls. Score the tops in the shape of a cross and place into a deep baking tray lined with baking parchment. Cover and leave for 25 minutes.

Meanwhile, make the crosses by mixing the flour with the water and vanilla. Roll into strips and attach to the top of the balls by wetting them slightly.

Bake at 190 degrees for 20 minutes.

Just before you pull them out of the oven, you can make the glaze by gently heating the sugar and water until it forms a syrup. Brush the buns with the glaze while they’re still warm.

pancake saturday

What's your favourite pancake topping?
What’s your favourite pancake topping?

Saturday is undoubtedly my favourite day of the week. Blissfully free of the Monday to Friday grind and yet lacking those Sunday blues that can descend on the day-before-you-go-back-to-work, Saturday is a friend that brings with it a sleep-in, morning coffee and a deep sense of relaxation.

To me, there’s no better day to have pancakes.

Pancake Saturday may not be as famous as Shrove Tuesday, but since I work full time and have neither the ability nor the desire to get up at 6am to make pancakes on the appropriate day, I postponed. And oh, the wait was worth it.

I defy you to stop at just one.

I’ve made gluten free pancakes before, but this recipe, taken from Nigella, is strictly traditional; it makes thick, sponge-like American pancakes and I even used white flour and everything (I did substitute dark muscovado sugar for the white sugar, but that was purely a matter of what I had in the cupboard).

There are rumours that you can make a pretty darn good pancake with wholemeal flour, and that’s what I’ll be trying next.

A veritable cascade of syrup.
A veritable waterfall of syrup.

American pancakes
225g plain flour (1½ cups)
1 tbsp baking powder
1 tsp sugar
1 pinch of salt
2 large eggs, beaten
30g butter, melted and cooled
300ml milk (1¼ cups)

Take the dry ingredients – flour, baking powder, sugar and salt – and mix in a bowl.

Make a well in the centre and pour in the wet ingredients – eggs, butter and milk.

Mix together briefly and let the mixture stand as you heat the frypan. The batter will look fairly runny, but it puffs up in the pan.

Oil the pan and dollop a small amount of batter onto the surface. Wait until the surface bubbles and then you can flip the pancake and cook for a minute on the other side.

the hangover brekkie

Minimum fuss. Maximum comfort.

Let’s be honest: is there anything better than a drink or two with friends after a difficult week?

I salute those of you going through Dry January, I really do. But it seems like everyone I know is reluctant to accept the fact that the festivities of the Christmas period have passed, and have carried on merrily arranging dinners, drinks, events and celebrations all to be accompanied by vast quantities of wine or colourful cocktails.

And who am I to resist the siren call of the grain and grape?

Of course, nights out on the town don’t come without a cost, and the morning after can be a terrible, penitent affair. The food situation can be particularly tricky, with your stomach behaving like a moody teenager; one day it can rebel at the slightest hint of acid, weird textures, odd smells and adventurous tastes, the next it can protest at bland, comforting foods, beg for caffeine and yearn for oil (I inevitably wake up wanting a burger and fries).

I like this particular hangover brekkie because it manages to be comforting and plain without being boring. Also, I generally have the ingredients sitting in the fridge, which is perfect for when you can’t face the long wander down the street to the shops.

The hangover brekkie
2 slices toast
2 tbsp hummus
Half a chorizo sausage
4 eggs
Salt and pepper
Parsley (optional)

Chop the chorizo into small pieces and place in a dry pan over medium heat. Depending on the size of the slices, it can take around 2-5 minutes to cook. You’ll know they’re done when they turn a brilliant red-gold. Remove and place onto a paper towel.

Crack the eggs into a bowl, season with salt and pepper and beat. Place in the pan over a low heat and cook, dragging the spatula through the middle to scramble them. Now would be a good time to put the toast on as well.

When the eggs begin to look sloppy, add the chorizo back to the pan and cook the eggs through.

Spread the hummus on the toast or serve on the side. Top with the eggs and if you have parsley, it will add a fresh, vibrant crunch.

Last but not least, make yourself a cup of tea and think about what you’ve done, and whether there is any photo evidence you’ll need to take care of once you’re back to full strength.

haloumi omelette

haloumi omelette
The highly photogenic use-everything-up fridge omelette.

Let’s face it: everything in my fridge has seen better days.

How could I have let it come to this? Well, there’s a good reason for the very-unlike-me paucity of food in the tiny kitchen; I’m moving next week and I’m struggling to clear my cupboards to make things as simple as possible. That means the half-bags of pasta, cup of lentils, highly ambitious biryani mix, on-special kilo of chickpeas – it all has to go. I’ve been doing all sorts of odd culinary contortions (chicken bourgignon, anyone?) in an effort to use everything up.

So at the end of a determined month-long embargo on buying goods, my fridge is in a pretty sad state. What a creative and nutritional challenge!

Haloumi omelette
100g haloumi
Half a pointed pepper
3 eggs (2 yolks, 3 egg whites), lightly beaten

Chop the haloumi into small chunks (rather than the slices used in a haloumi salad). Place in a non-stick frypan over medium-high heat. If your pan is properly non-stick, you won’t need oil.

Fry the haloumi until it begins to brown. This should take around 5 minutes. Make sure you flip the pieces so both sides get browned.

Meanwhile, slice the pointed pepper into slivers. Add them to the pan once the cheese is browned, then cover with the eggs.

I am not a great omelette-maker. That perfect omelette shape eludes me, especially since I don’t have a grill to finish the top. But I make up for this by not caring in the slightest what shape my omelette turns out to be. I wait until the edges of the omelette turn pale, meaning it’s safe to flip, then I flip it with two spatulas onto its other side and give it thirty seconds. Then I slide it onto the plate, attempting to fold it in half as I go.

The haloumi is really salty, so no seasoning is required. Serve with a drizzle of balsamic if you like, and a pile of pickled baby beetroot if it’s there just waiting to be used.

perfect poachies

Breakfast: one of the three most imporant meals of the day.

There’s something very special about poaching. I think it’s mainly because it’s such a precarious process and one we generally prefer to leave to cafes with experience in that kind of thing. After all, it involves breaching the protective barrier of the shell and expecting the whites to hold together and surround the yolk in an aesthetically-pleasing fashion while you simmer it in a pan of hot water – honestly, we don’t expect much, do we?

I’m not going to get holier-than-thou about free range eggs, because it’s not as if I haven’t bowed to cost pressures and bought cage eggs before. But for poachies, there is simply no alternative. You have to use the free range kind, which have better shells so they’re less likely to explode in the pan when you boil them. They also tend to be larger, more flavoursome and upon consuming them, you achieve a nice halo effect that only comes with doing the humane thing and being able to feel virtuous about it.

Little beauties. Aren’t you gorgeous?

The other non-negotiable factor is the freshness of the egg. If you don’t have super fresh eggs – they’re not always easy to get in London – you should consider scrambling, frying, hard-boiling or half-boiling your little loved ones. Either that, or lower your expectations. The albumen in fresh eggs clings to the yolk better and will help you to achieve that nice ‘whole egg’ look. Once they’re a few days old, it begins to pull away and it makes it difficult to keep the team together.

Poached Eggs
2 large free-range eggs
Vinegar

Half-fill a pan with water and bring to a low boil. Add a splash of vinegar – don’t worry, you won’t be able to taste it. It just helps the shells not to crack when you boil eggs (incidentally, if you’re hard-boiling, the vinegar will stop the shells from splitting and leaking egg white into the pan).

Using a slotted spoon, gently lower the two eggs into the pan. Boil for 20 seconds and rescue.

Using a fork to split the shell, break one egg into a shallow dish. The white should just have begun to take on a translucent sheen.

Being an egg ain’t all it’s cracked up to be.

Make sure the water is on a low simmer – steam should be rising from the pan, but the water shouldn’t be moving very much. An occasional bubble is good. Hold the dish over the water and gently slip the egg into the pan. The way it falls is the way it sets, so be careful!

In a perfect world, every egg would poach like this.

A soft-poached egg takes approximately 2-3 minutes. If your pan is large enough and your egg seems to be holding it together nicely, do the other egg on the other side of the pan. Otherwise, cook your egg for 2 minutes and place into iced water to stop the cooking process while you take care of the other eggs. Before serving, dip it into hot water for 30 seconds.

And hey, don’t worry so much if your egg whites run everywhere. If it’s just for you, nobody will know – and if you’re cooking for other people, they’re probably just happy they’re not the ones at the stove.