simple char kway teow

Char kway teow: warm, filling and easier to make than you think.

My dad is known throughout the house as the Noodle King.

Mind you, it’s not the only name he has. Throughout my life, he has variously been Chief Chauffeur, Education Executive (Maths and Chemistry Departments), Coach, Captain of Kahmen’s Cheer Squad, Director of Driving Instruction and Head Fixer of Things That Break. Oh, and he also answers to ‘AAAAARRRRRRGHHHHH SPIDER!!!!’

A man of many talents. But even amongst these skills, his noodles stand out.

Straight from the pan: glossy, dense and dark with sauces.

When I was little, the sight of mountains of yellow or white noodles sitting on the bench filled me with a balloon-like expansive happiness and excitement. We were going to have noodles, which was basically a kind of culinary miracle to me. And as if that wasn’t awesome enough, I’d probably get to take some to school the next day. My cup runneth over.

I would watch Dad would prepare the ingredients, washing the dirt from the vegetables, chopping garlic and slicing fishcake. Inevitably, he would tut as he picked over the bean sprouts and shallots – ‘Aiyaaaa, why don’t you like chung? It’s high in zinc!’ – and yet most times, he would end up making a separate batch of noodles without these wretched ingredients, just for me.

That’s love for ya.

Love on a plate.
Love on a plate.

Gradually I’ve learnt from the Noodle King and now I make my own noodles right here in the tiny kitchen. To me, they’re the ultimate comfort food, reminding me of home and my dear little parents, half a world away. And yes, the sight of noodles sitting on my bench still brings me a secret little thrill of excitement.

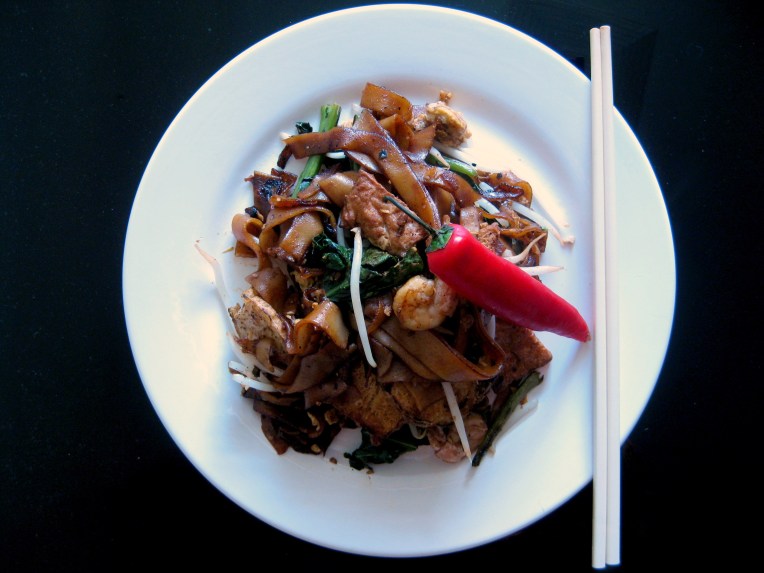
Char kway teow is a classic Malaysian hawker stall dish made with flat rice noodles, soy sauce and bean sprouts. The original version is made in pork fat, with belacan, prawns, Chinese sausage and cockles. It’s high in saturated fats, packed with flavour and very filling.

If you’ve ever made noodles in large batches, you’ll know that even in a big kitchen it can become unwieldy and slightly stressful. After it’s all over, it’s kind of like that scene from the Sixth Sense; dirty plates everywhere, every utensil imaginable on the bench and all cupboard doors open.

It's the simple pleasures in life that count the most: eating noodles and not having piles of washing up to do. Yes!
It’s the simple pleasures in life that count the most: eating noodles and not having piles of washing up to do afterwards. Yes!

This much-simplified adaptation would never pass for the traditional, but it’s quick, easy and far healthier than the original. Better still, nothing comes out of the pan, so it uses a minimal number of plates (I got by with one plate and a chopping board).

The key is to use a large wok, essentially treating half as a warm holding bay and half as a frypan. The order of ingredients and timing is also important; since you don’t remove anything, you have to add ingredients according to how long they take to cook.

Char kway teow made easy.

I’ve used garlic oil to start the process and waited until quite a long way into the process to add garlic because it would just burn. If you don’t have garlic oil, heat some regular oil in the pan, add two cloves of garlic, sliced, and cook until fragrant. Then scoop the garlic out and use the oil.

Last but not least, don’t worry if you don’t have everything on the list. Like most street food, char kway teow channels the principles of convenience and taste, and so should you.

Simple char kway teow (serves 2)
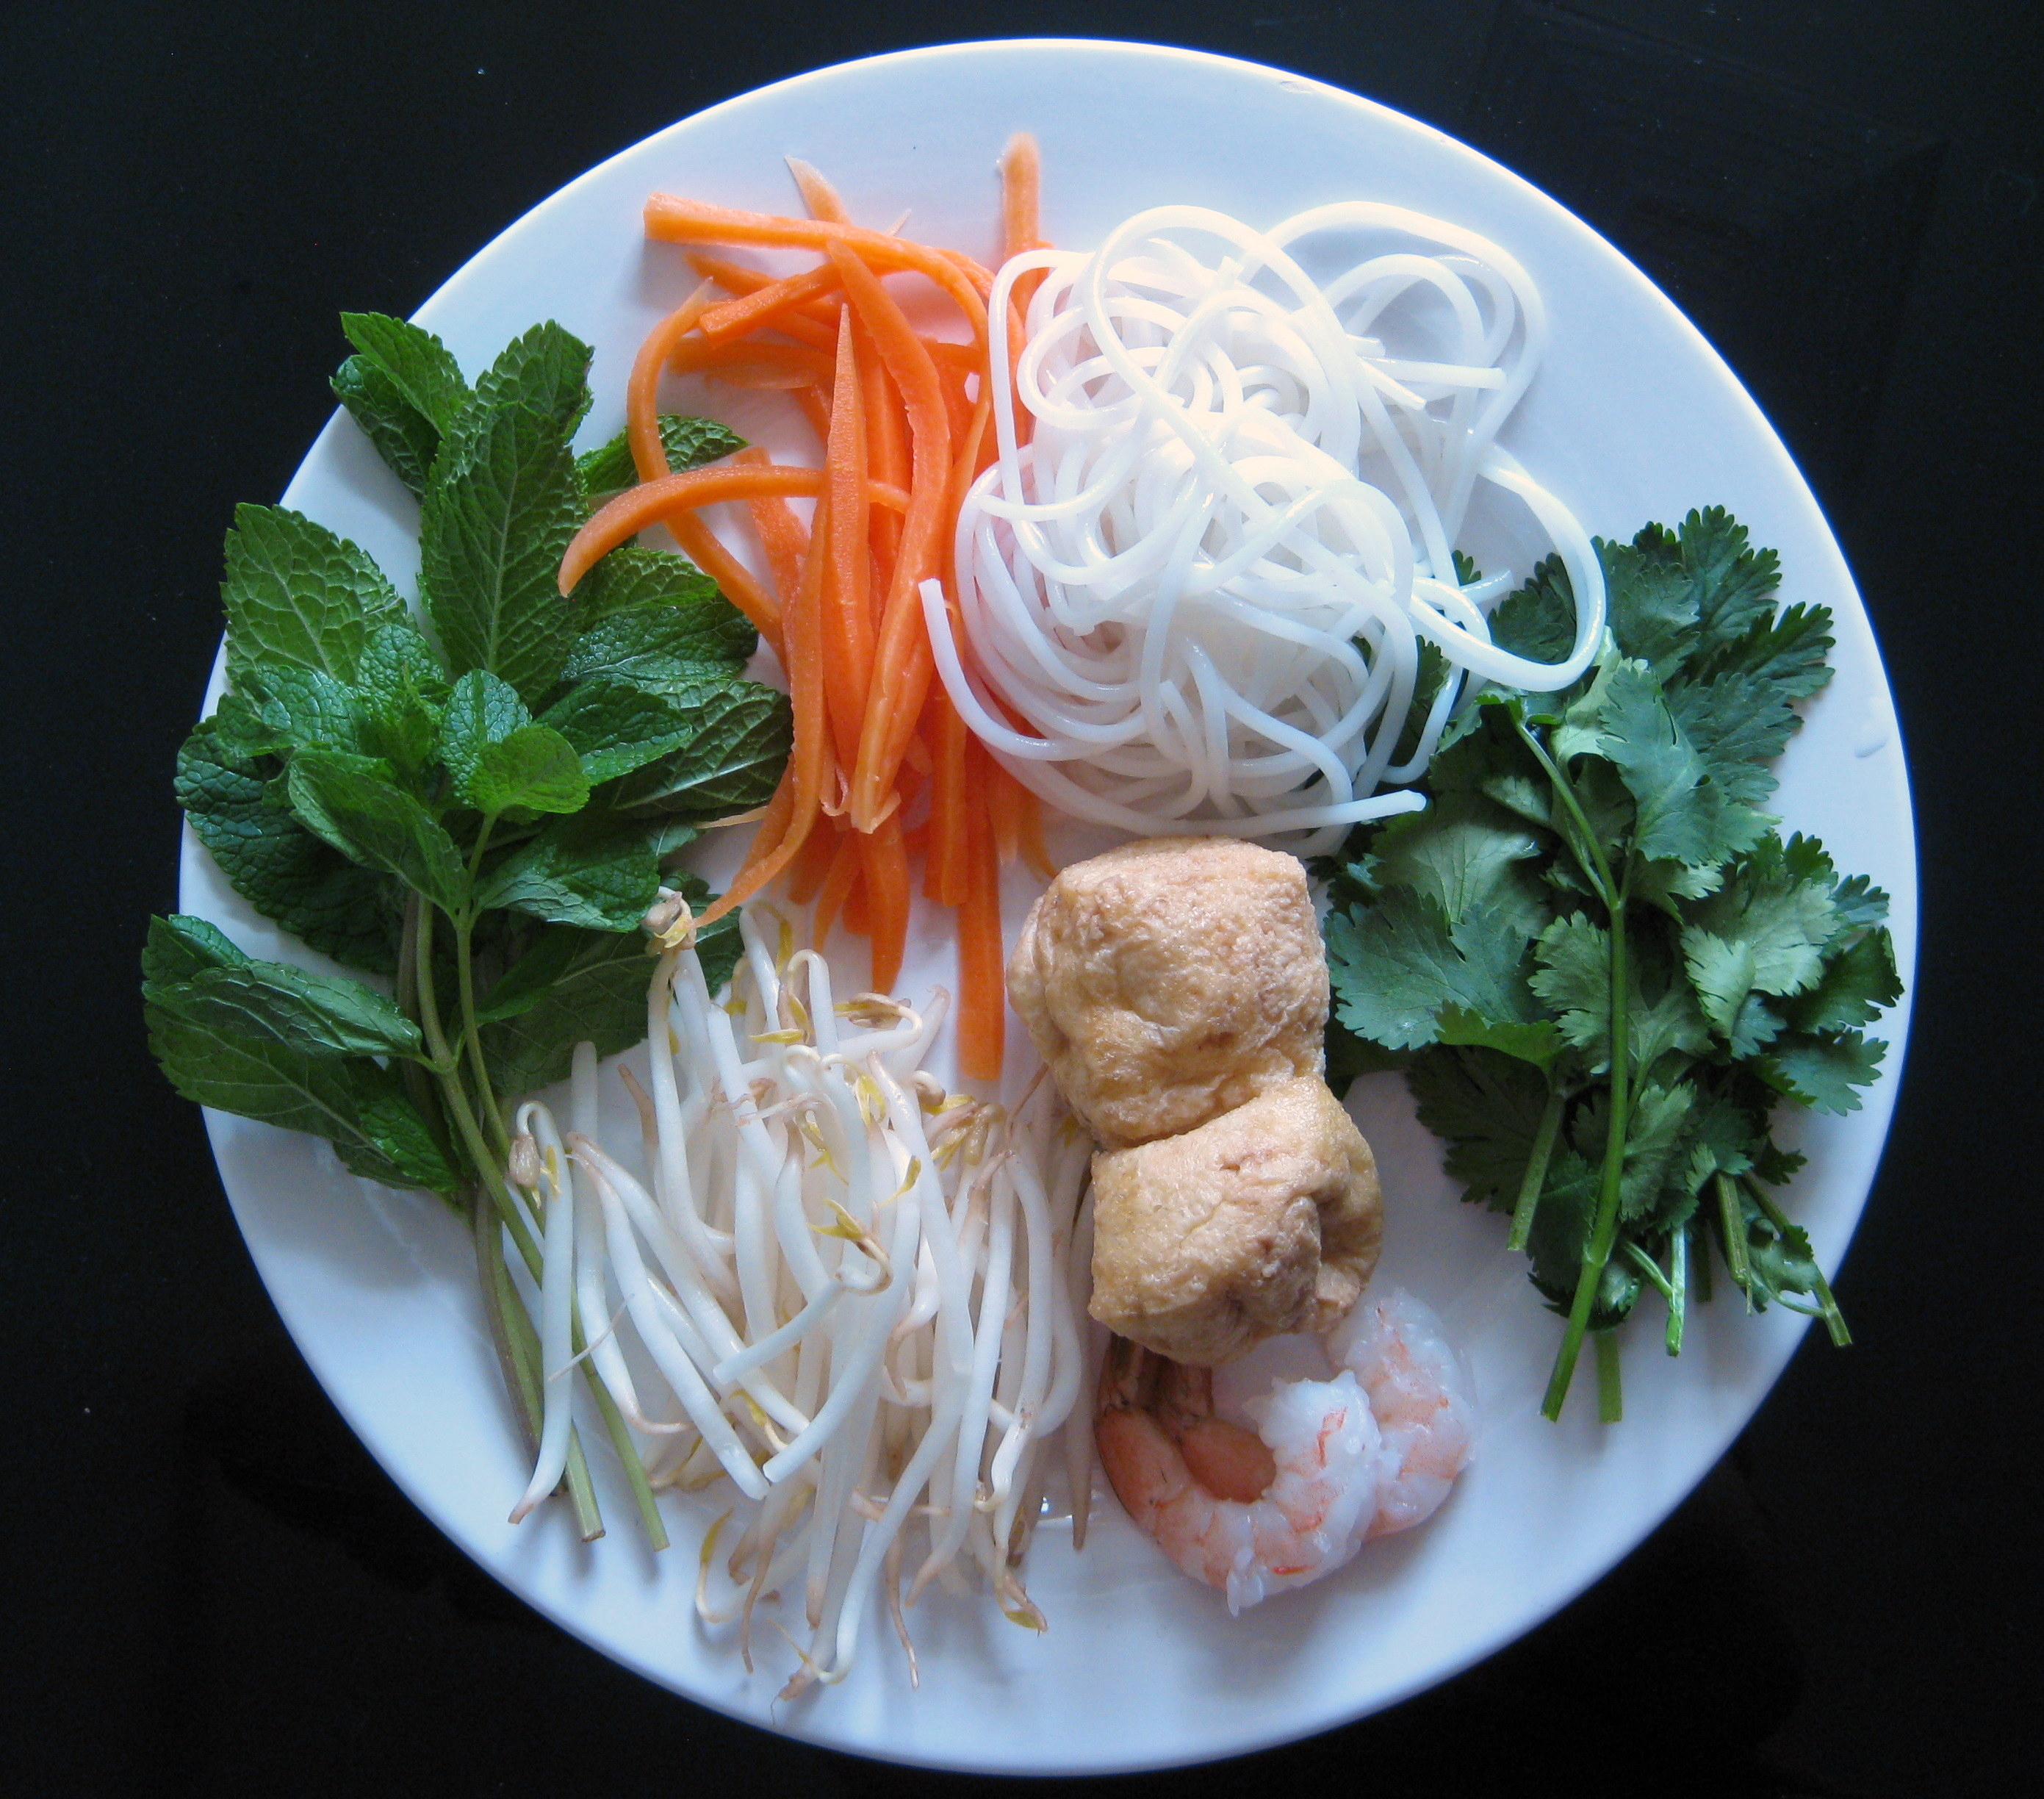
400g flat rice noodles
6 full stalks of gai lan (or a large handful of vegetables of your choice)
65g frozen fishcake (half)
200g fried tofu (optional, and probably not traditional)
6 large prawns (cooked or raw)
3 eggs
200g bean sprouts
5 cloves garlic, finely chopped
4 tbsp light soy
2 tbsp dark soy
1 tbsp caramel sauce (optional)
1 tbsp kecap manis
White pepper
Garlic oil

Once the cooking gets going, it’s really quick, so you need to prepare everything first. Wash the vegetables and chop into stems and leaves, keeping them apart.

Cut the fishcake into slices about 5mm thick.

Cut the tofu into small slices, about the same width as the fishcake.

Then chop the garlic. ‘Start chopping,’ my sister says. ‘Then chop some more. When you think you have too much, chop another few cloves.’

As you begin cooking, microwave your noodles so they’re soft when they hit the pan. Sometimes if you get them fresh, you don’t need to do this at all, but the ones I’ve seen in London are fridge-cold and need about 4 minutes in the microwave.

In a large wok, heat the garlic oil over a high heat until it shimmers, then turn it down to medium. Add:
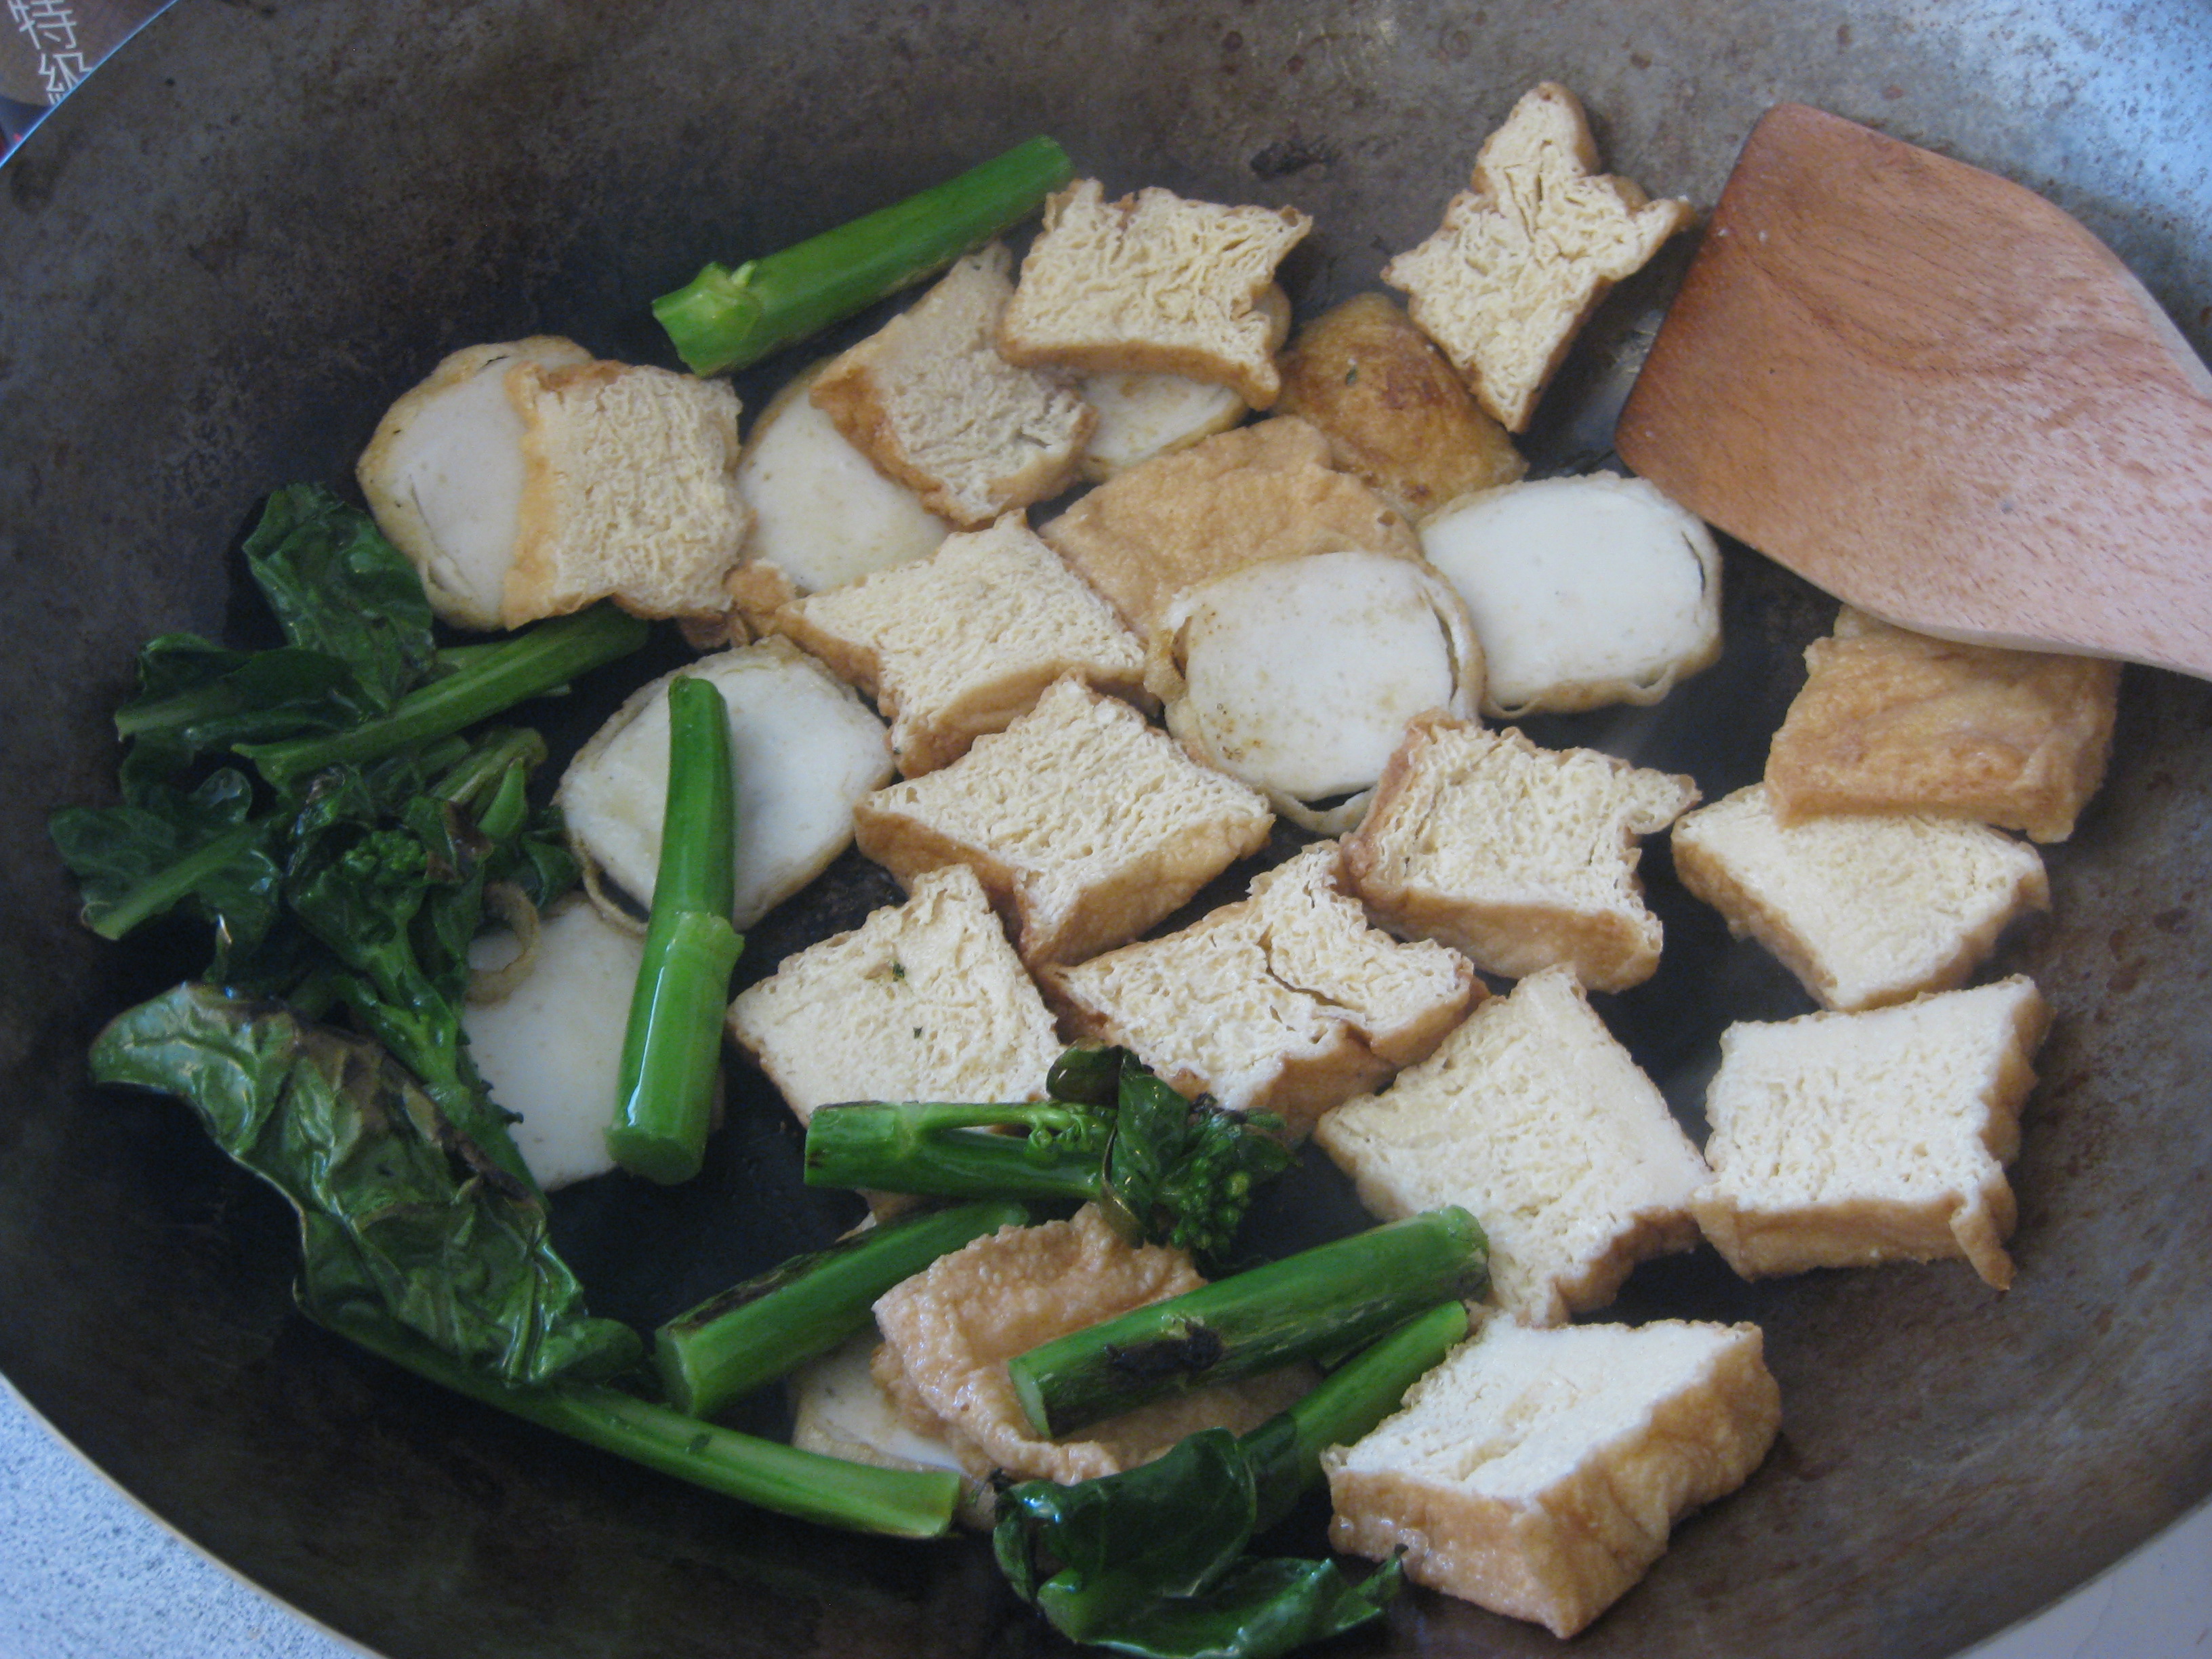
– Gai lan stems and fry for 30 seconds
– Fishcake and tofu and fry until golden (about 4 minutes)
– One third of the chopped garlic right before the next step

Start with the items that take the longest to cook.

Push these ingredients to one side and move the wok so it is slightly off-centre, with the full half sitting partially off the flame.

In the empty half, add the noodles and the sauces plus the white pepper. Mix until the noodles have changed colour, add the raw prawns and gai lan leaves and then incorporate with the other half of the pan.

The noodles should be dark, glossy, slightly peppery and slightly sweet.

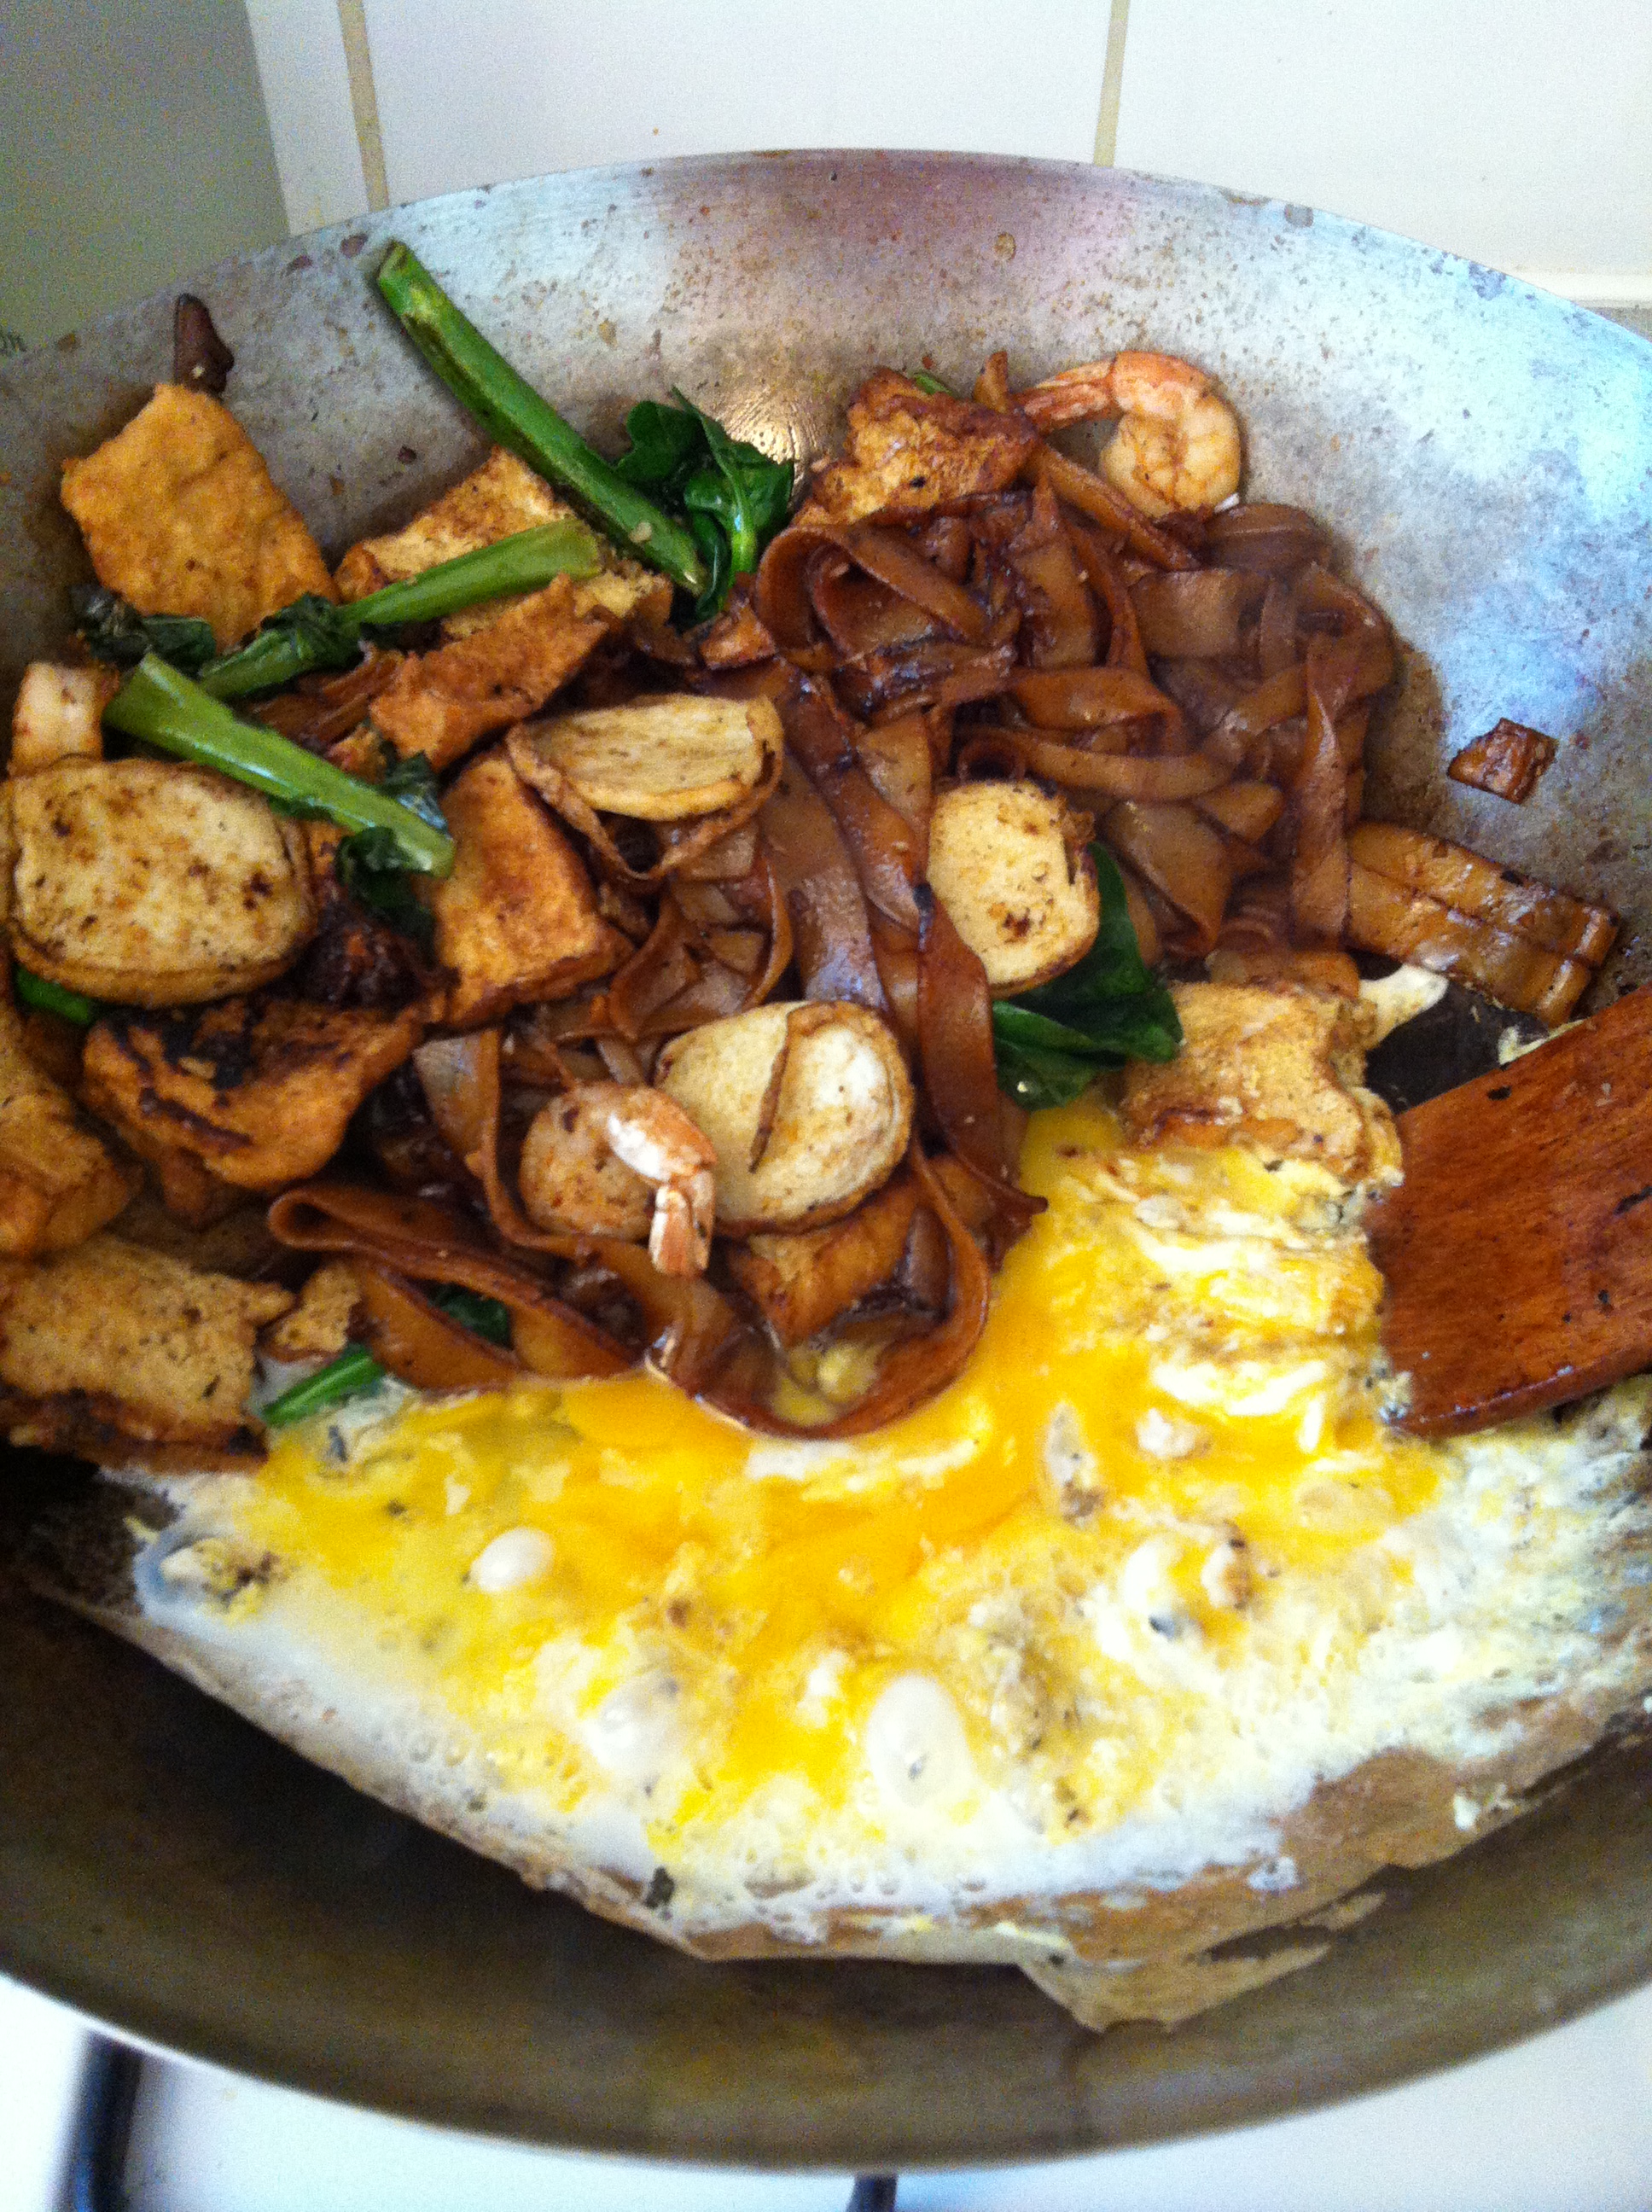
Again, push this to one side and move the wok so the full side is partially off the flame. Pour the eggs and one third of the garlic into the empty half. You might need to hold the wok so it sits correctly and the eggs don’t run too far into the other half (but it all gets cooked, so don’t worry too much about it.)

When the egg is cooked, add the rest of the garlic and incorporate the whole lot together. Taste and adjust the seasoning with extra soy if needed.

Turn off the flame and add the bean sprouts. You want them to be bright, juicy and crisp, so you barely need to heat them.

Serve immediately.

summer rolls

Start - err, spring - with summer rolls.
Start – err, spring – with summer rolls.

As I write this, I’m keenly aware that there is a pile of washing up behind me that closely resembles a small mountain.

I’m breaking the rules a bit here, because although it’s certainly achievable to make these even in a small space, this isn’t exactly an ideal tiny kitchen recipe. It’s time consuming, a little fiddly and uses more plates than I would like – but I have to include it, because I simply can’t have you going into Spring without the deliciousness of summer rolls.

In truth, my love affair with Vietnamese food began with these rolls. Gỏi cuốn, nem cuốn or bánh tráng cuốn, as they’re known, are rice paper rolls stuffed with bún (rice noodles), herbs, vegetables and meat. They’re best served at room temperature with a dipping sauce – I personally think that you can’t beat the classic nước cam, but you can also serve them with a sweet hoisin or chilli sauce and peanuts.

Gluten-free and easily adapted to suit vegans and meat-eaters alike.

Summer rolls embody everything I think is amazing about Vietnamese cuisine. Light and zingy, crunchy and softly dense, summer rolls have a certain balance of tastes and textures designed to bedazzle the palate. They’re commonly served as an entrée, and they make a beautifully bright introduction to the stronger flavours of phở and cơm tấm.

So while there may seem like there’s a lot of ingredients and a load of washing up to do at the end; persist, friends. It’s most definitely worth it.

There's something exceptionally light, fresh and tasty about summer rolls.
There’s something exceptionally light, fresh and tasty about summer rolls.

Summer rolls
10 rice paper sheets
100g rice vermicelli noodles
1 carrot, julienned
Small bunch of coriander
Small bunch of mint
Three lettuce leaves
Bean sprouts (optional)
Cooked prawns (three per roll) – for a vegetarian alternative you can use fried tofu

Prepare all the ingredients so that they’re ready to roll. Start with the noodles; you can cook according to directions but in my opinion you almost never need to boil them. Soaking them in boiling water is fine. Like pasta, make sure the noodles are al dente – they should be springy but not chewy. Drain well.

While the noodles are soaking, take the carrot and blanch in equal parts water and vinegar. If you’d prefer to save time and not to pickle your carrot, that’s fine too.

Finely chop the lettuce.

Pull the mint and coriander into leaves and pick over the bean sprouts.

When you’re done, you should have a crowded-looking plate of noodles, carrot, lettuce, herbs and bean sprouts. The key is to make sure that all the filling ingredients are as dry as possible.

To prepare the rice paper, have a bowl of very hot water and a clean tea towel next to your rolling surface. Dip the paper in the water until it softens and carefully fish it out, trying not to break it. Lay it briefly on the clean towel to absorb the excess water and then lay it flat on the board.

Assemble your summer roll. I use three prawns or one tofu puff sliced into three, plus a few shards of everything else. Try to make it as compact as possible as this will help when you roll.

Rolling is an art. I’ve rolled plenty of spring rolls, but they’re a cinch compared to the fiddly nature of the summer roll beast; all the lightness and springyness that we love about a summer roll seems to work against us here in a very irritating manner.

My tip is to flip up one end over the ingredients and use it to push them into as compact a roll as possible. Using one hand to keep the roll tight, fold up the sides and then push the roll forwards to complete.

Also, be careful about flipping rice paper – running a close second to the nasty possibility of the paper tearing is it sticking to itself. Once it does that, it’s very difficult to unstick it without tearing.

Serve with nuoc cam.

banana and avocado muffins

A new way to use avocados, those versatile darlings.

This one requires a small leap of faith.

Not in the way of ‘here, eat these crickets, they’re really tasty and an excellent source of protein’ or anything, but enough that I ask for your trust as we explore the world of using avocados in baking.

What?! Why would you do that to a delicious avocado? Has the London smog gotten to your brain?

I know, right. And yet there is a point to the madness; avocados are a great substitute for butter. Whereas butter is over 50% saturated fat, avocados contain just 2.1g per 100g. Avocados are high in fibre, a good source of potassium and folic acid, and have no cholesterol.

Go on, get yourself an avocado. I’ll wait.

banana and avocado muffins... with hazelnuts and dark chocolate chips.
Banana and avocado muffins… with hazelnuts and dark chocolate chips.

Even knowing all this, using them in baking can be a bit of a stretch. What if my cake goes a lurid green? What if it tastes strange and salad-like? Should I dump the lot in cornbread with some jalapeños and just have an all-in-one Mexican meal?

Please don’t worry. These muffins are light and moreish; the avocado makes them moist without being greasy. I promise you can’t taste the avocado, and the wholemeal flour means that they also keep you full for a good long time. These muffins are smug, ‘I’m being good but also rather decadent’, win-win muffins.

I have it on my bestie’s authority that avocados are also fantastic in a smoothie – but that is another post for another time.

Light, moist and moreish. You'll just have to trust me on this one.
Light, moist and moreish. You’ll just have to trust me on this one.

Banana and avocado muffins
2 small ripe avocados
2 overripe bananas
1 cup sugar (I used about half a cup of golden caster sugar and then two tablespoons of honey)
2 eggs
1 tsp vinegar
6 tablespoons milk
1 cup white flour
1 cup wholemeal flour
1 tsp baking powder
1 tsp baking soda
Nuts and chocolate chips (optional, but who are we kidding)

In a bowl, mash the avocados really, really well. If you leave any lumps you’ll see it in the final product, so be diligent with that fork.

Add the sugar and whisk thoroughly with the avocado.

Add the eggs, milk, baking soda and vinegar and whisk away. The vinegar is there to activate the baking soda and you won’t taste it in the final product. If you don’t have baking soda, just use two teaspoons of baking powder in the next step.

Place the flours and baking powder in a sieve and sift into the bowl, mixing very gently. You don’t want to overmix, so stir until combined.

If you want to have nuts or chocolate in your muffins, now is the time to add them.

Drop the muffin mix into a greased muffin tray (or make pretty tulip cases by pressing greaseproof paper into the tray) and bake at 180 degrees for 35 minutes.

pancake saturday

What's your favourite pancake topping?
What’s your favourite pancake topping?

Saturday is undoubtedly my favourite day of the week. Blissfully free of the Monday to Friday grind and yet lacking those Sunday blues that can descend on the day-before-you-go-back-to-work, Saturday is a friend that brings with it a sleep-in, morning coffee and a deep sense of relaxation.

To me, there’s no better day to have pancakes.

Pancake Saturday may not be as famous as Shrove Tuesday, but since I work full time and have neither the ability nor the desire to get up at 6am to make pancakes on the appropriate day, I postponed. And oh, the wait was worth it.

I defy you to stop at just one.

I’ve made gluten free pancakes before, but this recipe, taken from Nigella, is strictly traditional; it makes thick, sponge-like American pancakes and I even used white flour and everything (I did substitute dark muscovado sugar for the white sugar, but that was purely a matter of what I had in the cupboard).

There are rumours that you can make a pretty darn good pancake with wholemeal flour, and that’s what I’ll be trying next.

A veritable cascade of syrup.
A veritable waterfall of syrup.

American pancakes
225g plain flour (1½ cups)
1 tbsp baking powder
1 tsp sugar
1 pinch of salt
2 large eggs, beaten
30g butter, melted and cooled
300ml milk (1¼ cups)

Take the dry ingredients – flour, baking powder, sugar and salt – and mix in a bowl.

Make a well in the centre and pour in the wet ingredients – eggs, butter and milk.

Mix together briefly and let the mixture stand as you heat the frypan. The batter will look fairly runny, but it puffs up in the pan.

Oil the pan and dollop a small amount of batter onto the surface. Wait until the surface bubbles and then you can flip the pancake and cook for a minute on the other side.

pork and water chestnut dumplings

Mardi Gras pork and water chestnut dumplings
Pork and water chestnut dumplings

Next week marks the beginning of Lent, traditionally a period of sacrifice, penance and atonement.

Even if you’re not a religious person, I think it’s a good idea to become acquainted with these concepts, because undoubtedly at some point in your life you’ll experience these things, difficult as they are. And after all, towards the brighter shade of the same spectrums lie indulgence, forgiveness and acceptance.

To me, Lent is a thoughtful period in the spiritual calendar; a somewhat sombre time of reflection on the notions of love and strength of will. But before all that solemnity kicks off, there’s Mardi Gras (‘Fat Tuesday’ in French), which must be celebrated in the traditional manner – with richer, fatty foods on the last night before the Lenten season. Presumably this would use up the last of the goods and also keep people sane during a period of fasting.

I know most people eat pancakes – and believe me, I fully intend to participate in that too – but I thought it fitting to celebrate the beginning of a season of love by making these delicious little pork and water chestnut dumplings.

Dumplings are something special.
It’s impossible not to love a dumpling.

There’s something very special about dumplings. They always make me think of home; from the initial laughter-filled all-hands-on-deck preparation method and the proud presentation of neat rows of adorable little parcels (with the inevitable teasing about a few of the misshapen practice shots), to the family dinner at night and sharing the rewards with loved ones. There’s nothing more deeply satisfying than biting past the delicate pastry into the juicy filling and the flavour flooding your mouth and seeing smiles all around and thinking I helped to create this moment.

I’m always dazzled by the powerful combination of sweet pork, fiery ginger and sharp vinegar, and amazed by the complexity of flavours in Chinese cooking. Savoury and moreish, these tiny treasures go perfectly with a sharp and sweet dipping sauce.

Pork and water chestnut dumplings – makes 40
For the filling:
500g lean pork mince (see note below)
3 shallots, finely chopped
8 water chestnuts, diced
4 shitake mushrooms, diced
3 tsp grated ginger
3 cloves garlic, minced
3 tsp corn flour
1 tbsp oyster sauce
1 tbsp light soy sauce
1 tbsp Shaoxing rice wine (or dry sherry)
1 tsp sesame oil

To wrap:
40 x gyoza wrappers

To serve:
5 slivers of ginger
Black rice vinegar or distilled sugar cane vinegar
Light soy sauce

dumpling ingredients

Just reading the list of ingredients can feel a bit daunting – goodness, is all that really necessary, Kahmen?

The short answer is yes; dumplings are meant to be complex and balanced so every bite is a joy. But the good news is that you can take each ingredient and add it directly to the mixing bowl as soon as it’s ready, so they’re really simple to make.

Combine all the filling ingredients and mix well. Yep, that’s it. Dumpling mix done and no MSG in sight.

If you’re planning to freeze dumplings, dust the tray with cornflour. I can’t even begin to tell you how many times I forget to do this and it always ends in torn dumplings and tears the next day.

On a clean flat surface, lay out a set of dumpling wrappers – I think about nine at a time is about right because if you prepare too many they’ll dry out before you can get to folding them.

Lay about a teaspoon of mix in the centre of each wrapper. I find it easier to fold later if you shape the mix into a sausage now.

Ready to be folded
Ready to be folded

Dab the rim of the wrapper with water and fold over into a half circle, pinching the edges together. If you like, you can crimp them slightly to give the classic gyoza look. One down, thirty-nine to go.

You can either steam the dumplings for 8 minutes, or you can fry in a medium pan with oil, then add some water to create steam and cover for 4 minutes to help the insides cook.

I haven’t given quantities on the dipping sauce recipe because everyone has their own preference. In general, people recommend that you start off with equal parts vinegar and soy and then adjust to taste. I like a sharp sauce, so 2 parts vinegar to 1 part soy is about right.

NB: Interestingly, dumpling recipes always tell you to use fatty meat and with good reason – the juicier your dumplings, the tastier they’ll be. However, a quick look at the fat content in regular mince was enough to scare me right off, and I opted for lean mince, which you’ll be glad to know turned out just fine.