almond flour pancakes

Sunday breakfast means pancakes.

What is a Sunday without pancakes? Just another day of the week that ends in ‘y’, obviously.

When I was growing up, there was always a flurry of excitement when pikelets entered the house. Pikelets are really pancakes, but Down Under pancakes are the size of a small dinner plate, whereas pikelets are a neat, manageable handful. Each member of my family pretty much eats them the same way; slathered in peanut butter, or toasted and slathered in peanut butter.

It wasn’t until much later in life that I learned the ‘proper’ way of eating them in Australia is with golden syrup, and by then it was too late – the lifelong habit of eating savoury goods with these little gems had stuck. Eventually I happened upon the Canadian way of eating them with bacon and maple syrup, and it became a close second to the peanut butter breakfast rally.

Pancakes should be light, fluffy and served with something equally delicious.

Of course, making pancakes is pretty simple, but the primary ingredient is flour. Not only do I rarely keep flour in the house (there’s a bad weevil experience behind that), but one of my good friends has recently been diagnosed with both IBS and coeliac disease, and it has been my mission over the past few weeks to look at things she can eat, which is trickier than you might expect.

Coeliac disease is at least consistent, although painful: no gluten, which means no wheat, barley, rye, spelt, flour derived from any of those, nothing that has come into contact with gluten products. Restrictive, but straightforward. Lots of things are marked gluten-free and the label will generally tell you if gluten is present in the product.

IBS is a whole different beast. Following the FODMAP diet seems to help her, but it’s difficult to remember what to avoid. It’s also supremely tough to eat out when you have to avoid onion and garlic and that’s present in almost everything in a commercial kitchen.

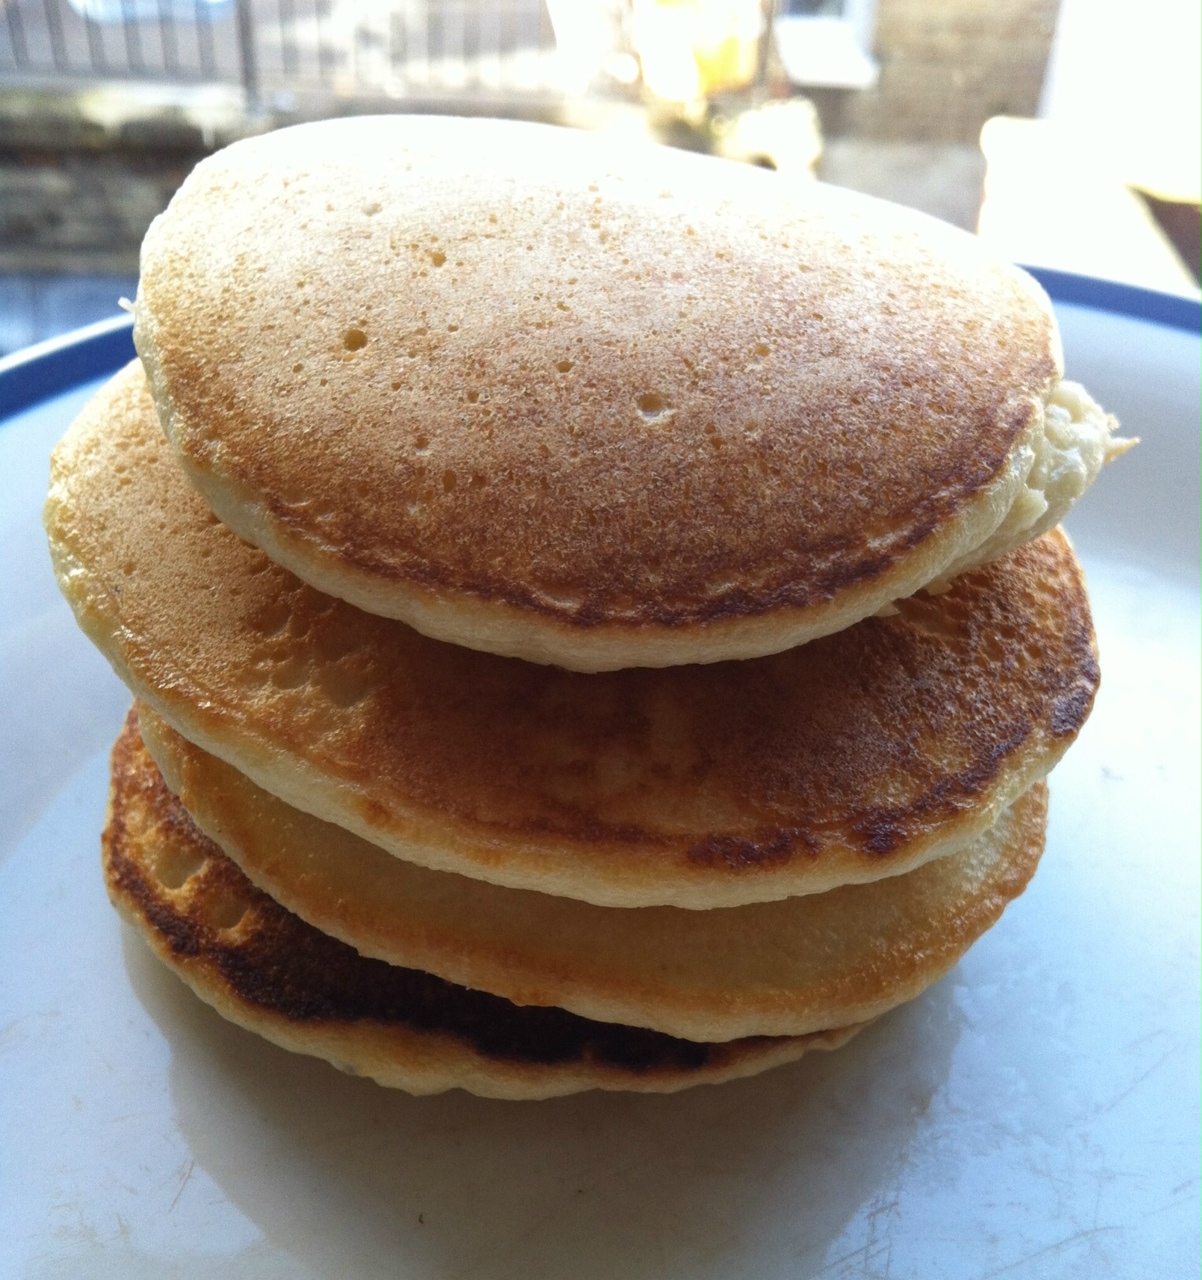
I wanted to try out a recipe that would help my buddy put the spark back into her Sunday breakfast. So here it is: taken from about.com, these almond flour pancakes are gluten-free, IBS-friendly, low-carb, easy and very filling.

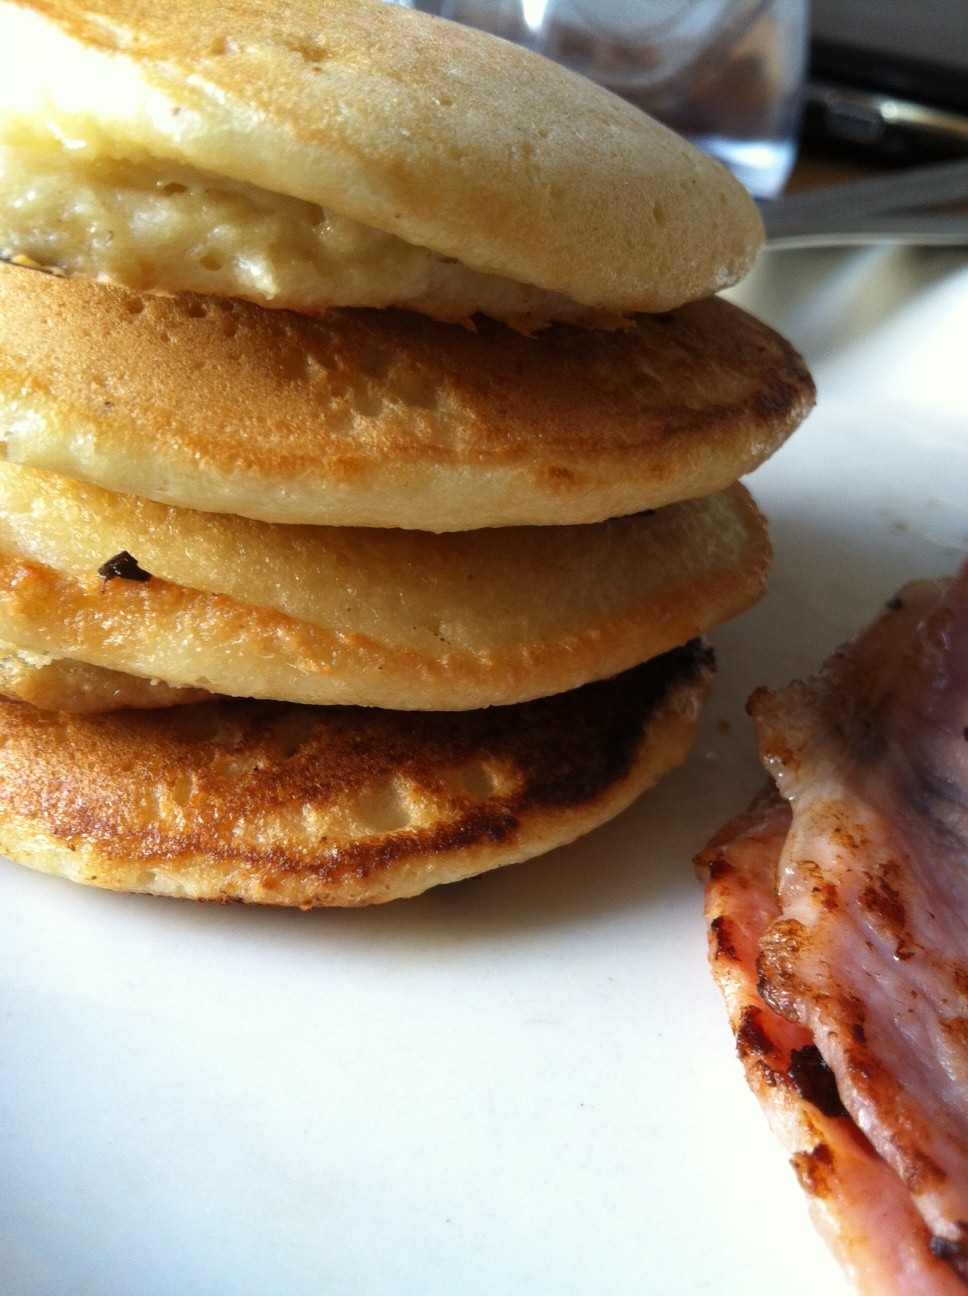
I probably did not need to eat all four pancakes, but hey, it’s a Sunday.

Almond flour pancakes (makes 4)
Half a cup of almond flour
1 egg
10 drops of liquid stevia (you can substitute with liquid sucralose or just use half a tablespoon of sugar)
1/8 cup of water
1 tablespoon oil
small sprinkle of salt

Warm your non-stick frying pan over medium heat whilst you mix all ingredients together.

Place two tablespoons of mixture into the pan. The good thing about this is that it doesn’t spread far, so if your pan is big enough you can do two at a time.

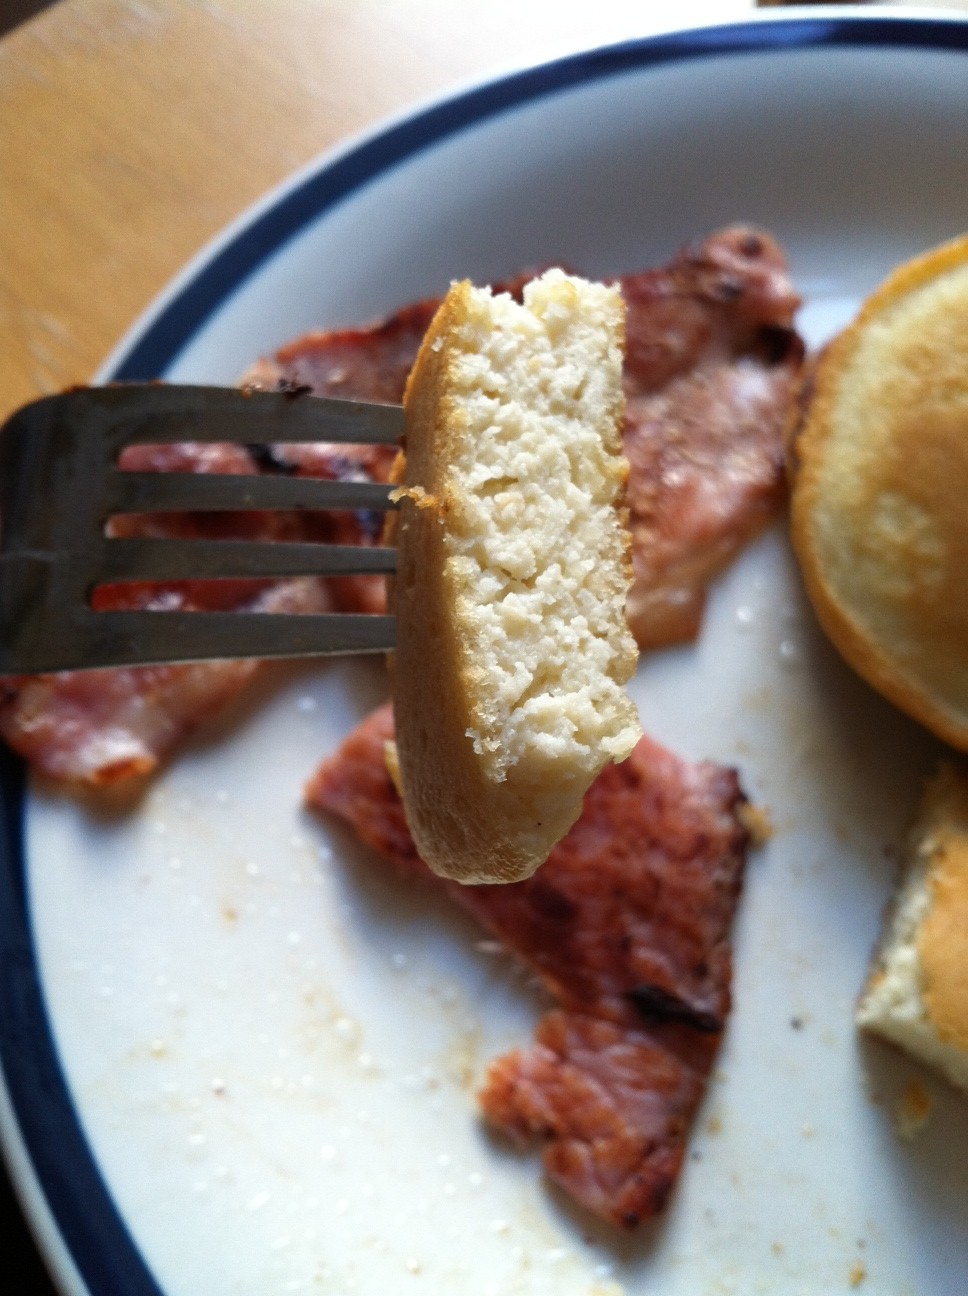
The pancake needs about 2-3 minutes on the first side before you flip it. They don’t really bubble the same way a pancake does, but you’ll know when it’s ready to turn because the edges will become lighter as they cook – once the pancake has a white ring all the way around, it’s ok to flip. It will need about a minute on the other side.

Serve with bacon, peanut butter or if you must, drizzled with golden syrup, and relish the Sunday-morning feeling.

The perfect Sunday breakfast.

A note about cooking for coeliacs: this is probably an obvious point but if you’re cooking for a coeliac, make sure the pan, all your utensils and crockery are ultra-squeaky-clean. The slightest bit of gluten can make them seriously ill.

gourmet cauliflower mash

It's cauliflower mash, only supercharged.
It’s cauliflower mash, only supercharged.

I have covered cauliflower mash before – a recipe so simple it’s almost cheating to call it a recipe – but lately I’ve been experimenting a little with the standard formula and whilst I still love the old favourite, I’ve got to say that this one is closer to the starchy texture of real potato mash.

The point of mash, for me, is to provide a good textural base on which to build your main meal – stew, casserole, pie, sausages. You’re not looking for a strong flavour, but I find that using a vegetable cube and garlic just lifts it slightly. You’d be surprised at how mild the garlic is, but if you don’t care for these flavours you might like to leave them out altogether.

The end product is closer to a mash that has had butter and milk added – thick, creamy and sticky, as opposed to the fine sand-like fluffiness of pure whipped potato.

Gourmet cauliflower mash
1 large head of cauliflower
Vegetable stock cube
3 cloves of garlic, peeled
30ml cream (I used soy cream)

Chop the cauliflower into florets and place in a pot with the garlic and stock cube. Cover with water and boil until very soft.

Drain the pot and mash, garlic and all. I used a hand masher but I’m sure a stick blender would produce excellent results.

Return the pot to medium heat without the lid. This bit is all about making it as fluffy and dry as possible, so you want to evaporate all the liquid left. Add the cream, stirring frequently and it should take around 5 minutes to produce a fantastic pot of cauliflower mash.

haloumi salad

haloumi salad
Suddenly, post-Christmas penance doesn’t seem so bad.

Well! Where on earth have I been?

You know how it is over Christmas. There’s the huge leadup where you embrace the Christmas spirit and try to push people out of the way when you’re buying presents on Oxford St, then there are the alcohol-soaked Christmas parties, then (if your family is anything like my boyfriend’s) there are days and days of being fed turkey and ham and potatoes and chocolate biscuits until you feel you might as well hop into the oven and roast alongside the bird. Ain’t it glorious?

Then, inevitably, comes the period of self-recrimination where you realise that you maybe ate one or fifteen too many Roses. The new year begins. And so does the diet.

Salads are fantastic because they’re healthy, quick and no-fuss. The trouble is, when you’re eating a salad you always, always know about it. It goes from making you feel virtuous and elated at how good you’re being to your body to making you feel depressed and like you’d kill a small puppy for a plate of pasta. Trust me, I know.

The trick is to use fresh ingredients and keep it interesting. I am not a fan of bitter leaves, although I know lots of people who think they provide a nice contrast in a salad (actually, I’m not a fan of bitter flavours, full stop). But each to their own.

I confess that the inspiration for this salad came from a recent purchase of a non-stick frypan which is actually non-stick. I don’t know how I’ve been getting along without it. Do you know how liberating it is to cook without knowing you’ll need to soak the burnt pans overnight again? Really, if I’d known how ridiculously happy it would make me I would have spent the £2.99 a long time ago.

So I have been looking for things to fry (not easy with salads) and haloumi came to mind. Haloumi is a Cypriot cheese made from goat’s, sheep’s or cow’s milk, is salty to taste and firm in texture. I like it grilled, which creates a nice brown crust and softens the inside to a toothsome squidginess.

The bad news about haloumi is that if it goes cold, it takes on a rather rubbery texture (still tastes good though). Also, it is high in fat so if you’re concerned about that, try to watch the amount you’re using.

Haloumi salad
3-4 slices of haloumi
4 baby plum tomatoes
half an avocado
salad leaves
balsamic vinegar

Place the haloumi into a non-stick frypan (no oil necessary) over a medium heat.

While the cheese is grilling, arrange the salad leaves on a plate. Slice the tomatoes and avocado and add to the salad.

Make sure you turn the cheese once or twice during cooking so both sides take on that browned look. When they’re done, place them onto the salad and finish with a drizzle of balsamic vinegar.

pumpkin soup

Hello, my pretties

More soup?

I grew up with Asian soups, which are mostly broth-style concoctions with various things floating in them – from the standard pork and prawn dumplings or chicken to the weird and wonderful unnameable items that are considered to be the ultimate panacea for everything from stomach aches to back pain.

There is pretty much only one Western-style soup my mother makes, and that is pumpkin soup. It’s a hearty, filling winter wonder that I think is fitting for my American buddies who’ll be tucking into all sorts of Thanksgiving goodies very soon.

In my wholly unbiased and humble opinion it is the finest pumpkin soup you will ever taste, anywhere, and it ridiculously healthy because unlike most pumpkin soups it has no cream and no sugar, instead relying on the smooth texture and natural sweetness of the pumpkin. Go forth and try it! Wrap yourself in the warm blanket of virtue and congratulate yourself on how healthy you’re being.

Pumpkin soup
For the vegetable stock:
2 carrots
Two-thirds of a leek
Half an onion
2 sticks of celery
4 bay leaves
6 black peppercorns

For the pumpkin soup:
Half a kilo butternut pumpkin
Half a kilo paquito pumpkin
One-third of a leek, sliced
Half an onion, chopped
2 carrots, chopped

Make the vegetable stock by placing all the stock ingredients in a pot, covering with cold water and bringing to a boil, then turning to a simmer for 20 minutes. Heston advises that you should slice the vegetables as thinly as possible to provide as much surface area as you can, but if you can’t be bothered it will turn out just fine.

Meanwhile, prepare the pumpkin. The butternut pumpkin in my photo is just over a kilo, and the paquito pumpkin is just under a kilo, and I used half of each. You could simply use one whole pumpkin, but I like the different tastes each pumpkin gives – the butternut has a nutty, robust undertone, and the paquito pumpkin is just a little sweeter and negates the need for you to add sugar.

There is nothing for it but to chop the pumpkins into small pieces, removing the skin as you go. This is a fairly painful process but sadly I see no way around it. Wear your pumpkin blisters with pride.

Pumpkin blisters. I hope you can avoid these, but if not, wear them with pride.

In a pan over a medium heat, place the onions and leek and cook until they start to soften but don’t brown them.

Add the pumpkin pieces and cook for 7-8 minutes.

A glorious orange frenzy

Meanwhile, drain the vegetable stock, reserving the liquid. Put the liquid back into the pot and add the chopped carrots, and when the pumpkin and onion is ready, add it to the pot. Cook for 20minutes or until the pumpkin is very soft.

Remove from heat and ladle out a bowlful of the liquid, keeping to one side. You want to hang onto this just in case the soup is thicker than you would like.

A stick blender would be ideal at this point, but I don’t have one, so I just used a hand masher instead – hence the rather pureed look of my soup. It still tasted wonderful. Proof positive that some recipes are extremely forgiving!

Bowlful of goodness

cauliflower mash

The ‘before’ picture.

Don’t worry, I haven’t completely lost the plot. I know this is a perfectly ordinary cauliflower sitting here and I know I might be cheating ever-so-slightly by giving you a recipe for essentially taking it and turning it into mush. But it is nevertheless a staple in this tiny kitchen, and it’s hard to get right, so here goes.

Cauliflower mash
1 large head of cauliflower

Cut the cauliflower into pieces. One of the best things about this is that since the cauliflower is going to be mashed, you don’t need to waste time agonising over cutting the thing into florets of the same size so they’ll cook at the same speed (does anyone else do that, or is it just me?).

Boil the cauliflower in a large saucepan. Normally, you’d try to take cauliflower to a stage of perfect toothsomeness, just the same way you’re searching for al dente pasta. For mash, you want to take it beyond that point, to where a fork can split the floret with a touch.

Drain the cauliflower and return it to the saucepan. Roll up your sleeves, grab the potato masher, and work through the frustrations of the day.

If you were to serve it now, it would be tasty, but wet and sloppy. Since I often use this as a substitute for potato, I prefer a lighter, fluffier mash. What you want to do is remove the liquid that has come out of the cauliflower, and the best way to do this is by evaporation. Draining, sadly, won’t cut it.

Once you’ve mashed the cauliflower, return it to the stove and place over a low heat. You need to leave it steaming gently over the stove for a good ten minutes. You don’t really need to worry about looking after it – cauliflower shouldn’t burn or stick to the pan – but give it a stir every now and then to check how much liquid is left. The end result should be light and fluffy, ready for use as a delicious alternative to mashed potato.

And… after.


*If you’re looking for a variation that holds together better and has the consistency of mash, try this gourmet cauliflower mash.

perfect poachies

Breakfast: one of the three most imporant meals of the day.

There’s something very special about poaching. I think it’s mainly because it’s such a precarious process and one we generally prefer to leave to cafes with experience in that kind of thing. After all, it involves breaching the protective barrier of the shell and expecting the whites to hold together and surround the yolk in an aesthetically-pleasing fashion while you simmer it in a pan of hot water – honestly, we don’t expect much, do we?

I’m not going to get holier-than-thou about free range eggs, because it’s not as if I haven’t bowed to cost pressures and bought cage eggs before. But for poachies, there is simply no alternative. You have to use the free range kind, which have better shells so they’re less likely to explode in the pan when you boil them. They also tend to be larger, more flavoursome and upon consuming them, you achieve a nice halo effect that only comes with doing the humane thing and being able to feel virtuous about it.

Little beauties. Aren’t you gorgeous?

The other non-negotiable factor is the freshness of the egg. If you don’t have super fresh eggs – they’re not always easy to get in London – you should consider scrambling, frying, hard-boiling or half-boiling your little loved ones. Either that, or lower your expectations. The albumen in fresh eggs clings to the yolk better and will help you to achieve that nice ‘whole egg’ look. Once they’re a few days old, it begins to pull away and it makes it difficult to keep the team together.

Poached Eggs
2 large free-range eggs
Vinegar

Half-fill a pan with water and bring to a low boil. Add a splash of vinegar – don’t worry, you won’t be able to taste it. It just helps the shells not to crack when you boil eggs (incidentally, if you’re hard-boiling, the vinegar will stop the shells from splitting and leaking egg white into the pan).

Using a slotted spoon, gently lower the two eggs into the pan. Boil for 20 seconds and rescue.

Using a fork to split the shell, break one egg into a shallow dish. The white should just have begun to take on a translucent sheen.

Being an egg ain’t all it’s cracked up to be.

Make sure the water is on a low simmer – steam should be rising from the pan, but the water shouldn’t be moving very much. An occasional bubble is good. Hold the dish over the water and gently slip the egg into the pan. The way it falls is the way it sets, so be careful!

In a perfect world, every egg would poach like this.

A soft-poached egg takes approximately 2-3 minutes. If your pan is large enough and your egg seems to be holding it together nicely, do the other egg on the other side of the pan. Otherwise, cook your egg for 2 minutes and place into iced water to stop the cooking process while you take care of the other eggs. Before serving, dip it into hot water for 30 seconds.

And hey, don’t worry so much if your egg whites run everywhere. If it’s just for you, nobody will know – and if you’re cooking for other people, they’re probably just happy they’re not the ones at the stove.

not tabouleh

THIS IS NOT TABOULEH.

I’ve got to say that before all my Lebanese friends come after me, pelting me with falafels (which I maybe wouldn’t mind as much as I should). Real tabouleh is made with parsley, bulgur wheat, lemon juice, spring onion and mint. Calling this tabouleh would be like saying sushi is Chinese because it’s made with rice. Big no-no.

But as potentially culturally offensive as this little salad is, the ingredients were what I had in the fridge when I came home at about 8pm after a day of hardcore shopping and I certainly was not about to traipse out to get anything else. I very nearly reached for the pasta and sauce, but I didn’t, and I’m glad. This dish tastes wonderful – zingy and fresh and healthy – so I’m going to post it here for you to enjoy under the proviso that you all understand that calling it tabouleh would be a mistake, a misrepresentation, an egregious error.

The Not-Tabouleh Salad
Bunch of parsley, chopped
Two tomatoes, finely chopped
Quarter of a red onion, very finely chopped
3 tbsp of couscous
Juice of one lime
Olive oil

Parsley is wonderfully springy and robust, but the key is to get it as dry as humanly possible before chopping it, otherwise it ends up in a soggy mess. You can just use paper towels to pat the leaves after you’ve washed it. I know people who use a salad spinner to get it really dry before chopping it, which is great but a little Mission Impossible for the small kitchen.

When chopping parsley, grab the stalks and chop from the leaves down. Get it right the first time because the ‘running the knife through again’ technique that I often use to make things are properly chopped doesn’t really fly with parsley – you can end up bruising the leaves and they get soggy. In any case, don’t fret if there are one or two leaves sticking out at the end. Make sure you’ve chopped enough that the parsley salad is really about the parsley, not the couscous.

Combine the parsley, couscous, tomato and onion (I’m not wild about raw onion, so I only used a quarter, but use your judgement). I don’t like lashings of olive oil dripping everywhere so I used just the tiniest drizzle and then squeezed the lime juice over. Mix well and serve by itself, or with romaine lettuce leaves.

I may have also helped myself to the world’s largest scoop of hummus. Why not?

simple salsa

Those of you who are quick on the uptake (or just really passionate about food) have probably spotted the glaring problem with the photo on my guacamole entry.
Salsa, of course! It’s not there!

I had committed the culinary equivalent of placing Romeo without Juliet, Mickey without Minnie, Abelard without Heloise (although she would have been much better off without him, in my opinion). I don’t quite know how it happened, but let’s just say that I was overcome with the excitement of learning how to make guacamole that I simply forgot about the unbroken pact between guac and salsa.

I’m going to rectify that now, because trying to have a Mexican meal without salsa just isn’t right. I won’t allow it.

Salsa
3 tomatoes
Quarter of an onion
One deseeded chilli
Small handful of fresh coriander
Salt
Squeeze of lime juice

Finely chop the tomatoes, onion, chilli and coriander. Combine in a bowl and add salt and lime juice to taste. Nothing simpler!

holy guacamole

Mexican cuisine is like the lover who sporadically makes appearances in your life and works his way back into your heart by charming you with something new and exciting each time. After a particularly long run of soups and salads and sandwiches, Mexican shows up and you vaguely consider settling down – because it has flavour, texture, heat and sweetness and crunch and comfort; everything you could possibly want in a cuisine.

It amuses me to tell you that for the longest time I didn’t like avocados. I used to scrape the guacamole off my nachos and give it to my bestie. In fact, I didn’t like avocados until I came to this country and tried guacamole at Wahaca.

Slowly, I’ve fallen in love with the creamy texture and subtle, fresh taste. Guacamole is something indescribably complex; muted creaminess balanced with the spike of raw onion, chunks of soft flesh, a sharp note of lime juice and of course the flavour kick of coriander. These days I’m drawn irrepressibly to the vivid, iridescent green whenever I’m in a Mexican restaurant.

Guacamole
3 x large ripe avocados*
Half a red onion, very finely chopped
1 lime
Small handful of coriander, finely chopped
Salt

Mince the coriander and half the onion, chopping as finely as humanly possible. If you’re lucky enough to have a mortar and pestle, use that. Otherwise, a little muscle on the chopping board will do. Place into a bowl, add a pinch of salt.
Scoop the flesh from the avocados, add to the bowl and mash with a fork. Add half the lime juice as you go.
When you’ve got a rough guacamole, add the rest of the lime and onion and mix well. Season with black pepper and more salt if necessary.

If you like, you could add additional coriander leaves, chilli or a deseeded tomato.

*It’s easy to buy avocados from Sainsbury’s or Tesco, where they’re the cheapest, but often the ‘ready to eat’ avocados are about as hard as hockey pucks or else they’re descending into that really icky soft rotten place. Press gently on the small tip and if it gives just slightly you’re in luck. Otherwise buy firm avocados a few days ahead and keep them in the fridge.