kale & quinoa salad

kale, quinoa and salmon salad

Remember when you were growing up, and a salad was eternally comprised of a sad, round tomato, circles of cucumber and wads of damp iceberg lettuce, drowning in a sea of sharp, vinegary dressing? Oh, that salad. Sometimes it was accompanied by a ring of pungent onion, or a lonely olive that was also wondering why it was there. They weren’t particularly bad or good, they were just something that had to be heroically endured to get to the good stuff, like pizza and chicken and lasagne.

salmon on kale and quinoa salad
grilled salmon is a delicious indulgence

I’m not sure when it all started changing, but Australia probably owes a great debt to its multicultural history. Greek salad. Caesar salad. Someone heard a rumour of this amazing stuff called tabbouleh, others murmured words like panzanella and fattoush and niçoise.

And thus salads were set free, and we were all a lot happier for it.

kale and quinoa salad
Say yes to salads.

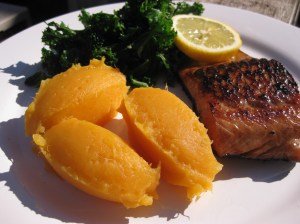
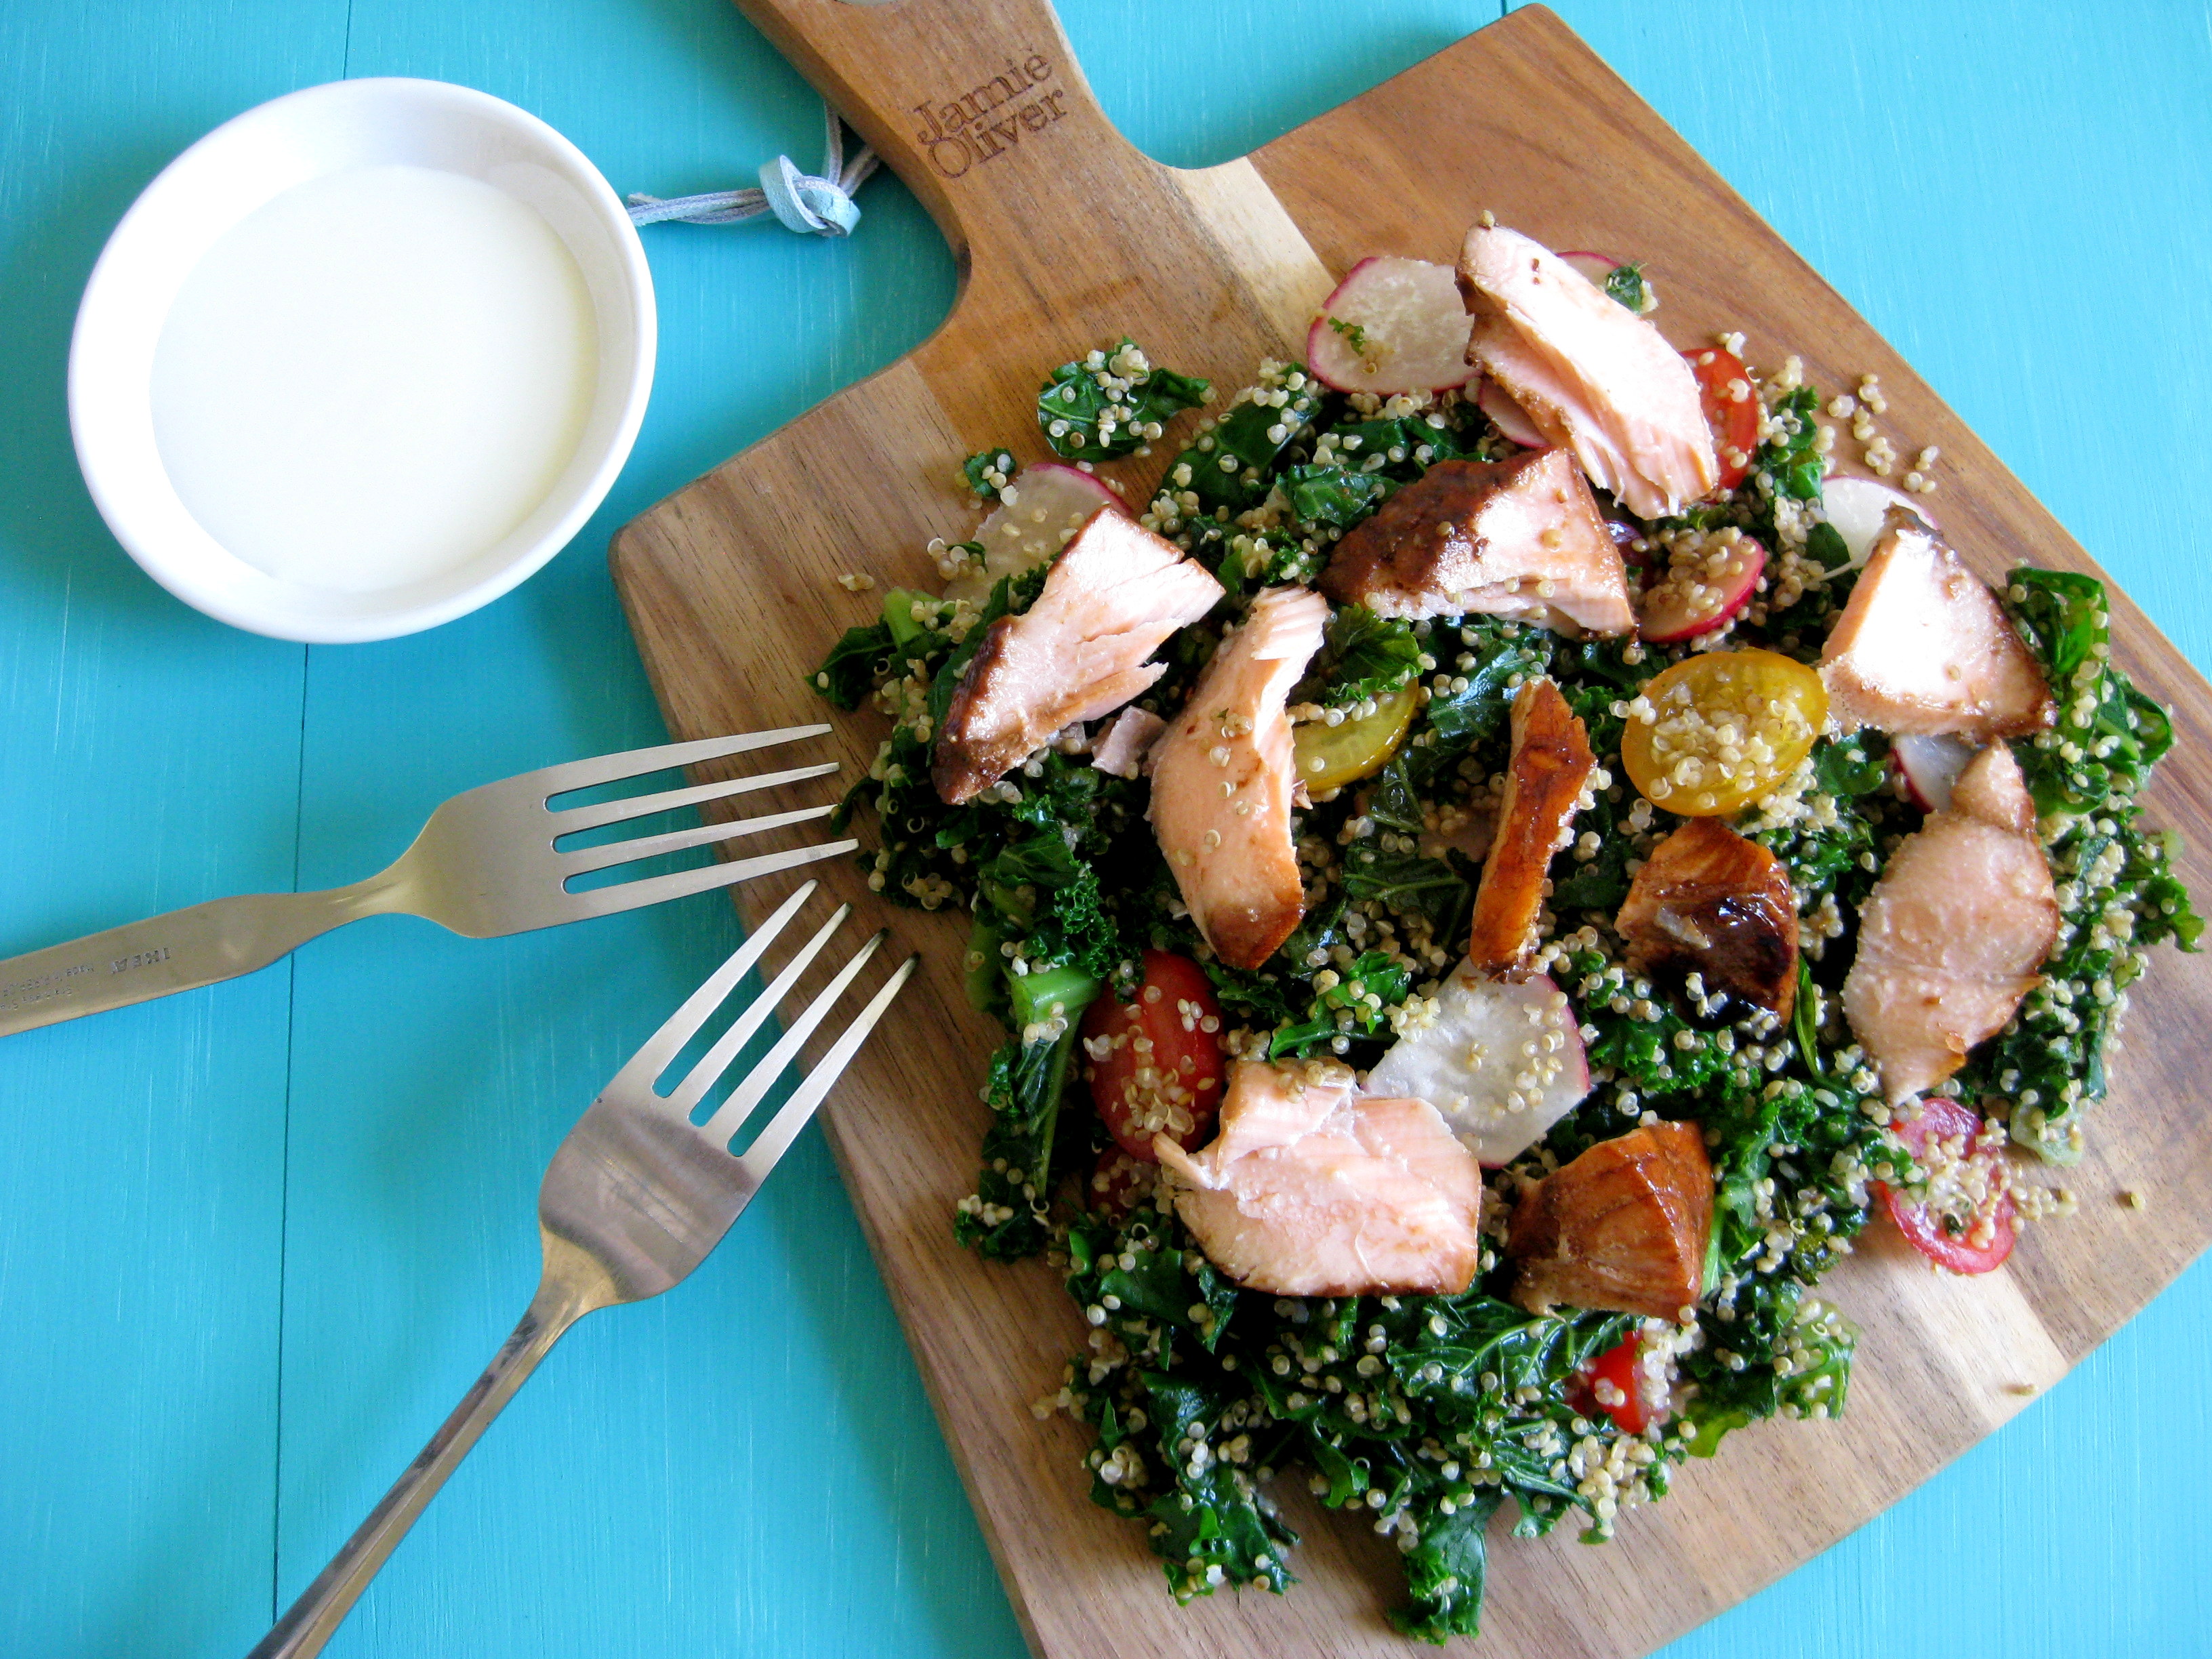
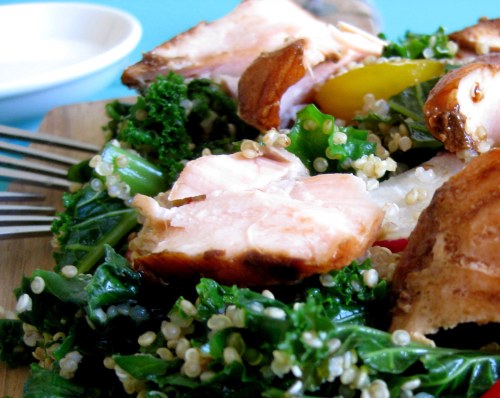
I love using kale as an alternative to salad leaves, because it feels so much more substantial than biting into lettuce (although don’t get me wrong, I also love lettuce). Quinoa is often a feature in my salads, not just because it’s excellent for my gluten-free friends, but also because it lends a brilliant texture, holds dressing well and gives the salad a certain heft.

And if you need something else to convince you, let me just say that the grilled salmon is a deliciously indulgent affair that means you’ll never have to dread eating a salad for dinner ever again. I promise.

Kale and quinoa salad with grilled salmon (serves 2)
For the salad:
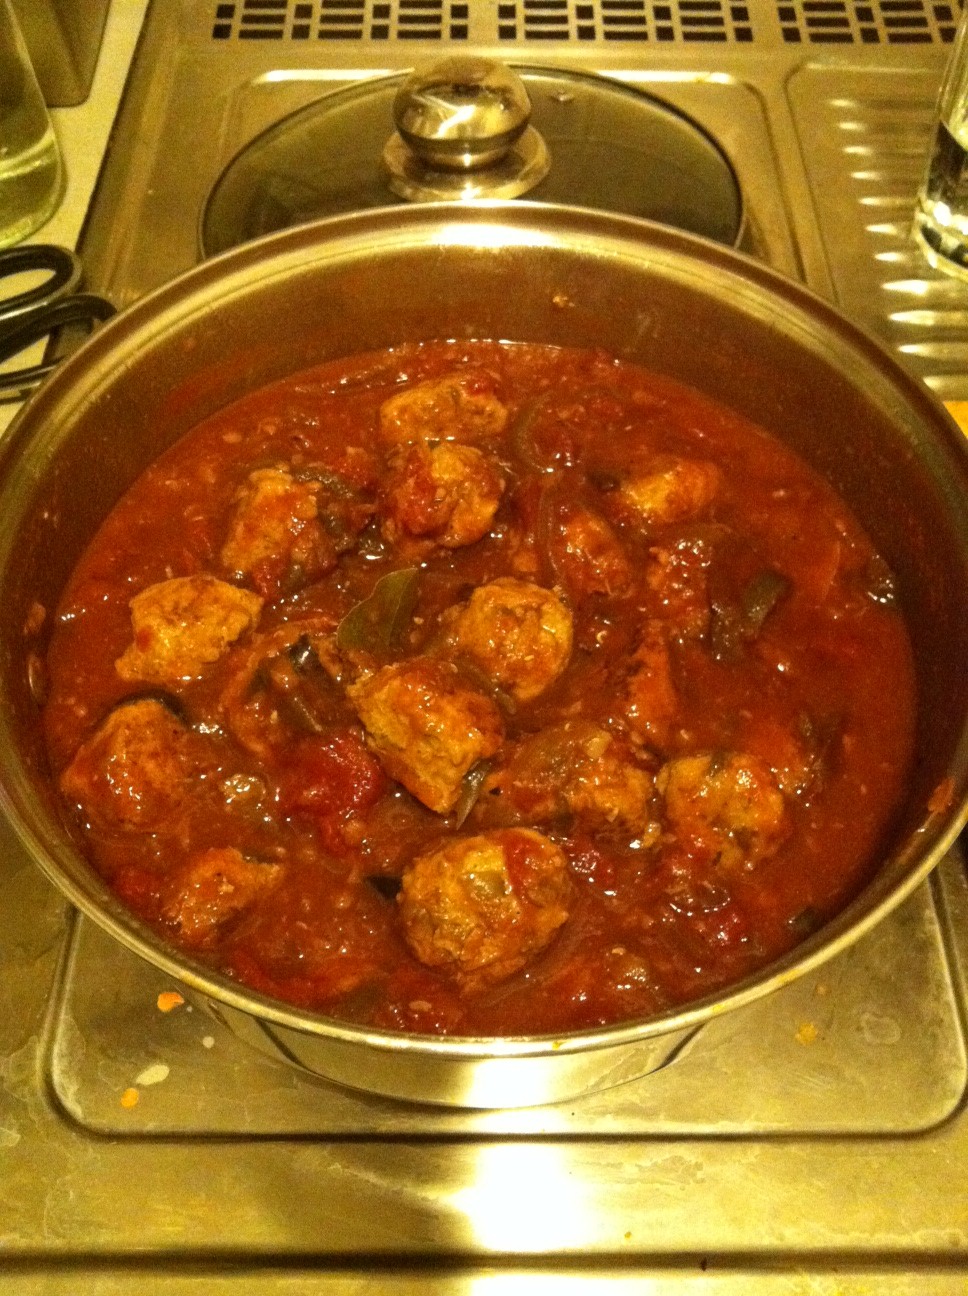
1 x salmon fillet, grilled (try honey soy salmon)
100g kale
150g quinoa
5 baby radishes, sliced
100g plum of cherry tomatoes

For the dressing:
250g low-fat Greek yoghurt
Juice of a lemon
1 tbsp honey

Rinse the quinoa well and cook until just tender. This is quite often a much shorter cooking time than they suggest on the packet, so check it at 5 minutes.

Steam the kale (if your pot is big enough, you can steam it above the quinoa) and dry using a clean teacloth or a salad spinner.

Slice the radishes and tomatoes.

Combine all the salad ingredients and make the dressing by stirring the juice of a lemon into a cup of yoghurt, then sweetening with the honey.

Advertisement

honey soy salmon, kale & sweet potato mash

Salmon. It's nutritious and delicious!
Salmon. It’s nutritious and delicious!

I really ought to eat more fish.

I tell myself things like this on a regular basis. Fish is delicious – tender, light yet filling and full of delicate flavour – and it’s good for you, too; packed full of vitamins, protein and omega 3s, fish is rightfully known as brain food. It’s the heart-healthy meat that can be farmed sustainably and your body will love you for it.

But just between you and me, I may be a wee bit – scared – of cooking fish. I mean, it has this reputation, doesn’t it? It’s fiddly, it falls apart not just on your fork but also in the pan, or sticks with a stubbornness that only a determined spatula can overcome. It cooks unevenly. It can turn dry and tough. When you cook fish you’re taking the chance that it all may come to a ruinous, nightmarish mess resulting in pasta and sauce for dinner.

honey and soy salmon
honey and soy salmon, served with a gingery kale and sweet potato mash.

Worry not, friends. The dense, tender flesh of salmon stands up to flavours well, is significantly less likely to fall apart and is much more forgiving than your average fish when it comes to cooking times. Its high fatty acid content means it’s unlikely to dry out, and most importantly it makes for wonderful eating. If you’re at all wary about cooking fish, salmon’s where you start.

Honey and soy, two things I always have in the cupboard, make an excellent marinade for the salmon, highlighting its natural sweetness. To balance this, I’ve added ginger and garlic to the kale – yet another so-good-for-you-it’s-hard-to-believe ingredient. Kale is nutrient-rich, high in calcium, fibre and iron, not to mention vitamins C and K.

And please, let us not have me begin waxing lyrical about sweet potato again. Suffice it to say that a good bed of buttery sweet potato mash completes this delicious and nutritious feelgood trinity.

oh, that sweet potato.

Make the most of the last rays of the summer sun – or indeed, welcome spring as they are back in Oz. Enjoy!

Honey soy salmon with ginger kale and sweet potato mash
For the salmon:
2 salmon fillets
2 tbsp honey
2 tbsp light soy sauce
For the kale:
100g kale
2 tsp freshly grated ginger
2 cloves garlic, grated OR garlic oil
For the sweet potato mash:
500g sweet potatoes
25g butter

Mix the honey and soy together and pour over the salmon fillets. You can do this the night before and store them in a ziplock bag, or marinate 30 minutes before you start.

Peel and wash the sweet potatoes, then cut into large chunks and boil in a pot until soft (this takes around 20 minutes depending on the size of your chunks). Drain and add the butter before mashing, then cover and set aside.

Heat oil in a pan and add the grated ginger and garlic. For low-FODMAPpers, leave out the garlic and use garlic oil.

Add the kale and fry gently until the leaves go glossy and dark green – this should only take about 2-3 minutes.

Heat oil in a pan (the same one, if you like!) and then add the salmon, skin-side down. Fry for 4 minutes, taking care the honey isn’t burning the skin. Flip and cook for another 3 minutes.

avocado & oat cookies

Being good to yourself is important, but so is being kind to yourself.

Is it possible to have your cookie and eat it too?

I’m so glad you asked. Summer is well and truly here, bringing the whole healthy eating thing into glaringly sharp changing-room-lights focus. Not just because of the amount of skin we’re starting to show (a pretty terrifying prospect all on its own), but also because the heat makes it so much harder to feel good if we’re eating badly.

There are lots of differing opinions out there as to what constitutes ‘eating badly’, but I think you can’t go too far wrong if you listen to your body. For me, that means I physically feel pretty awful if I’m on a constant diet of deep-fried foods, fatty meats, sugary drinks and refined carbs (basically all the fun stuff). But at the same time, mentally I feel pretty awful if I’m restricted to lettuce leaves and a wistful, longing look at the wine list.

So is there a balance? I think so. I feel pretty good and fairly sane if I’m eating complex carbohydrates like brown rice and wholemeal bread, a smattering of lean meats, loads of vegetables and the occasional reality check of eating whatever I want to.

avocado and oat cookies

Which brings us nicely to today’s recipe. It’s basically an adapted Anzac biscuit recipe, made with wholemeal flour, a reduced amount of sugar and without butter. Once again, I’ve gone with avocados in place of butter – honestly I think I ought to take out shares in an avocado farm – which lends the cookies a brilliant green tinge. Take a deep breath, and think of pistachios.

The final product has a dense chewiness (from the oats and coconut) amidst a soft, moist, cake-like texture (from the flour and avocados). They hit a fine balance of sweet-but-not-too-sweet – I personally think that they could go either way and be served alongside a coffee or on a cheese plate. Without strongly-flavoured ingredients, you do get a sense of the avocado, so if that worries you you might like to add a handful of chocolate chips, a mashed banana, or some cheese and tomato.

These cookies hold their shape, so make sure you're happy with how they go into the oven.
These cookies hold their shape, so make sure you’re happy with how they go into the oven.

Avocado and oat cookies (makes 12)
2 small ripe avocados
1 cup rolled oats
½ cup wholemeal flour
2 tablespoons caster sugar
¾ cup (60g) desiccated coconut
¹⁄3 cup golden syrup
1 teaspoon baking soda
2 tablespoons hot water

Preheat your oven to 165 degrees. While heating, you can toast the oats lightly while you get on with the cookies.

Place the flour, sugar and coconut into a large bowl.

Mash the avocados finely.

Place the golden syrup in a pot and heat gently, then add the avocados and stir until combined. This produces a slightly alarming-looking green mixture which may cause you to lose faith.

Add the hot water to the baking soda and then pour into the pot. The green mixture will turn into a frothy green concoction. At this stage, it would be perfectly natural for you to wonder what kind of crazy recipe you’re following.

Add the toasted oats to the flour and then pour in the wet ingredients and mix.

Shape into 7cm discs and flatten. Without butter, these cookies don’t spread at all so you can afford to place them quite closely together.

Bake at 165 degrees for 15 minutes and cool on the tray for 5 minutes before transferring to a wire rack.

mayo-free coleslaw

You know you’re in trouble when you’re rifling through the vegetable bin on a mad search for the most photogenic carrot in the bag.
You know you need serious help when you’re rifling through the vegetable bin on a mad search for a ‘photogenic carrot’.

I get the feeling that it’s not quite cool to love cabbage. I mean, there’s the trendy purple sprouting broccoli, showy rainbow collards and the ultra-chic kale, but you don’t really hear about artisanal cabbages, do you? And that’s a little sad. It always strikes me as somewhat underappreciated and overlooked; a steady and consistent performer, but hardly ever invited to be the star of the show.

Except, of course, in coleslaw.

Coleslaw is one of those mad concoctions that has the rather unexpected capacity to blow your culinary socks off. It’s a riot of colours and textures, a positive festival of flavours. Homemade coleslaw is a world away from its commercial counterpart, which tends to be a damp and colourless collection of mystery vegetables swimming in a sort of mayonnaise soup. If you have the chance, it’s worth the extra effort.

Mayo-free healthy coleslaw
It’s time to celebrate the humble cabbage, don’t you think?

Since it’s so often served with meat (like the weekend’s pulled pork), I think it particularly important that it be able cut through that rich density with a bright, crisp zingyness.

This mayo-free coleslaw is all zesty freshness and isn’t remotely heavy. You can serve it as a traditional side dish, but in my opinion it also stands on its own as a delicately balanced, intensely crunchy salad.

Mayo-free coleslaw
For the slaw:
4 x spring cabbage leaves, finely sliced into ribbons (you can use a quarter of a white cabbage if you prefer)
Quarter red cabbage, finely sliced into ribbons
Half a red onion, very finely sliced
1 carrot, grated
Juice of half a lemon

For the dressing:
4 tbsp olive oil
Juice of a whole lemon
1 tbsp honey
Half tbsp wholegrain mustard

To take the punch out of the onion, squeeze half a lemon over it and leave it to soak as you get on with the other ingredients. You can skip this bit if you’re fond of the taste.

In a large bowl, toss all your salad ingredients.

In a separate bowl, whisk the salad dressing ingredients together (you can also shake in a jar). The juice output of lemons varies, but you’ll know when you’ve got it right because it will form a light, citrusy emulsion. Season with a pinch of salt, or to taste.

Pour the dressing over the coleslaw and mix well. I tend to like mixing it ahead of time so the cabbage has time to lose a little of its rawness. The dressed or naked salad keeps well overnight.

summer rolls

Start - err, spring - with summer rolls.
Start – err, spring – with summer rolls.

As I write this, I’m keenly aware that there is a pile of washing up behind me that closely resembles a small mountain.

I’m breaking the rules a bit here, because although it’s certainly achievable to make these even in a small space, this isn’t exactly an ideal tiny kitchen recipe. It’s time consuming, a little fiddly and uses more plates than I would like – but I have to include it, because I simply can’t have you going into Spring without the deliciousness of summer rolls.

In truth, my love affair with Vietnamese food began with these rolls. Gỏi cuốn, nem cuốn or bánh tráng cuốn, as they’re known, are rice paper rolls stuffed with bún (rice noodles), herbs, vegetables and meat. They’re best served at room temperature with a dipping sauce – I personally think that you can’t beat the classic nước cam, but you can also serve them with a sweet hoisin or chilli sauce and peanuts.

Gluten-free and easily adapted to suit vegans and meat-eaters alike.

Summer rolls embody everything I think is amazing about Vietnamese cuisine. Light and zingy, crunchy and softly dense, summer rolls have a certain balance of tastes and textures designed to bedazzle the palate. They’re commonly served as an entrée, and they make a beautifully bright introduction to the stronger flavours of phở and cơm tấm.

So while there may seem like there’s a lot of ingredients and a load of washing up to do at the end; persist, friends. It’s most definitely worth it.

There's something exceptionally light, fresh and tasty about summer rolls.
There’s something exceptionally light, fresh and tasty about summer rolls.

Summer rolls
10 rice paper sheets
100g rice vermicelli noodles
1 carrot, julienned
Small bunch of coriander
Small bunch of mint
Three lettuce leaves
Bean sprouts (optional)
Cooked prawns (three per roll) – for a vegetarian alternative you can use fried tofu

Prepare all the ingredients so that they’re ready to roll. Start with the noodles; you can cook according to directions but in my opinion you almost never need to boil them. Soaking them in boiling water is fine. Like pasta, make sure the noodles are al dente – they should be springy but not chewy. Drain well.

While the noodles are soaking, take the carrot and blanch in equal parts water and vinegar. If you’d prefer to save time and not to pickle your carrot, that’s fine too.

Finely chop the lettuce.

Pull the mint and coriander into leaves and pick over the bean sprouts.

When you’re done, you should have a crowded-looking plate of noodles, carrot, lettuce, herbs and bean sprouts. The key is to make sure that all the filling ingredients are as dry as possible.

To prepare the rice paper, have a bowl of very hot water and a clean tea towel next to your rolling surface. Dip the paper in the water until it softens and carefully fish it out, trying not to break it. Lay it briefly on the clean towel to absorb the excess water and then lay it flat on the board.

Assemble your summer roll. I use three prawns or one tofu puff sliced into three, plus a few shards of everything else. Try to make it as compact as possible as this will help when you roll.

Rolling is an art. I’ve rolled plenty of spring rolls, but they’re a cinch compared to the fiddly nature of the summer roll beast; all the lightness and springyness that we love about a summer roll seems to work against us here in a very irritating manner.

My tip is to flip up one end over the ingredients and use it to push them into as compact a roll as possible. Using one hand to keep the roll tight, fold up the sides and then push the roll forwards to complete.

Also, be careful about flipping rice paper – running a close second to the nasty possibility of the paper tearing is it sticking to itself. Once it does that, it’s very difficult to unstick it without tearing.

Serve with nuoc cam.

oven-baked pizza

An Angela aubergine.

Would you look at this eggplant?

Eggplants, for me, are tremendously exciting and deeply satisfying at the same time. I can’t get over their brilliant purple hues – from dark, plummy violets to luminous lilacs and lavenders, I think eggplants are possibly the prettiest fruit I’ve ever seen, and that’s without being biased by the lovely velvety texture and mild, creamy taste.

Ok, I haven’t totally lost the plot. There is a reason that I’m waxing lyrical about eggplants, and it’s because this beautiful Angela Aubergine inspired tonight’s dinner: homemade oven-baked pizza.

To be honest, I would eat pizza a lot more if it wasn’t so unhealthy. It’s true that the kind you order on the phone or buy in freezer sections can be extremely high in fat and calories and carbs and just about every other tasty thing in the world – but if you make it yourself, you get to control what goes onto it and you get to use up all the vegetable odds and ends knocking around in your fridge.

Delicious, convenient and fast.

This one is a relatively low-fat pizza and clocks in at around 250 calories. No, really.

Everyone’s got their favourite pizza ingredient, and I fully encourage random experimentation (the best pizza I’ve ever eaten had radicchio and truffle sausage on it). The one thing I will say is that the base is incredibly thin, so if you do want to place a lot of ingredients on it, you may need to double the base. Glue them together with a smattering of mozzarella.

While the mushroomy simplicity of pizza al funghi never fails to seduce me, I love the fiery heat of salami and the creamy texture of eggplant. The burst of colour that rocket lends completes the pizza, and my night.

Oven-baked pizza
Pizza sauce:
Olive oil
5 cloves garlic
2 tbsp tomato paste
1 tbsp Italian herbs
2 tomatoes, sliced (optional)

Pizza – obviously, all the toppings are optional, but here’s what I used:
1 wholemeal wrap (I used a sorj wrap, but you can use pita or an actual pizza base)
9 slices of eggplant (slice as thinly as possible so it cooks)
2 mushrooms, sliced
Roasted capsicum
1 slice hot salami
Mozzarella cheese (I used bocconcini)
Rocket

To make the pizza sauce, heat the oil over a low heat and crush the garlic into the oil.

Add the tomato paste, tomatoes and herbs with a little water and bring to a boil, then reduce and simmer for 15 minutes, or until the tomatoes have fallen apart.

pizza sauce
pizza sauce

Preheat the oven to 180 degrees celcius and prepare the vegetables.

Assemble the pizza. Start with a small amount of the sauce, layer on the vegetables and salami and top with cheese.

I love the beautiful little bocconcini balls.
I love the beautiful little baby bocconcinis.

Place in the oven and bake for 15 minutes or until the cheese has melted.

Top with rocket and serve with a large glass of red wine.

frijoles negros

Black turtle beans.
Black turtle beans.

If you’re ever in Sydney’s inner west, swing by a restaurant known as Baja Cantina in Glebe and you’ll understand why the top end of my food-rating spectrum is food for which you would consider moving countries.

Is that a little extreme? You might think so if you had never eaten the nachos at Baja Cantina. The first time I tried them, my little head exploded with the colours, tastes and textures of a country I had never seen; the salty crunch of thick, hand-cooked corn chips, creamy, gently spiced beans, fire-laced salsa and jalapenos and zesty guacamole married in perfect harmony by smatterings of mature cheese and a dollop of sour cream.

I’m getting a little emotional just thinking of it.

My bestie and I have been to Baja Cantina hundreds of times, the colourful walls bearing silent witness to our laughter, tears, venting sessions, tantrums, dramas and soul-searching conversations that can only occur over a plate of Sydney’s finest nachos.

They're not exactly photogenic now. But you'll understand when you taste them.
They’re not exactly photogenic now. But you’ll understand when you taste them.

It was Stephy who introduced me to black beans, and I’ve never looked back. Black turtle beans have a dense texture, unlike the starchy flouriness of pinto beans, and stand up to flavours well. They require lengthy cooking, but are very low-maintenance and the end result is a delicious, inky, creamy and deeply flavoursome dish.

Frijoles negros
250g dried black beans
1 onion, cut into eighths
5 cloves garlic, peeled
Six large sprigs of thyme
Five bay leaves
Two slices of bacon
oil
salt

Bay leaves and thyme are essential to this dish.

Normally, you would begin a bean-based recipe by soaking the beans to reduce your risk of being poisoned by the toxin phytohaemagglutinin. With this particular recipe there’s no risk of that since you cook them for ages anyway, but you can soak them for a few hours to reduce cooking time. If you don’t have time for that, it doesn’t matter – you might just have to keep them on the stove for a bit longer.

Place the onion, garlic into a pot with a splash of oil and cook gently for a few minutes.

So beautiful in the pot!

Add the black beans, thyme and bay leaves and cover with water. Bring to a boil and simmer for one hour. Skim off any scum that appears on top and make sure they’re not boiling dry, adding water if necessary.

After an hour, add the bacon and a pinch of salt and return to a simmer for another hour. You can leave the bacon out if you’re vegetarian, but I find it provides a good weighty saltiness to the beans.

Beans reach a stage where the skin begins to lift off if you blow on them. You actually want to take these beans beyond that stage, to the point that they provide no resistance when you want to mash them.

After the beans are cooked, you’ve got a few options. The Mexican culinary goddess Thomasina Miers, of Wahaca fame, takes the cooked beans and fries them with a large amount of lard or butter plus additional onion and garlic, then processes them until smooth. She serves them with sour cream and a crumbled mature cheese.

Frijoles on salad.
Frijoles on salad.

I absolutely love Wahaca’s frijoles and they have never failed to transport me to the heights of culinary bliss, but at home in the tiny kitchen I find the second stage too fiddly and guilt-inducing. Instead, I take a fork to the cooked beans and mash until creamy. Don’t drain the cooking liquid, as you’ll need it to store the beans and to mash any leftovers the following day. Before reheating in a microwave, cover the beans with a little water to prevent them from drying out.

I like to serve frijoles negros on a pile of fresh, crunchy salad topped with pickled jalapenos and guacamole. A handful of corn chips rounds everything off nicely.

gobble this up

gobble gobble
gobble gobble

I’ve no recipe for you tonight, just a picture of yesterday’s turkey meatballs dished up the way they should be – perched on top of a bed of wholemeal spaghetti.

In case you’re wondering, the meatballs are juicy, sweet and light. Just what you need on this cold winter’s night!

turkey meatballs

Turkey meatballs - made for gobbling!
Turkey meatballs – made for gobbling!

I feel a bit ridiculous saying this when the memory of the chocolate hazelnut crepe I had for dessert last night is still fresh, but I’d like to be healthy. Wouldn’t we all?

Each day, we start out with the best of intentions and promise ourselves we’ll be good – and then, when confronted with the burger and fries we’ve wanted since time immemorial, our resistance crumbles like a honeycomb chocolate bar. Then the guilt sets in and the whole cycle begins again; the self-recrimination, the promise, the virtue of self-denial and sacrifice, and the inevitable ‘giving in’, generally a rather spectacular fall from grace involving a family-sized pizza and Sherlock DVDs.

Phew. How exhausting. I personally know of no quicker path to the ‘sharing’ bag of M&Ms.

Wouldn’t it be wonderful if eating wasn’t a constant exercise in the ability to say no? Wouldn’t it fantastic if we weren’t continuously enslaved by the thought of indulgence, held captive by the mere scent of a splurge, paralysed by the fear of one food group or another? (Carbs. Hang on, fat. No, calories. Wait, sugar. Here, munch this piece of cardboard while I think about it.)

I think that like most things in life, eating well is about balance; generally making the right choices about what you eat, but also treating yourself occasionally and sensibly, without any of the insanity that goes along with being given rare and temporary freedom from the shackles of self-denial.

But thankfully, it isn’t all about salads versus burgers (or crepes, if you like). A lot of the time, you can make everyday meals healthier by having a look at what goes into them. Once you understand the ingredients, you can start tweaking recipes here and there to make them better for you.

With all that in mind, I’m having a look at turkey mince this week. It depends on the cuts used to make the mince and the fat content, but in general, pound for pound, turkey mince is lower in fat, calories and cholesterol than beef, pork, lamb and chicken. You can find turkey breast mince which is even leaner and is perfectly fine to use for this particular dish.

Because of its low fat content, turkey mince can tend towards being dry and tasteless, so it does take a little more love to get it to taste good. This recipe’s not for the weekday; leave it til the weekend when you’ve got the time to spend on cooking!

A healthy and satisfying pot of heart-friendly love.

Turkey meatballs (makes 42)
For the meatballs
500g turkey breast mince
1 red onion, finely chopped
2 garlic cloves, finely chopped
1 tbsp tomato sauce
5 tsp dried mixed herbs
1 tbsp mild chilli powder
1 tbsp smoked paprika
1 chicken stock cube
1 egg
1 carrot, grated

For the sauce
1 red onion, finely sliced
2 garlic cloves, finely chopped
2 x 400g cans peeled plum tomatoes
2 bay leaves
50g red lentils

Start by caramelising both onions. Basically, that means you put them into a non-stick saucepan over medium-high heat and stir occasionally as they go through the process from raw to soft to sticky, which should take around 30 minutes. You don’t want to fuss over them too much, and after about 10 minutes you can add a small splash of balsamic vinegar or sugar to help them along.

Once they’re caramelised, remove half and place into a large pot.

Back to the saucepan. Crumble in the stock cube with a little water, and add the garlic. Cook for a further 2 minutes and then remove from heat, allowing to cool completely.

Place the cool sticky onion mixture in a large bowl with the turkey mince, egg, spices, grated carrot and tomato sauce. Season with salt and pepper and mix thoroughly.

Shape the meatballs with your hands. My mix made exactly 42 small meatballs, which I think are nicer than the big ones, but cook as you like.

While you’re getting ready to brown the turkey meatballs, get the sauce started. The large pot with the remaining caramelised onions can go back on the stove with the rest of the ingredients for the sauce. Cover and bring to a boil, adding a little water if the lentils soak up too much liquid.

Brown the turkey meatballs in batches and add to the pot. Simmer gently for 30 minutes.

Serve with wholemeal pasta, brown rice or greens.